It is very important for any app to be a user-friendly one. As a result you should not create dialog boxes using alert() calls. Electron provides a pretty good interface to accomplish the task of creating dialog boxes. Let us have a look at it.
Electron provides a dialog module that we can use for displaying native system dialogs for opening and saving files, alerting, etc.
Let us directly jump into an example and create an app to display simple textfiles.
Create a new main.js file and enter the following code in it −
const {app, BrowserWindow} = require('electron')
const url = require('url')
const path = require('path')
const {ipcMain} = require('electron')

let win

function createWindow() {
   win = new BrowserWindow({width: 800, height: 600})
   win.loadURL(url.format ({
  pathname: path.join(__dirname, 'index.html'),
  protocol: 'file:',
  slashes: true    }))
}

ipcMain.on('openFile', (event, path) => {
   const {dialog} = require('electron')
   const fs = require('fs')
   dialog.showOpenDialog(function (fileNames) {

  // fileNames is an array that contains all the selected
  if(fileNames === undefined) {
     console.log("No file selected");

  } else {
     readFile(fileNames[0]);
  }    });

   function readFile(filepath) {
  fs.readFile(filepath, 'utf-8', (err, data) => {

     if(err){
        alert("An error ocurred reading the file :" + err.message)
        return
     }

     // handle the file content
     event.sender.send('fileData', data)
  })    }
})
app.on('ready', createWindow)
This code will pop open the open dialog box whenever our main process recieves a ‘openFile’ message from a renderer process. This message will redirect the file content back to the renderer process. Now, we will have to print the content.
Now, create a new index.html file with the following content −
<!DOCTYPE html>
<html>
<head>
<meta charset = "UTF-8">
<title>File read using system dialogs</title>
</head>
<body>
<script type = "text/javascript">
const {ipcRenderer} = require('electron')
ipcRenderer.send('openFile', () => {
console.log("Event sent.");
})
ipcRenderer.on('fileData', (event, data) => {
document.write(data)
})
</script>
</body>
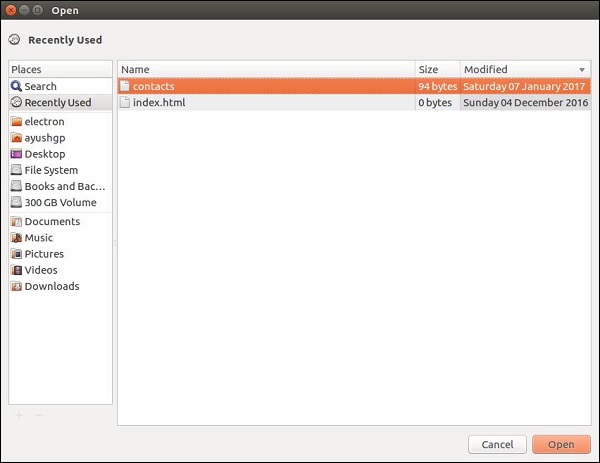
</html>Now whenever we run our app, a native open dialog box will pop up as shown in the following screenshot −
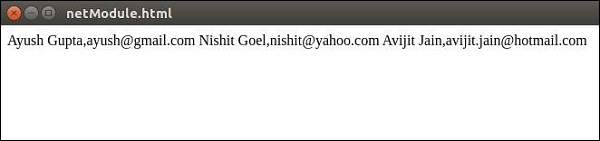
Once we select a file to display, its contents will be displayed on the app window −
This was just one of the four dialogs that Electron provides. They all have similar usage though. Once you learn how to do it using showOpenDialog, then you can use any of the other dialogs.
The dialogs having the same functionality are −
- showSaveDialog([browserWindow, ]options[, callback])
- showMessageDialog([browserWindow, ]options[, callback])
- showErrorDialog(title, content)