Node.js Timer functions are global functions. You don’t need to use require() function in order to use timer functions. Let’s see the list of timer functions.
Set timer functions:
setImmediate(): It is used to execute setImmediate.
setInterval(): It is used to define a time interval.
setTimeout(): ()- It is used to execute a one-time callback after delay milliseconds.
Clear timer functions:
clearImmediate(immediateObject): It is used to stop an immediateObject, as created by setImmediate
clearInterval(intervalObject): It is used to stop an intervalObject, as created by setInterval
clearTimeout(timeoutObject): It prevents a timeoutObject, as created by setTimeout
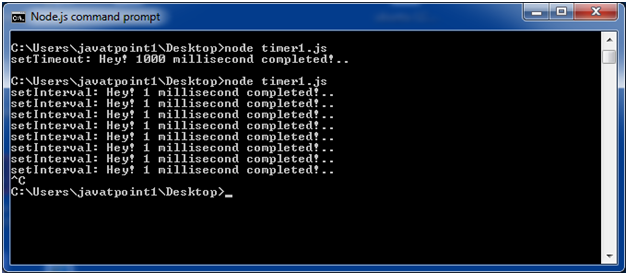
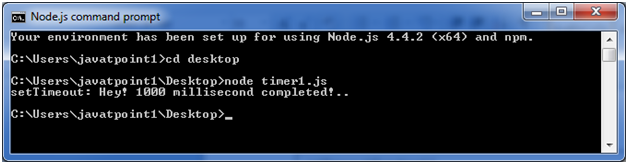
Node.js Timer setInterval() Example
This example will set a time interval of 1000 millisecond and the specified comment will be displayed after every 1000 millisecond until you terminate.
Open Node.js command prompt and run the following code:
node timer1.js
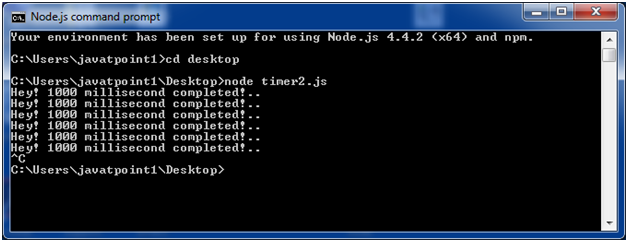
This example shows time out after every 1000 millisecond without setting a time interval. This example uses the recursion property of a function.
File: timer2.js
var recursive = function () {

    console.log("Hey! 1000 millisecond completed!..");

    setTimeout(recursive,1000);

}

recursive();
Open Node.js command prompt and run the following code:
node timer2.js
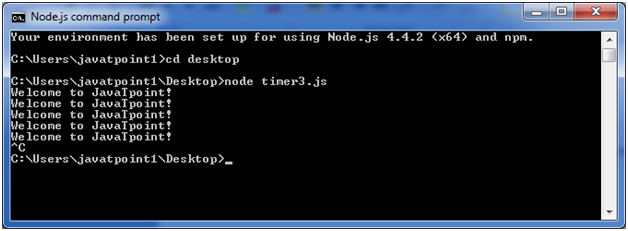
Node.js setInterval(), setTimeout() and clearTimeout()
Let’s see an example to use clearTimeout() function.
File: timer3.js
function welcome () {

  console.log("Welcome to JavaTpoint!");

}

var id1 = setTimeout(welcome,1000);

var id2 = setInterval(welcome,1000);

clearTimeout(id1);

//clearInterval(id2);
Open Node.js command prompt and run the following code:
node timer3.js
You can see that the above example is recursive in nature. It will terminate after one step if you use ClearInterval.
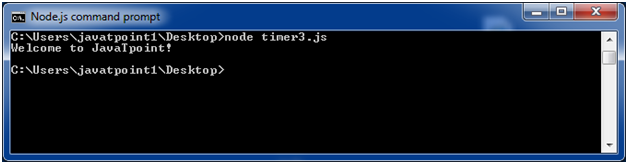
Node.js setInterval(), setTimeout() and clearInterval()
Let’s see an example to use clearInterval() function.
File: timer3.js
function welcome () {

  console.log("Welcome to JavaTpoint!");

}

var id1 = setTimeout(welcome,1000);

var id2 = setInterval(welcome,1000);

//clearTimeout(id1);

clearInterval(id2);
Open Node.js command prompt and run the following code:
Node.js OS provides some basic operating-system related utility functions. Let’s see the list generally used functions or methods.
Index
Method
Description
1.
os.arch()
This method is used to fetch the operating system CPU architecture.
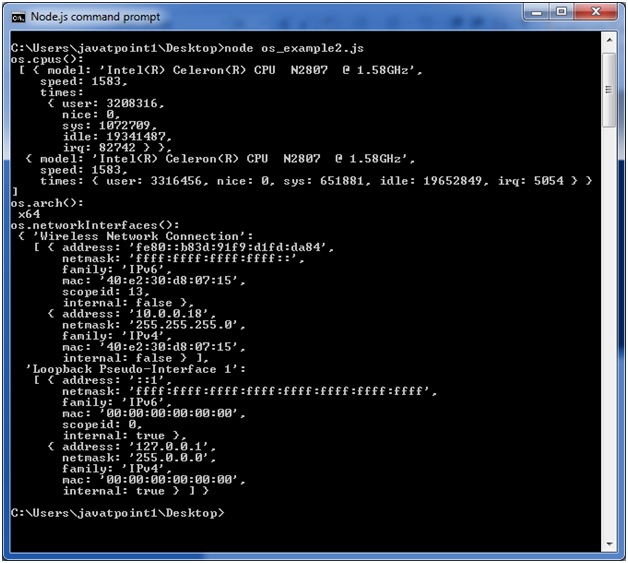
2.
os.cpus()
This method is used to fetch an array of objects containing information about each cpu/core installed: model, speed (in MHz), and times (an object containing the number of milliseconds the cpu/core spent in: user, nice, sys, idle, and irq).
3.
os.endianness()
This method returns the endianness of the cpu. Its possible values are ‘BE’ for big endian or ‘LE’ for little endian.
4.
os.freemem()
This methods returns the amount of free system memory in bytes.
5.
os.homedir()
This method returns the home directory of the current user.
6.
os.hostname()
This method is used to returns the hostname of the operating system.
7.
os.loadavg()
This method returns an array containing the 1, 5, and 15 minute load averages. The load average is a time fraction taken by system activity, calculated by the operating system and expressed as a fractional number.
8.
os.networkinterfaces()
This method returns a list of network interfaces.
9.
os.platform()
This method returns the operating system platform of the running computer i.e.’darwin’, ‘win32′,’freebsd’, ‘linux’, ‘sunos’ etc.
10.
os.release()
This method returns the operating system release.
11.
os.tmpdir()
This method returns the operating system’s default directory for temporary files.
12.
os.totalmem()
This method returns the total amount of system memory in bytes.
13.
os.type()
This method returns the operating system name. For example ‘linux’ on linux, ‘darwin’ on os x and ‘windows_nt’ on windows.
14.
os.uptime()
This method returns the system uptime in seconds.
15.
os.userinfo([options])
This method returns a subset of the password file entry for the current effective user.
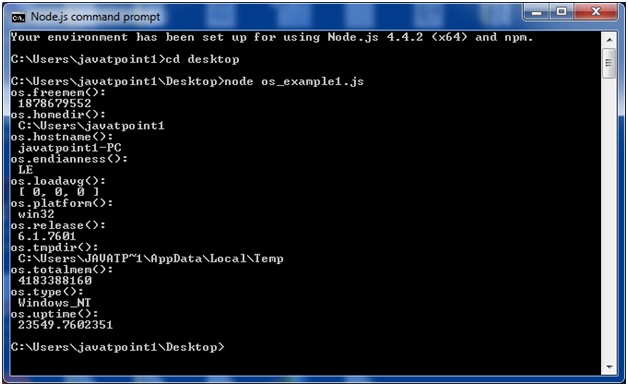
Node.js OS Example 1
In this example, we are including some basic functions. Create a file named os_example1.js having the following code:
Node.js global objects are global in nature and available in all modules. You don’t need to include these objects in your application; rather they can be used directly. These objects are modules, functions, strings and object etc. Some of these objects aren’t actually in the global scope but in the module scope.
A list of Node.js global objects are given below:
__dirname
__filename
Console
Process
Buffer
setImmediate(callback[, arg][, …])
setInterval(callback, delay[, arg][, …])
setTimeout(callback, delay[, arg][, …])
clearImmediate(immediateObject)
clearInterval(intervalObject)
clearTimeout(timeoutObject)
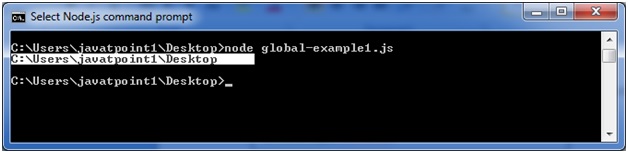
Node.js __dirname
It is a string. It specifies the name of the directory that currently contains the code.
File: global-example1.js
console.log(__dirname);
Open Node.js command prompt and run the following code:
node global-example1.js
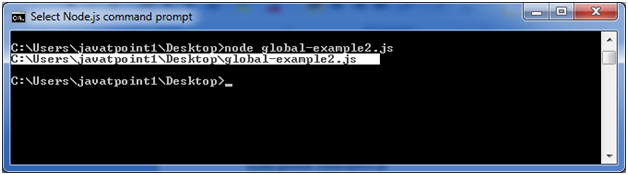
Node.js __filename
It specifies the filename of the code being executed. This is the resolved absolute path of this code file. The value inside a module is the path to that module file.
File: global-example2.js
console.log(__filename);
Open Node.js command prompt and run the following code:
There is a wide variety of command line options in Node.js. These options provide multiple ways to execute scripts and other helpful run-time options.
Let’s see the list of Node.js command line options:
Index
Option
Description
1.
v, –version
It is used to print node’s version.
2.
-h, –help
It is used to print node command line options.
3.
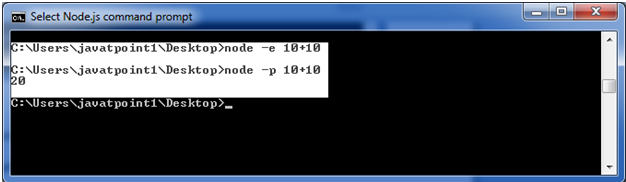
-e, –eval “script”
It evaluates the following argument as JavaScript. The modules which are predefined in the REPL can also be used in script.
4.
-p, –print “script”
It is identical to -e but prints the result.
5.
-c, –check
Syntax check the script without executing.
6.
-i, –interactive
It opens the REPL even if stdin does not appear to be a terminal.
7.
-r, –require module
It is used to preload the specified module at startup. It follows require()’s module resolution rules. Module may be either a path to a file, or a node module name.
8.
–no-deprecation
Silence deprecation warnings.
9.
–trace-deprecation
It is used to print stack traces for deprecations.
10.
–throw-deprecation
It throws errors for deprecations.
11.
–no-warnings
It silence all process warnings (including deprecations).
12.
–trace-warnings
It prints stack traces for process warnings (including deprecations).
13.
–trace-sync-io
It prints a stack trace whenever synchronous i/o is detected after the first turn of the event loop.
14.
–zero-fill-buffers
Automatically zero-fills all newly allocated buffer and slowbuffer instances.
15.
–track-heap-objects
It tracks heap object allocations for heap snapshots.
16.
–prof-process
It processes V8 profiler output generated using the v8 option –prof.
17.
–V8-options
It prints V8 command line options.
18.
–tls-cipher-list=list
It specifies an alternative default tls cipher list. (requires node.js to be built with crypto support. (default))
19.
–enable-fips
It enables fips-compliant crypto at startup. (requires node.js to be built with ./configure –openssl-fips)
20.
–force-fips
It forces fips-compliant crypto on startup. (cannot be disabled from script code.) (same requirements as –enable-fips)
21.
–icu-data-dir=file
It specifies ICU data load path. (Overrides node_icu_data)
Node.js Command Line Options Examples
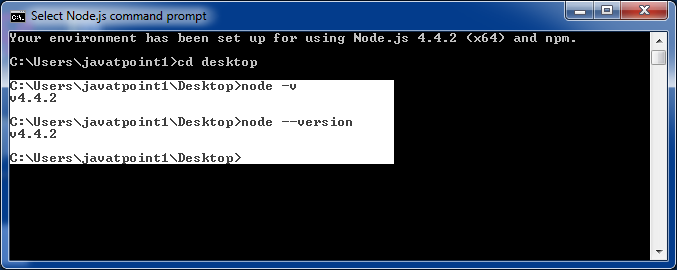
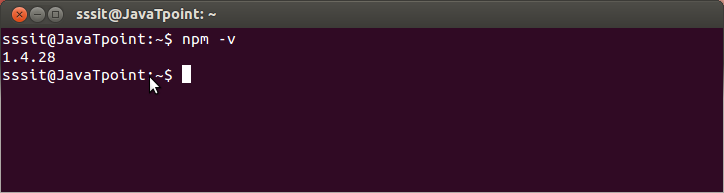
To see the version of the running Node:
Open Node.js command prompt and run command node -v or node –version
Node Package Manager provides two main functionalities:
It provides online repositories for node.js packages/modules which are searchable on search.nodejs.org
It also provides command line utility to install Node.js packages, do version management and dependency management of Node.js packages.
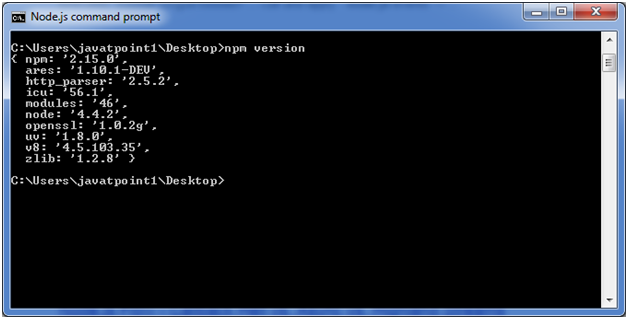
The npm comes bundled with Node.js installables in versions after that v0.6.3. You can check the version by opening Node.js command prompt and typing the following command:
npm version
Installing Modules using npm
Following is the syntax to install any Node.js module:
npm install <Module Name>
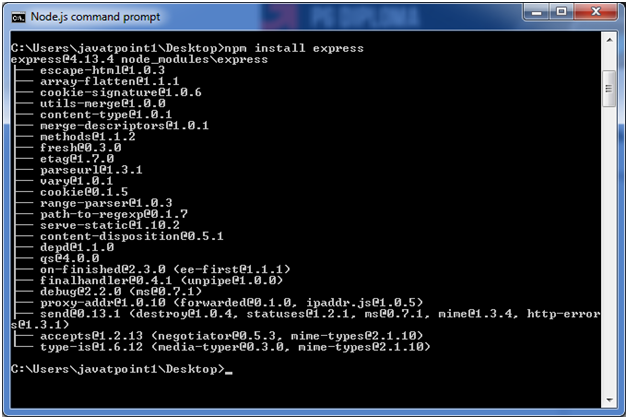
Let’s install a famous Node.js web framework called express:
Open the Node.js command prompt and execute the following command:
npm install express
You can see the result after installing the “express” framework.
Global vs Local Installation
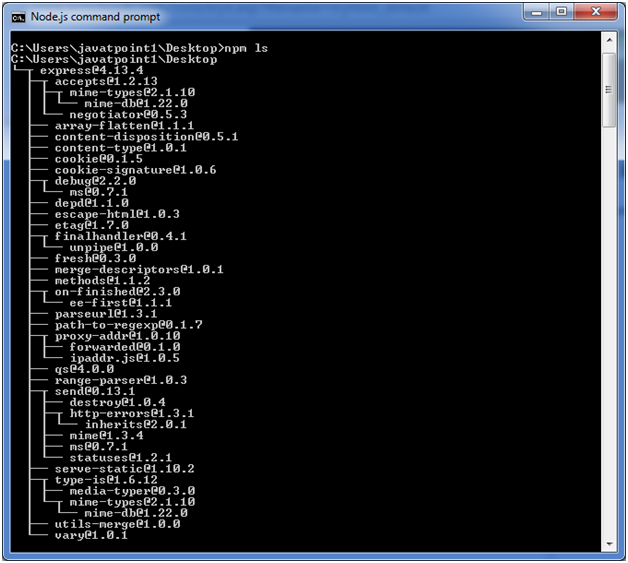
By default, npm installs dependency in local mode. Here local mode specifies the folder where Node application is present. For example if you installed express module, it created node_modules directory in the current directory where it installed express module.
You can use npm ls command to list down all the locally installed modules.
Open the Node.js command prompt and execute “npm ls”:
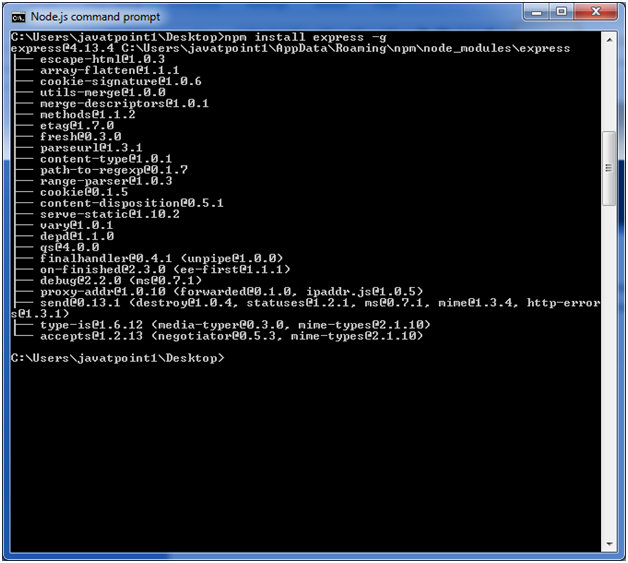
Globally installed packages/dependencies are stored in system directory. Let’s install express module using global installation. Although it will also produce the same result but modules will be installed globally.
Open Node.js command prompt and execute the following code:
npm install express -g
Here first line tells about the module version and its location where it is getting installed.
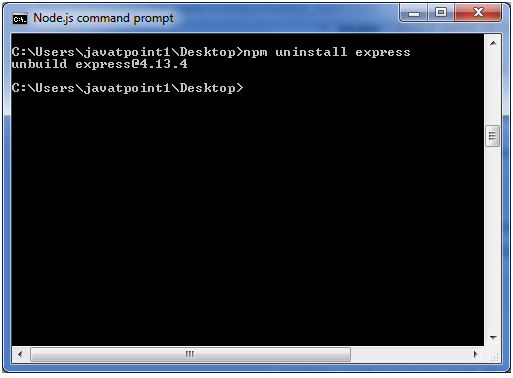
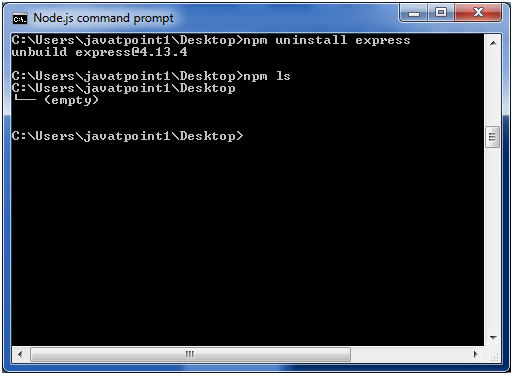
Uninstalling a Module
To uninstall a Node.js module, use the following command:
npm uninstall express
The Node.js module is uninstalled. You can verify by using the following command:
npm ls
You can see that the module is empty now.
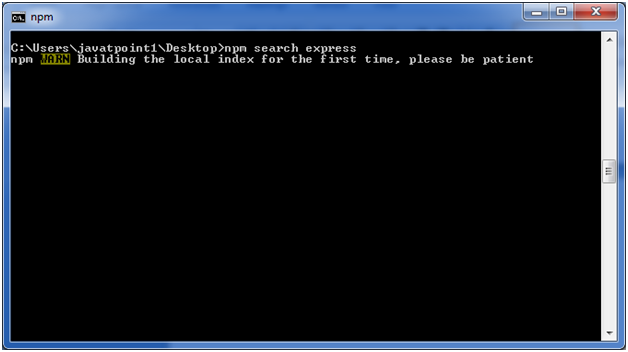
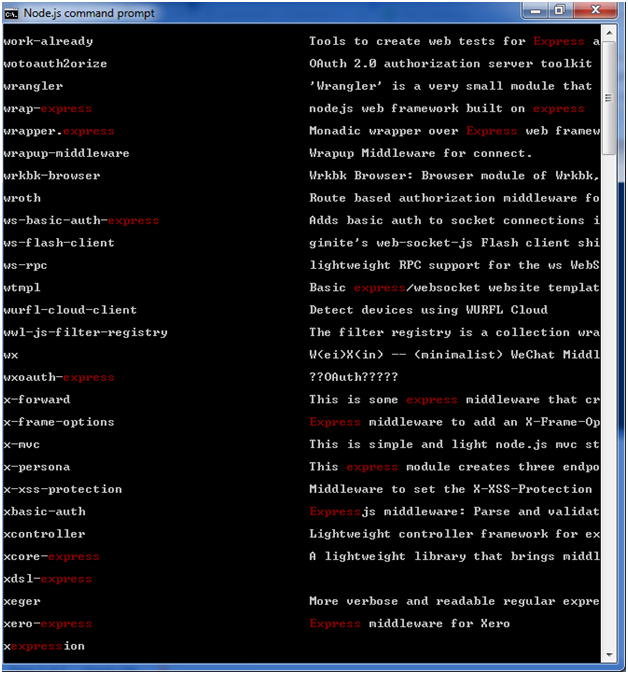
Searching a Module
“npm search express” command is used to search express or module.
The term REPL stands for Read Eval Print and Loop. It specifies a computer environment like a window console or a Unix/Linux shell where you can enter the commands and the system responds with an output in an interactive mode.
REPL Environment
The Node.js or node come bundled with REPL environment. Each part of the REPL environment has a specific work.
Read: It reads user’s input; parse the input into JavaScript data-structure and stores in memory.
Eval: It takes and evaluates the data structure.
Print: It prints the result.
Loop: It loops the above command until user press ctrl-c twice.
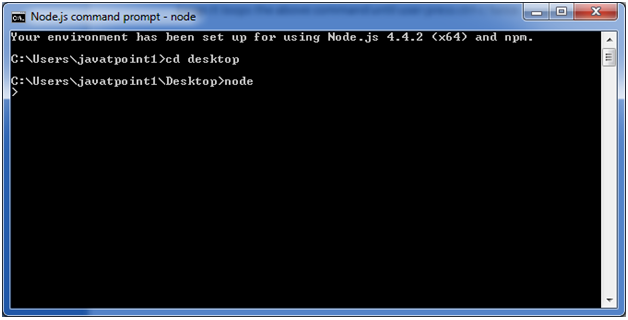
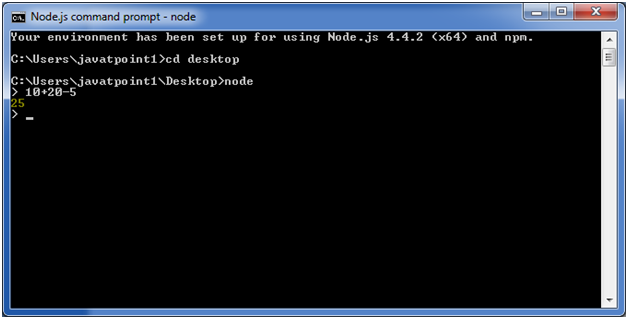
How to start REPL
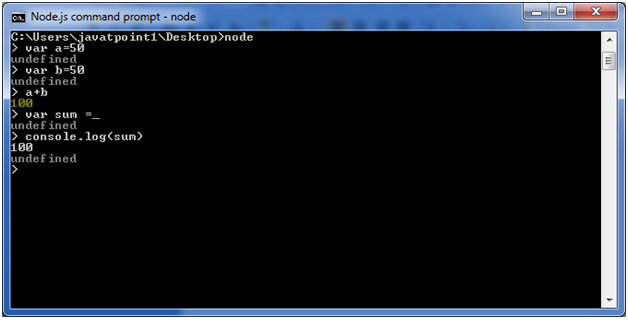
You can start REPL by simply running “node” on the command prompt. See this:
You can execute various mathematical operations on REPL Node.js command prompt:
Node.js Simple expressions
After starting REPL node command prompt put any mathematical expression:
Example: >10+20-5

25
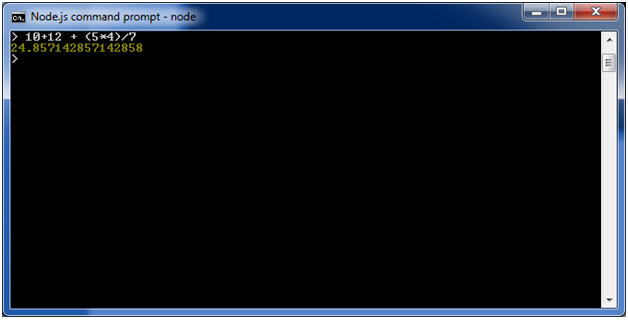
Example2: >10+12 + (5*4)/7
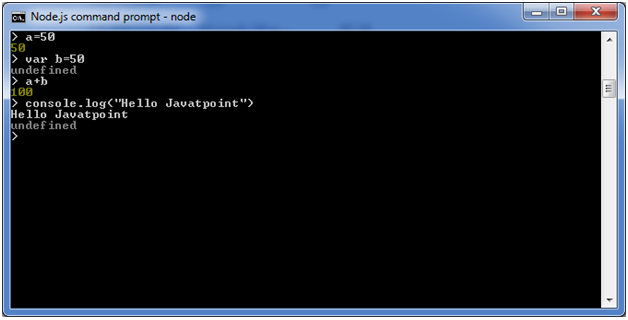
Using variable
Variables are used to store values and print later. If you don’t use var keyword then value is stored in the variable and printed whereas if var keyword is used then value is stored but not printed. You can print variables using console.log().
Example:
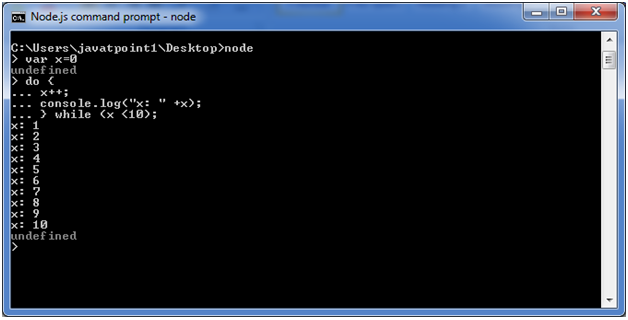
Node.js Multiline expressions
Node REPL supports multiline expressions like JavaScript. See the following do-while loop example:
var x = 0

undefined

> do {

... x++;

... console.log("x: " + x);

... } while ( x < 10 );
Node.js Underscore Variable
You can also use underscore _ to get the last result.
Example:
Node.js REPL Commands
Commands
Description
ctrl + c
It is used to terminate the current command.
ctrl + c twice
It terminates the node repl.
ctrl + d
It terminates the node repl.
up/down keys
It is used to see command history and modify previous commands.
tab keys
It specifies the list of current command.
.help
It specifies the list of all commands.
.break
It is used to exit from multi-line expressions.
.clear
It is used to exit from multi-line expressions.
.save filename
It saves current node repl session to a file.
.load filename
It is used to load file content in current node repl session.
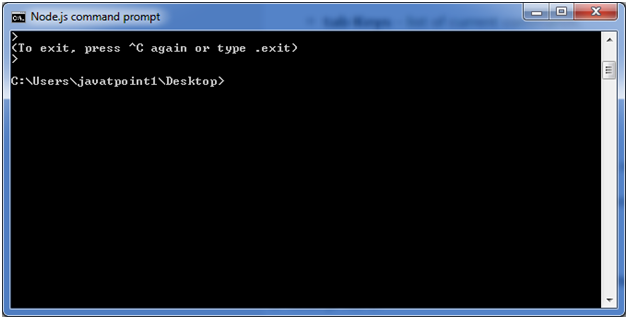
Node.js Exit REPL
Use ctrl + c command twice to come out of Node.js REPL.
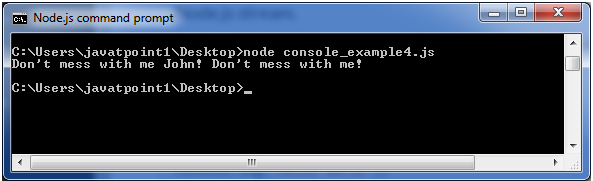
There can be console-based and web-based node.js applications.
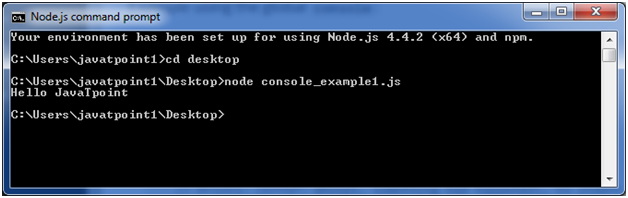
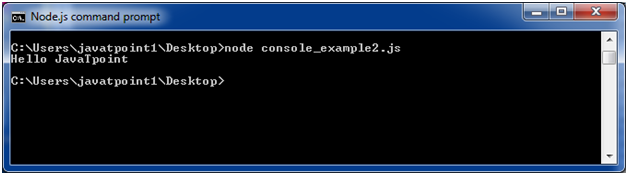
Node.js console-based Example
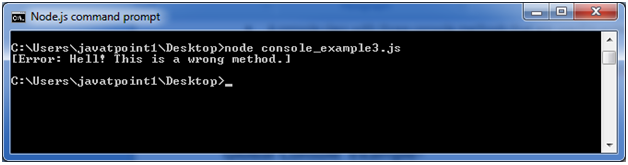
File: console_example1.js
console.log(‘Hello JavaTpoint’);
Open Node.js command prompt and run the following code:
node console_example1.js
Here, console.log() function displays message on console.
Node.js web-based Example
A node.js web application contains the following three parts:
Import required modules: The “require” directive is used to load a Node.js module.
Create server: You have to establish a server which will listen to client’s request similar to Apache HTTP Server.
Read request and return response: Server created in the second step will read HTTP request made by client which can be a browser or console and return the response.
How to create node.js web applications
Follow these steps:
Import required module: The first step is to use ?require? directive to load http module and store returned HTTP instance into http variable. For example:
var http = require("http");
Create server: In the second step, you have to use created http instance and call http.createServer() method to create server instance and then bind it at port 8081 using listen method associated with server instance. Pass it a function with request and response parameters and write the sample implementation to return “Hello World”. For example:
http.createServer(function (request, response) {

   // Send the HTTP header

   // HTTP Status: 200 : OK

   // Content Type: text/plain

   response.writeHead(200, {'Content-Type': 'text/plain'});

   // Send the response body as "Hello World"

   response.end('Hello World\n');

}).listen(8081);

// Console will print the message

console.log('Server running at http://127.0.0.1:8081/');
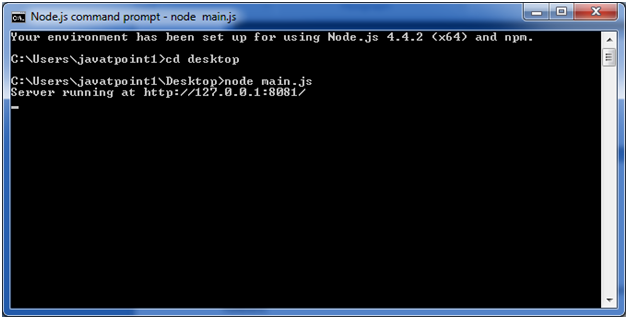
Combine step1 and step2 together in a file named “main.js”.
var http = require("http");

http.createServer(function (request, response) {

 // Send the HTTP header

   // HTTP Status: 200 : OK

   // Content Type: text/plain

   response.writeHead(200, {'Content-Type': 'text/plain'});

   // Send the response body as "Hello World"

   response.end('Hello World\n');

}).listen(8081);

// Console will print the message

console.log('Server running at http://127.0.0.1:8081/');
How to start your server:
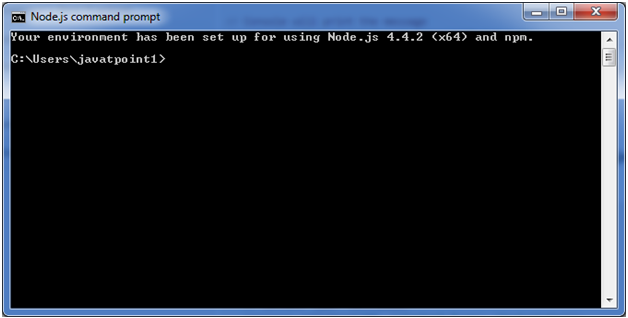
Go to start menu and click on the Node.js command prompt.
Now command prompt is open:
Set path: Here we have save “main.js” file on the desktop.
So type cd desktop on the command prompt. After that execute the main.js to start the server as follows:
node main.js
Now server is started.
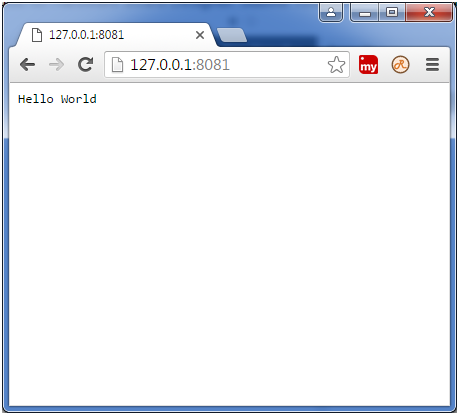
Make a request to Node.js server:
Open http://127.0.0.1:8081/ in any browser. You will see the following result.
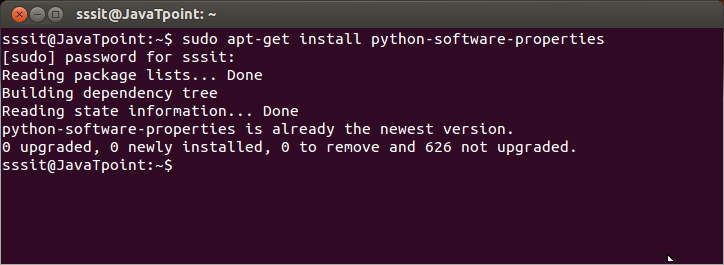
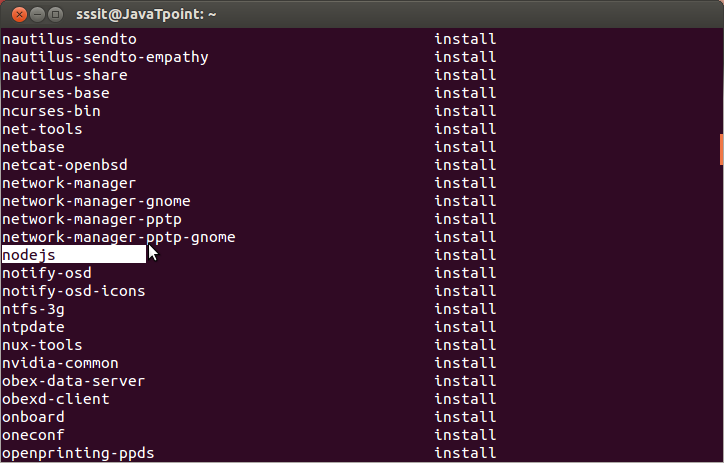
We can easily install Node.js on linux/ubuntu/centOS/fedora/linuxmint etc. To install Node.js on Linux (Ubuntu) operating system, follow these instructions:
1) Open Ubuntu Terminal (You can use shortcut keys (Ctrl+Alt+T).
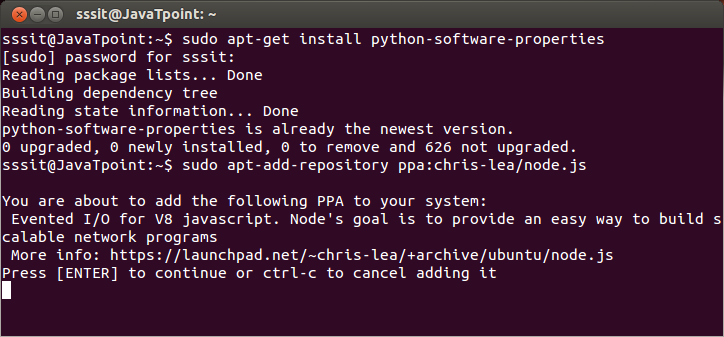
2) Type command sudo apt-get install python-software-properties
3) Press Enter (If you have set a password for your system then it will ask for the password)
4) Type the password and press enter
5) Type command sudo apt-add-repository ppa:chris-lea/node.js
6) Press Enter
7) Again Press Enter to continue
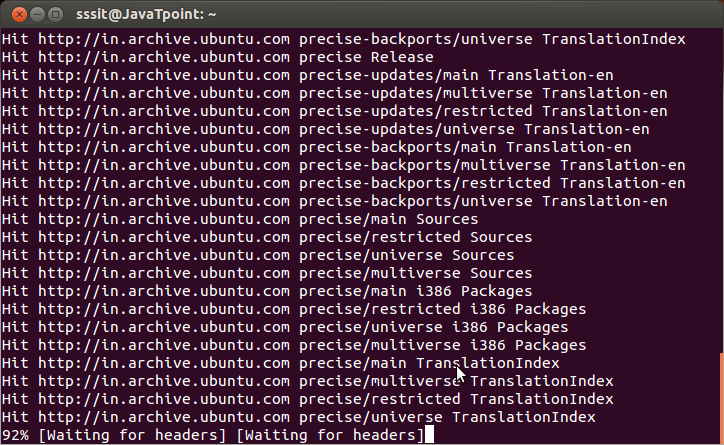
8) Type command sudo apt-get update ( Wait for sometime)
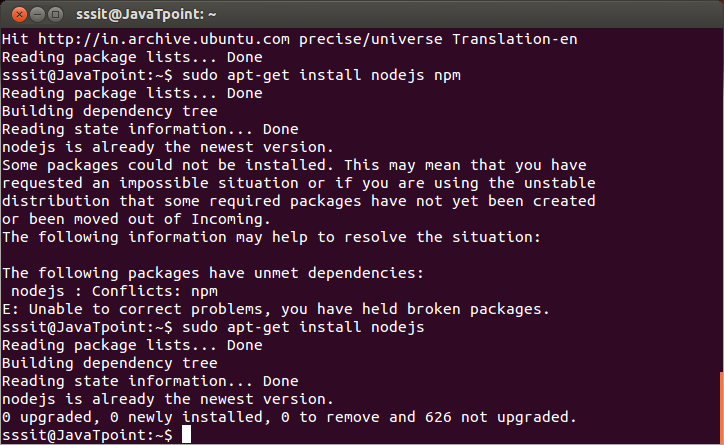
9) Type command sudo apt-get install nodejs npm
10) Type command sudo apt-get install nodejs
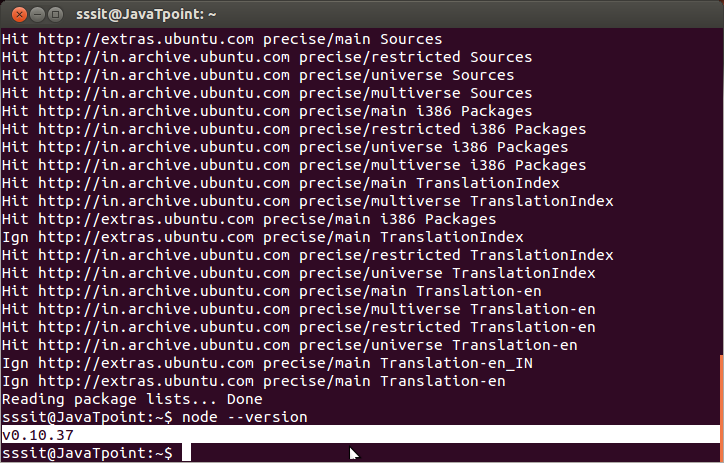
Installation completed. Now you can check the version of Node by node –version
Check the version of npm by npm -v
Now you can check the node.js in your installed program list by typing this command