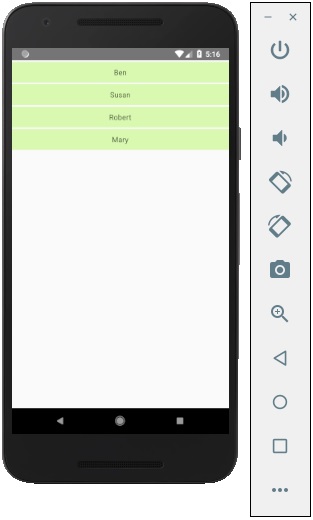
In this chapter, we will show you how to create a list in React Native. We will import List in our Home component and show it on screen.
App.js
import React from 'react'
import List from './List.js'

const App = () => {
   return (
  <List />   )
}
export default App
To create a list, we will use the map() method. This will iterate over an array of items, and render each one.
List.js
import React, { Component } from 'react'
import { Text, View, TouchableOpacity, StyleSheet } from 'react-native'
class List extends Component {
state = {
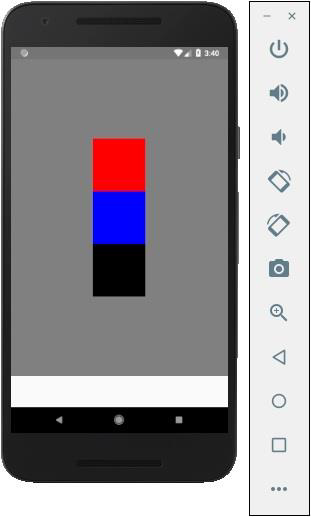
In the following example, we will import the StyleSheet. At the bottom of the file, we will create our stylesheet and assign it to the styles constant. Note that our styles are in camelCase and we do not use px or % for styling.
To apply styles to our text, we need to add style = {styles.myText} property to the Text element.
In our last chapter, we showed you how to use mutable state. In this chapter, we will show you how to combine the state and the props.
Presentational components should get all data by passing props. Only container components should have state.
Container Component
We will now understand what a container component is and also how it works.
Theory
Now we will update our container component. This component will handle the state and pass the props to the presentational component.
Container component is only used for handling state. All functionality related to view(styling etc.) will be handled in the presentational component.
Example
If we want to use example from the last chapter we need to remove the Text element from the render function since this element is used for presenting text to the users. This should be inside the presentational component.
Let us review the code in the example given below. We will import the PresentationalComponent and pass it to the render function.
After we import the PresentationalComponent and pass it to the render function, we need to pass the props. We will pass the props by adding myText = {this.state.myText} and deleteText = {this.deleteText} to <PresentationalComponent>. Now, we will be able to access this inside the presentational component.
App.js
import React from 'react';
import { StyleSheet, Text, View } from 'react-native';
import PresentationalComponent from './PresentationalComponent'
export default class App extends React.Component {
state = {
myState: 'Lorem ipsum dolor sit amet, consectetur adipisicing elit, used do eiusmod
tempor incididunt ut labore et dolore magna aliqua. Ut enim ad minim veniam, quis
nostrud exercitation ullamco laboris nisi ut aliquip ex ea commodo consequat. Duis
aute irure dolor in reprehenderit in voluptate velit esse cillum dolore eu fugiat
nulla pariatur. Excepteur sint occaecat cupidatat non proident, sunt in culpa qui
officia deserunt mollit anim id est laborum.'
}
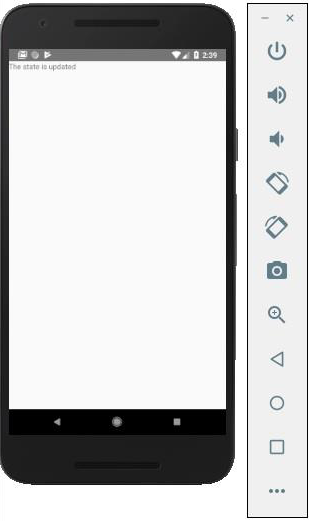
updateState = () => {
this.setState({ myState: 'The state is updated' })
We will now understand what a presentational component is and also how it works.
Theory
Presentational components should be used only for presenting view to the users. These components do not have state. They receive all data and functions as props.
The best practice is to use as much presentational components as possible.
Example
As we mentioned in our previous chapter, we are using the EC6 function syntax for presentational components.
Our component will receive props, return view elements, present text using {props.myText} and call the {props.deleteText} function when a user clicks on the text.
Now, we have the same functionality as in our State chapter. The only difference is that we refactored our code to the container and the presentational component.
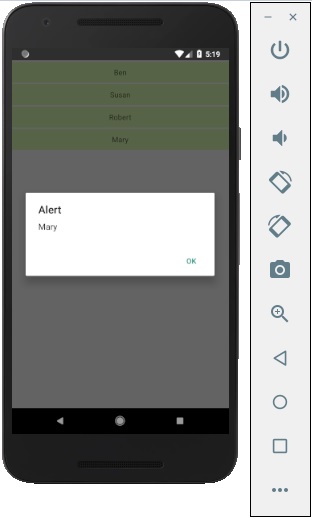
You can run the app and see the text as in the following screenshot.
If you click on text, it will be removed from the screen.
The data inside React Components is managed by state and props. In this chapter, we will talk about state.
Difference between State and Props
The state is mutable while props are immutable. This means that state can be updated in the future while props cannot be updated.
Using State
This is our root component. We are just importing Home which will be used in most of the chapters.
App.js
import React from 'react';
import { StyleSheet, Text, View } from 'react-native';
export default class App extends React.Component {
state = {
myState: 'Lorem ipsum dolor sit amet, consectetur adipisicing elit, used do eiusmod
tempor incididunt ut labore et dolore magna aliqua. Ut enim ad minim veniam, quis
nostrud exercitation ullamco laboris nisi ut aliquip ex ea commodo consequat.
Duis aute irure dolor in reprehenderit in voluptate velit esse cillum dolore eu
fugiat nulla pariatur. Excepteur sint occaecat cupidatat non proident, sunt in
culpa qui officia deserunt mollit anim id est laborum.'
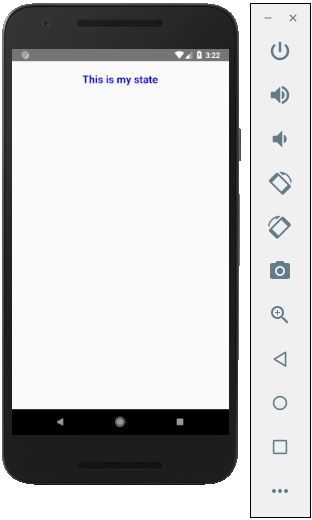
We can see in emulator text from the state as in the following screenshot.
Updating State
Since state is mutable, we can update it by creating the deleteState function and call it using the onPress = {this.deleteText} event.
Home.js
import React, { Component } from 'react'
import { Text, View } from 'react-native'
class Home extends Component {
state = {
myState: 'Lorem ipsum dolor sit amet, consectetur adipisicing elit, sed
do eiusmod tempor incididunt ut labore et dolore magna aliqua.
Ut enim ad minim veniam, quis nostrud exercitation ullamco laboris nisi
ut aliquip ex ea commodo consequat. Duis aute irure dolor in reprehenderit
in voluptate velit esse cillum dolore eu fugiat nulla pariatur.
Excepteur sint occaecat cupidatat non proident, sunt in culpa qui officia
deserunt mollit anim id est laborum.'
}
updateState = () ⇒ this.setState({ myState: 'The state is updated' })
render() {
NOTES − In all chapters, we will use the class syntax for stateful (container) components and function syntax for stateless (presentational) components. We will learn more about components in the next chapter.
We will also learn how to use the arrow function syntax for updateState. You should keep in mind that this syntax uses the lexical scope, and this keyword will be bound to the environment object (Class). This will sometimes lead to unexpected behavior.
The other way to define methods is to use the EC5 functions but in that case we will need to bind this manually in the constructor. Consider the following example to understand this.
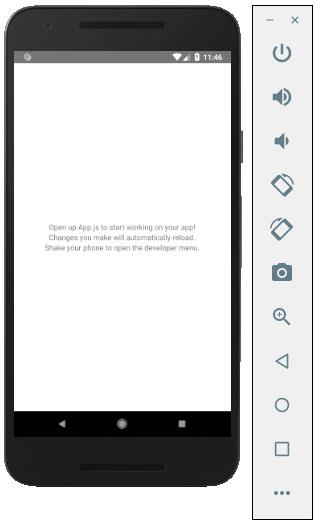
If you open the default app you can observe that the app.js file looks like
import React from 'react';
import { StyleSheet, Text, View } from 'react-native';
export default class App extends React.Component {
render() {
return (
<View style = {styles.container}>
<Text>Open up App.js to start working on your app!</Text>
<Text>Changes you make will automatically reload.</Text>
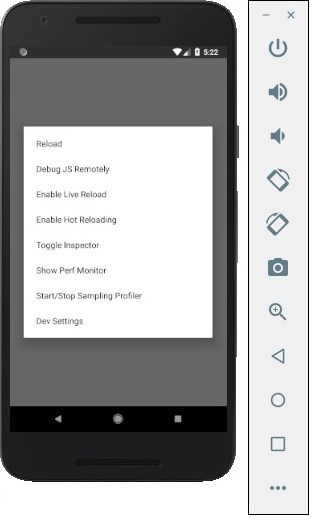
<Text>Shake your phone to open the developer menu.</Text>
</View>
);
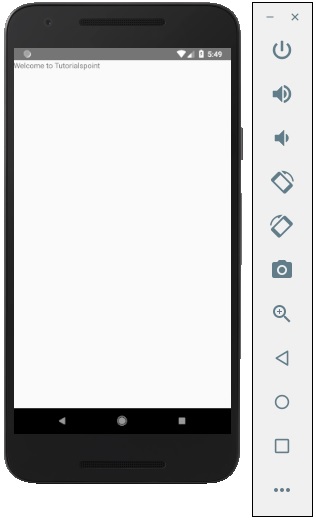
To display a simple message saying “Welcome to Tutorialspoint” remove the CSS part and insert the message to be printed wrapped by the <text></text> tags inside <view></view> as shown below.
import React from 'react';
import { StyleSheet, Text, View } from 'react-native';
export default class App extends React.Component {
render() {
return (
<View>
<Text>Welcome to Tutorialspoint</Text>
</View>
);
After executing the above command, a folder with specifies name is created with the following contents.
Explore our latest online courses and learn new skills at your own pace. Enroll and become a certified expert to boost your career.
Step 3: NodeJS Python Jdk8
Make sure you have Python NodeJS and jdk8 installed in your system if not, install them. In addition to these it is recommended to install latest version of yarn to avoid certain issues.
Step 4: Install React Native CLI
You can install react native command line interface on npm, using the install -g react-native-cli command as shown below.
npm install -g react-native-cli
Step 5: Start react native
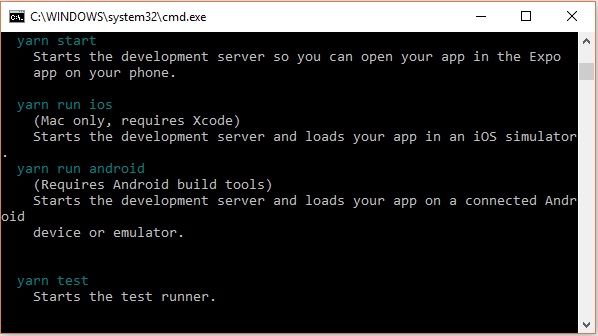
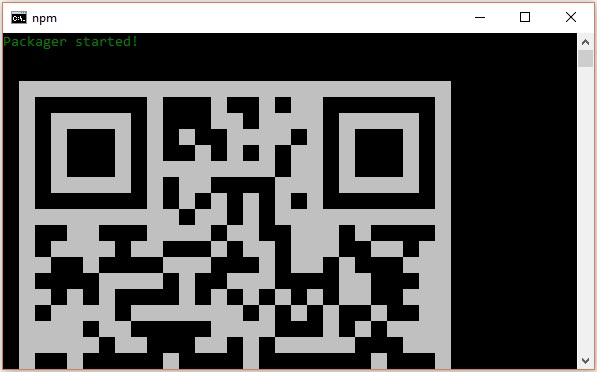
To verify the installation browse through the project folder and try starting the project using the start command.
If everything went well you will get a QR code as shown below.
As instructed, one way to run react native apps on your android devise is to using expo. Install expo client in your android devise and scan the above obtained QR code.
Step 6: Eject the project
If you want to run android emulator using android studio, come out of the current command line by pressing ctrl+c.
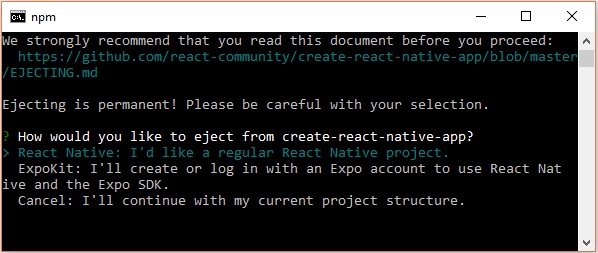
Then, execute run eject command as
npm run eject
This prompts you options to eject, select the first one using arrows and press enter.
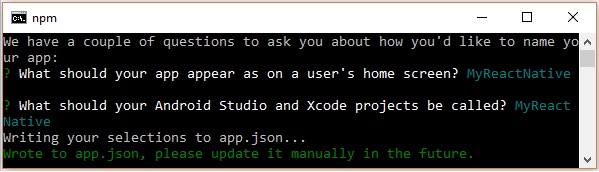
Then, you should suggest the name of the app on home screen and project name of the Android studio and Xcode projects.
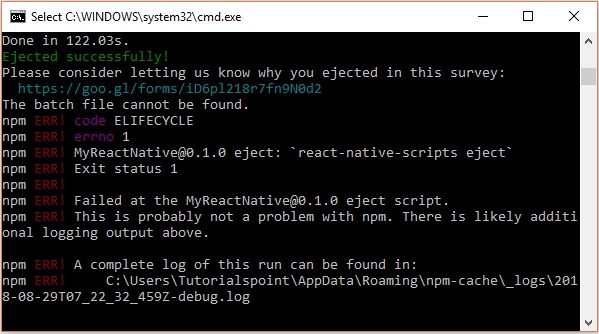
Though your project ejected successfully, you may get an error as −
Ignore this error and run react native for android using the following command −
react-native run-android
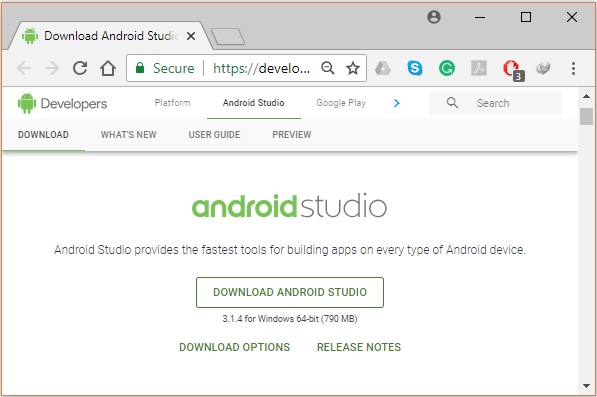
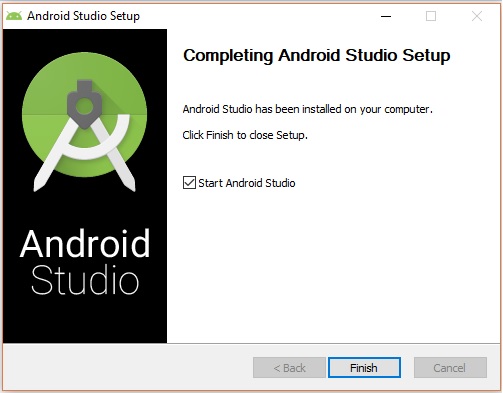
But, before that you need to install android studio.
After downloading the installation file of it, double click on it and proceed with the installation.
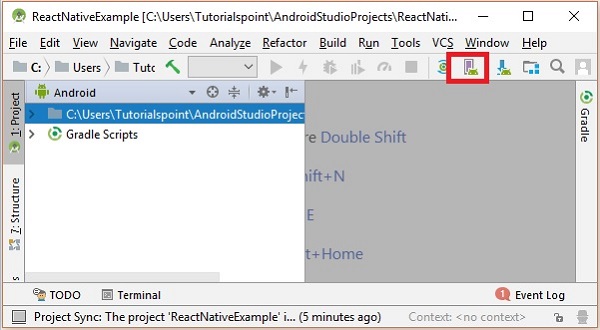
Step 8: Configuring AVD Manager
To configure the AVD Manager click on the respective icon in the menu bar.
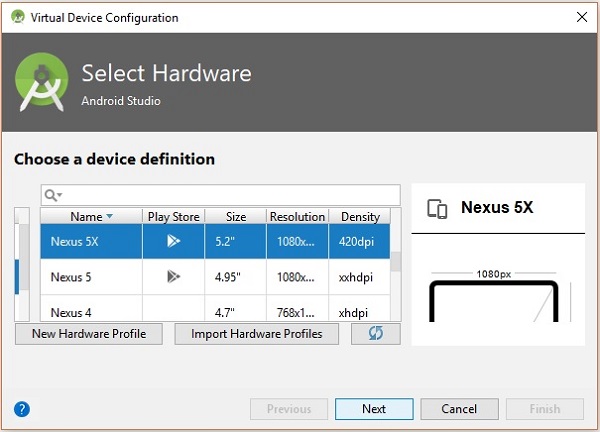
Step 9: Configuring AVD Manager
Choose a device definition, Nexus 5X is suggestable.
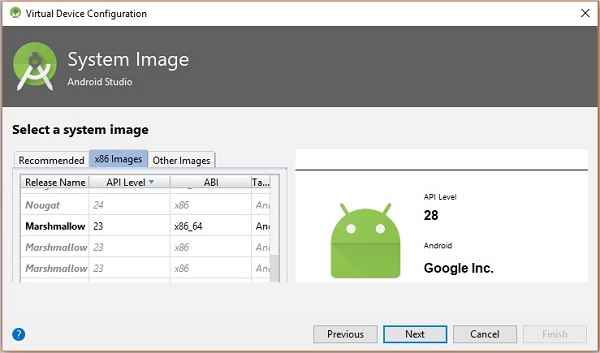
Click on the Next button you will see a System Image window. Select the x86 Images tab.
Then, select Marshmallow and click on next.
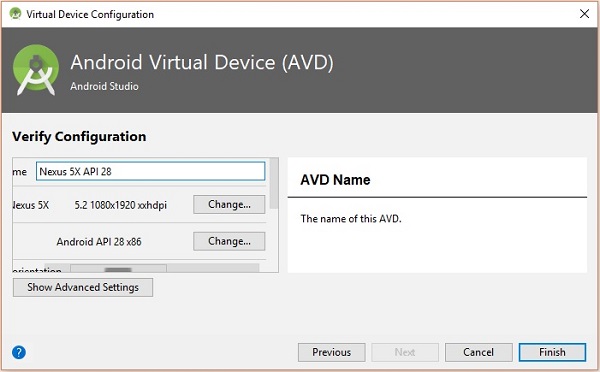
Finally, click on the Finish button to finish the AVD configuration.
After configuring your virtual device click on the play button under the Actions column to start your android emulator.
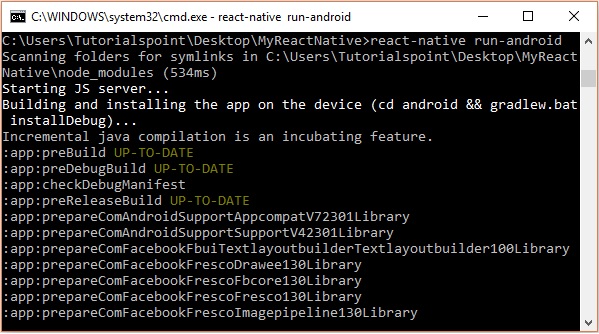
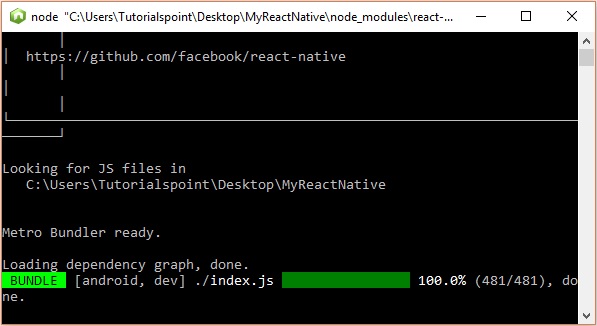
Step 10: Running android
Open command prompt, browse through your project folder and, execute the react-native run-android command.
Then, your app execution begins in another prompt you can see its status.
In your android emulator you can see the execution of the default app as −
Step 11: local.properties
Open the android folder in your project folder SampleReactNative/android (in this case). Create a file with named local.properties and add the following path in it.
React Native lets you build mobile apps using only JavaScript. It uses the same design as React, letting you compose a rich mobile UI from declarative components. With React Native, you don’t build a mobile web app, an HTML5 app, or a hybrid app; you build a real mobile app that’s indistinguishable from an app built using Objective-C or Java. React Native uses the same fundamental UI building blocks as regular iOS and Android apps. You just put those building blocks together using JavaScript and React.
React Native Features
Following are the features of React Native −
React − This is a Framework for building web and mobile apps using JavaScript.
Native − You can use native components controlled by JavaScript.
Platforms − React Native supports IOS and Android platform.
React Native Advantages
Follow are the advantages of React Native −
JavaScript − You can use the existing JavaScript knowledge to build native mobile apps.
Code sharing − You can share most of your code on different platforms.
Community − The community around React and React Native is large, and you will be able to find any answer you need.
Explore our latest online courses and learn new skills at your own pace. Enroll and become a certified expert to boost your career.
React Native Limitations
Following are the limitations of React Native −
Native Components − If you want to create native functionality which is not created yet, you will need to write some platform specific code.