Message flashing in a PHP web application refers to the technique that makes certain messages popup on the browser window for the user to receive application’s feedback. To be able to give the user a meaningful feedback to his interactions is an important design principle, that gives a better user experience.
In a PHP web application, we can use the session data to flash messages regarding success or failure of a certain action, notifications or warnings, etc., from time to time to keep the user informed.
A flash message allows you to create a message on one page and display it once on another page. To transfer a message from one page to another, you use the $_SESSION superglobal variable.
To start with, you add a variable to the $_SESSION array as follows −
Later, navigate to another page, and retrieve the flashed message from the $_SESSION variable and assign it to a variable. Then, you can display the message and then delete the message from the $_SESSION −
To generalize the basic idea of handling the flashed messages, we shall write a function that adds a message to the $_SESSION −
session_start();functioncreate_flash_message(string$name,string$message):void{// remove existing message with the nameif(isset($_SESSION[FLASH][$name])){unset($_SESSION[FLASH][$name]);}// add the message to the session$_SESSION[FLASH][$name]=['message'=>$message];}
Let us also have another function that reads back a message, flashes it on the browser, and removes it from the $_SESSION.
functiondisplay_flash_message(string$name):void{if(!isset($_SESSION[FLASH][$name])){return;}// get message from the session$flash_message=$_SESSION[FLASH][$name];// delete the flash messageunset($_SESSION[FLASH][$name]);// display the flash messageechoformat_flash_message($flash_message);}
The format_flash_message() function applies desired formatting to the obtained string with appropriate CSS rules.
If there are more than messages that have been flashed by the application, all of them can be retrieved and flashed with the following example −
functiondisplay_all_flash_messages():void{if(!isset($_SESSION[FLASH])){return;}// get flash messages$flash_messages=$_SESSION[FLASH];// remove all the flash messagesunset($_SESSION[FLASH]);// show all flash messagesforeach($flash_messagesas$flash_message){echoformat_flash_message($flash_message);}}
Use the following flash() function to create, format and flash the messages
functionflash(string$name='',string$message=''):void{if($name!==''&&$message!==''){create_flash_message($name,$message);}elseif($name!==''&&$message===''){display_flash_message($name);// display a flash message}elseif($name===''&&$message===''){display_all_flash_messages();// display all flash message}}
To implement the above method, call the flash() function on the first page.
flash('first','Hello World');
Navigate to another page and call the flash() function to retrieve and display the message −
flash('first');
Mechanism of using the flash messages is usually employed on a signup page to redirect users to the login page with a welcome message after they sign up.
In PHP, PRG stands for “Post/Redirect/Get”. It is a commonly used technique that is designed to prevent the resubmission of a form after it’s been submitted. You can easily implement this technique in PHP to avoid duplicate form submissions.
Usually a HTML form sends data to the server with the POST method. The server script fetches the data for further processing like adding a new record in a backend database, or running a query to fetch data. If the user accidentally refreshes the browser, there is a possibility of the same form data being resubmitted again, possibly leading to loss of data integrity. The PRG approach in PHP helps you avoid this pitfall.
Example
To start with, let us consider the following PHP script that renders a simple HTML form, and submits it back to itself with POST method. When the user fills the data and submits, the backend script fetches the data, renders the result, and comes back to show the blank form again.
First Name: <input type="text" name="first_name"><br/>
Last Name: <input type="text" name="last_name" /><button type="submit" name="submit">Submit</button></form></body></html></code></pre>
Assuming that the server is running, the above script is placed in the document root folder and visited in the browser.
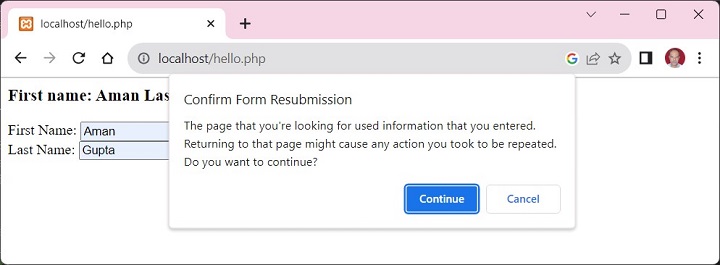
Fill the data and submit. The browser echoes the result, and re-renders the form. Now if you try to refresh the browser page, a warning pops up as shown below −
If you press Continue, the same data is posted again.
The problem can be understood with the following figure −
Following steps are taken in the PHP script to avoid the problem −
The PHP script before the HTML form starts a new session.
Check if the form has been submitted with POST method.
If so, store the form data in session variables
Redirect the browser to a result page. In our case, it is the same page. With the exit command, to terminate this script to make sure no more code gets executed.
If PHP finds that the REQUEST method is not POST, it checks if the session variables are set. If so, they are rendered along with the fresh copy of form.
Now even if the form is refreshed, you have successfully averted the possibility of resubmission.
Example
Here is the PHP code that uses the PRG technique −
Open Compiler
<?php
session_start();
if (isset($_POST["submit"])) {
In PHP, it is important to ensure that the input data is sanitized properly by removed any undesired characters before it is processed by the server side code. Usually, the users input their data to a PHP web application through a HTML form. If the form data consists of any undesired characters, it may prove to be harmful, hence an appropriate cleansing operation must be performed.
Input sanitization can be done with the help of one or more of the following functions in PHP.
The htmlspecialchars() Function
This function converts special characters to HTML entities.
In HTML, certain characters have special significance. This htmlspecialchars() function is used to encode special characters in HTML entities. This is useful when you want to display user input as HTML and want to prevent script injection attacks.
The following special characters are translated as shown −
Character
Replaced by
& (ampersand)
&
” (double quote)
", unless ENT_NOQUOTES is set
‘ (single quote)
' (for ENT_HTML401) or ' (for ENT_XML1, ENT_XHTML or ENT_HTML5), but only when ENT_QUOTES is set
< (less than)
<
> (greater than)
>
Flag Constants
The flags parameter is a bitmask of one or more of the following flags, which specify how to handle quotes, invalid code unit sequences and the used document type.
Sr.No
Constant & Description
1
ENT_COMPATWill convert double-quotes and leave single-quotes alone.
2
ENT_QUOTESWill convert both double and single quotes.
3
ENT_NOQUOTESWill leave both double and single quotes unconverted.
4
ENT_IGNOREdiscard invalid code unit sequences instead of returning an empty string.
5
ENT_SUBSTITUTEReplace invalid code unit sequences with a Unicode Replacement Character U+FFFD (UTF-8) or �
6
ENT_DISALLOWEDReplace invalid code points for the given document type with a Unicode Replacement Character U+FFFD (UTF-8) or � (otherwise) instead of leaving them as is. This may be useful.
7
ENT_HTML401Handle code as HTML 4.01.
8
ENT_XML1Handle code as XML 1.
9
ENT_XHTMLHandle code as XHTML.
10
ENT_HTML5Handle code as HTML 5.
Example
Take a look at the following example −
Open Compiler
<?php
   $str = 'Welcome To "PHP Tutorial" by <b>TutorialsPoint</b>';
   echo htmlspecialchars($str);
?>
It will produce the following output −
Welcome To "PHP Tutorial" by <b>TutorialsPoint</b>
The strip_tags() Function
The strip_tags() function removes all the HTML and PHP tags from a given string.
This function is very useful when you want ensure that the user input doesn’t contain any potentially malicious tags.
The allowed_tags parameter is an optional second parameter to specify tags which should not be stripped. These are either given as string, or as an array.
The $value parameter is a variable whose value needs to be sanitized. The $filter parameter is any of the predefined filter constants.
Sr.No
ID & Description
1
FILTER_SANITIZE_EMAILRemove all characters except letters, digits and !#$%&’*+-=?^_{|}~@.[].</td></tr><tr><td>2</td><td><strong>FILTER_SANITIZE_ENCODED</strong>URL-encode string, optionally strip or encode special characters.</td></tr><tr><td>3</td><td><strong>FILTER_SANITIZE_ADD_SLASHES</strong>Apply addslashes(). (Available as of PHP 7.3.0).</td></tr><tr><td>4</td><td><strong>FILTER_SANITIZE_NUMBER_FLOAT</strong>Remove all characters except digits, +- and optionally .,eE.</td></tr><tr><td>5</td><td><strong>FILTER_SANITIZE_NUMBER_INT</strong>Remove all characters except digits, plus and minus sign.</td></tr><tr><td>6</td><td><strong>FILTER_SANITIZE_SPECIAL_CHARS</strong>HTML-encode '"<>& and characters with ASCII value less than 32, optionally strip or encode other<br>special characters.</td></tr><tr><td>7</td><td><strong>FILTER_SANITIZE_FULL_SPECIAL_CHARS</strong>Equivalent to calling htmlspecialchars() with <strong>ENT_QUOTES</strong> set. Encoding quotes can be disabled by setting <strong>FILTER_FLAG_NO_ ENCODE_QUOTES</strong>.</td></tr><tr><td>8</td><td><strong>FILTER_SANITIZE_URL</strong>Remove all characters except letters, digits and $-_.+!*'(),{}|\\^~[]<>#%”;/?:@&=.
9
FILTER_UNSAFE_RAW
Example
The following code shows how you can sanitize Email data −
The provision of sending emails is one the commonly required features of a typical PHP powered web application. You would like to send emails containing notifications, updates and other communications to your registered users, through your PHP application itself, instead of a different mail service. You can add this capability to your PHP application by adopting the techniques described in this chapter.
PHP has a built-in mail() function to send an email. However, you need configure properly the “php.ini” settings to be able to do so. First, you must know the SMTP domain of the web hosting platform that you are using. For example, if your website is being hosted on GoDaddy hosting service, the SMTP domain is “smtp.secureserver.net”, which you should use in the configuration.
If you use Windows based hosting of GoDaddy, you should ensure that two directives are enabled in php.ini file. The first is called SMTP that defines your email server address. The second is called sendmail_from which defines your own email address.
The configuration for Windows should look something like this −
Linux users simply need to let PHP know the location of their sendmail application. The path and any desired switches should be specified to the sendmail_path directive.
The configuration for Linux should look something like this −
[mail function];For Win32 only.SMTP=;For win32 only
sendmail_from =;For Unix only
sendmail_path =/usr/sbin/sendmail -t -i
mail() function in PHP requires three mandatory arguments that specify the recipient’s email address, the subject of the message and the actual message additionally there are other two optional parameters.
mail( to, subject, message, headers, parameters );
Parameters
to − Required. Specifies the receiver / receivers of the email
subject − Required. Specifies the subject of the email. This parameter cannot contain any newline characters
message − Required. Defines the message to be sent. Each line should be separated with a LF (\n). Lines should not exceed 70 characters
headers − Optional. Specifies additional headers, like From, Cc, and Bcc. The additional headers should be separated with a CRLF (\r\n)
parameters − Optional. Specifies an additional parameter to the send mail program
Multiple recipients can be specified as the first argument to the mail() function in a comma separated list.
Sending HTML Email
When you send a text message using PHP then all the content will be treated as simple text. Even if you will include HTML tags in a text message, it will be displayed as simple text and HTML tags will not be formatted according to HTML syntax. But PHP provides option to send an HTML message as actual HTML message.
While sending an email message you can specify a Mime version, content type and character set to send an HTML email.
Example
The following example shows how to send an HTML email message to “[email protected]” copying it to “[email protected]”. You can code this program in such a way that it should receive all content from the user and then it should send an email.
It should receive all content from the user and then it should send an email.
Open Compiler
<?php
   $to = "[email protected]";
   $subject = "This is subject";

   $message = "<b>This is HTML message.</b>";
   $message .= "<h1>This is headline.</h1>";

   $header = "From:[email protected] \r\n";
   $header .= "Cc:[email protected] \r\n";
   $header .= "MIME-Version: 1.0\r\n";
   $header .= "Content-type: text/html\r\n";

   $retval = mail ($to,$subject,$message,$header);

   if( $retval == true ) {
  echo "Message sent successfully...";   }else {
  echo "Message could not be sent...";   }
?>
It will produce the following output −
Message could not be sent...
sh: 1: /usr/sbin/sendmail: not found
Explore our latest online courses and learn new skills at your own pace. Enroll and become a certified expert to boost your career.
Sending Email from Localhost
The above method of calling PHP mail() may not work on your localhost. In that case, there is an alternate solution to sending email. You can use PHPMailer to send email using SMTP from localhost.
PHPMailer is an open-source library to connect SMTP to send emails. You can download it from PEAR or Composer repositories, or download it from https://github.com/PHPMailer/PHPMailer. Download the ZIP file from here, and copy the contents of the PHPMailer folder into one of the include_path directories specified in your PHP configuration and load each class file manually.
Example
Use the following PHP script to send email with PHPMailer library −
Phpmailer.php
<?php
use PHPMailer\PHPMailer\PHPMailer;
use PHPMailer\PHPMailer\SMTP;
use PHPMailer\PHPMailer\Exception;
require_once __DIR__ . '/vendor/phpmailer/src/Exception.php';
require_once __DIR__ . '/vendor/phpmailer/src/PHPMailer.php';
require_once __DIR__ . '/vendor/phpmailer/src/SMTP.php';
require 'vendor/autoload.php';
$mail = new PHPMailer;
if(isset($_POST['send'])){
// getting post values
$fname=$_POST['fname'];
$toemail=$_POST['toemail'];
$subject=$_POST['subject'];
$message=$_POST['message'];
$mail->isSMTP(); // Set mailer to use SMTP
$mail->Host = 'smtp.gmail.com';
$mail->SMTPAuth = true;
$mail->Username = '[email protected]'; // SMTP username
$mail->Password = 'mypassword'; // SMTP password
// Enable TLS encryption, 'ssl' also accepted
$mail->SMTPSecure = 'tls';
$mail->Port = 587;
$mail->setFrom([email protected]', 'My_Name');
$mail->addReplyTo([email protected]', 'My_Name');
$mail->addAddress($toemail); // Add a recipient
$mail->isHTML(true); // Set email format to HTML
$bodyContent=$message;
$mail->Subject =$subject;
$body = 'Dear'.$fname;
$body .='<p>'.$message.'</p>';
$mail->Body = $body;
if(!$mail->send()) {
echo 'Message could not be sent.';
echo 'Mailer Error: ' . $mail->ErrorInfo;
} else {
echo 'Message has been sent';
}
}
?>
Use the following HTML form to compose the mail message. The form is submitted to the above phpmail.php script
To send an email with mixed content you should set Content-type header to multipart/mixed. Then text and attachment sections can be specified within boundaries.
A boundary is started with two hyphens followed by a unique number which can not appear in the message part of the email. A PHP function md5() is used to create a 32 digit hexadecimal number to create unique number. A final boundary denoting the email’s final section must also end with two hyphens.
// Filename that will be used for the file as the attachment
$fileatt_name = substr($attachment, $start,
strlen($attachment));
$email_from = $from; // Who the email is from
$subject = "New Attachment Message";
$email_subject = $subject; // The Subject of the email
$email_txt = $message; // Message that the email has in it
$email_to = $to; // Who the email is to
if($ok) {
echo "File Sent Successfully.";
// delete a file after attachment sent.
unlink($attachment);
} else {
die("Sorry but the email could not be sent. Please go back and try again!");
}
}
move_uploaded_file($_FILES["filea"]["tmp_name"],
'temp/'.basename($_FILES['filea']['name']));
From PHP version 7 onwards, the session_start() function accepts an array of options to override the session configuration directives set in “php.ini”. The [session] session in “php.ini” defines the default values of various options.
The options, if provided, are in the form of an associative array of options that will override the currently set session configuration directives. The keys should not include the “session.” prefix.
Example
For example, you may start the HTTP session with the two session options defined as the parameters of session_start() function −
Some of the configurable options of an HTTP session in PHP are as follows −
session.name
It specifies the name of the session which is used as cookie name. It should only contain alphanumeric characters. Defaults to PHPSESSID.
session.save_handler
It defines the name of the handler which is used for storing and retrieving data associated with a session. Defaults to files.
session.auto_start
It specifies whether the session module starts a session automatically on request startup. Defaults to 0 (disabled).
session.cookie_lifetime
It specifies the lifetime of the cookie in seconds which is sent to the browser. The value 0 means “until the browser is closed.” Defaults to 0.
session.cache_limiter
It specifies the cache control method used for session pages. It may be one of the following values: nocache, private, private_no_expire, or public. Defaults to nocache.
session.sid_length
It allows you to specify the length of session ID string. Session ID length can be between 22 to 256. The default is 32.
session.upload_progress.enabled
It enables upload progress tracking, populating the $_SESSION variable. Defaults to 1, enabled.
session.lazy_write
When it is set to 1, it means that the session data is only rewritten if it changes. Defaults to 1, enabled.
A web session is the time duration between the time a user establishes connection with a server and the time the connection is terminated. Along with the cookies, the session variables make the data accessible across the various pages of an entire website.
During a session, the website maintains information about the user’s actions and preferences. The session data is populated in a superglobal associative array $_SESSION.
To start a new session in PHP, you need to call the session_start() function.
Starting a Session
In order to enable access to session data, session_start() function must be invoked. session_start() creates a session or resumes the current one based on a session identifier passed via a GET or POST request, or passed via a cookie.
session_start(array$options=[]):bool
This function returns true if a session was successfully started, otherwise false.
PHP first creates a unique identifier for that particular session which is a random string of 32 hexadecimal numbers.
The session_id() function sets or retrieves a unique session ID.
session_id(?string$id=null):string|false
PHP will generate a random session ID, if the $id parameter is not given. You may specify your own ID instead. The function returns the session id for the current session or the empty string if there is no current session. On failure, it returns false.
The browser will show a random string as the output −
Session Id: mi3976f8ssethe9f04vq1ag6it
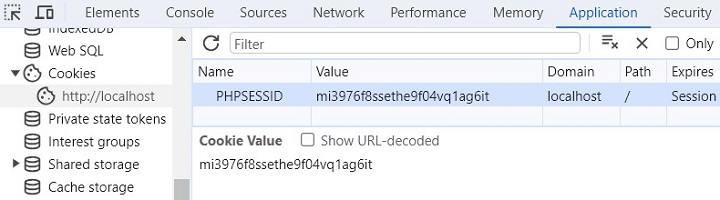
A cookie called PHPSESSID is automatically sent to the user’s computer to store unique session identification string.
A session creates a file in a temporary directory on the server where registered session variables and their values are stored. This data will be available to all pages on the site during that visit.
The location of the temporary file is determined by a setting in the “php.ini” file called “session.save_path”.
Handling Session Variables
Session variables are stored in associative array called $_SESSION[]. These variables can be accessed during lifetime of a session.
To create a new session variable, add a key-value pair in the $_SESSION array −
$_SESSION["var"]=value;
To read back the value of a session variable, you can use echo/print statements, or var_dump() or print_r() functions.
echo$_SESSION["var"];
To obtain the list of all the session variables in the current session, you can use a foreach loop to traverse the $_SESSION −
foreach($_SESSIONas$key=>$val)echo$key."=>".$val;
Example
The following example starts a session then register a variable called counter that is incremented each time the page is visited during the session.
Use the isset() function to check if a session variable is already set or not.
The following PHP script starts a session when it runs for the first time, and sets a session variable named counter. When the client revisits the same URL again, since the session variable is already set, the counter is incremented.
}
$msg = "Number of visits in this session: ". $_SESSION['counter'];
?><?php
echo "$msg";
?>
Refresh the browser multiple times to simulate repeated visits. The browser displays the counter −
Number of visits in this session: 5
Explore our latest online courses and learn new skills at your own pace. Enroll and become a certified expert to boost your career.
Destroying a PHP Session
A PHP session can be destroyed by session_destroy() function. This function does not need any argument and a single call can destroy all the session variables. If you want to destroy a single session variable then you can use unset() function to unset a session variable.
Here is an example to unset a single variable −
<?php
   unset($_SESSION['counter']);
?>
Here is the call which will destroy all the session variables −
<?php
   session_destroy();
?>
You don’t need to call start_session() function to start a session when a user visits your site if you can set session.auto_start variable to 1 in php.ini file.
Example
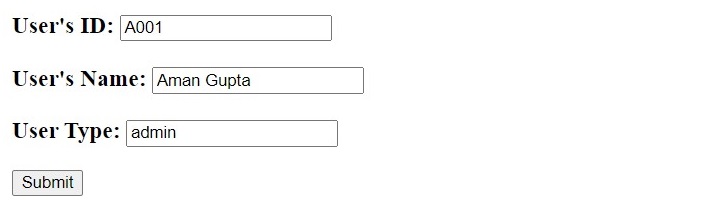
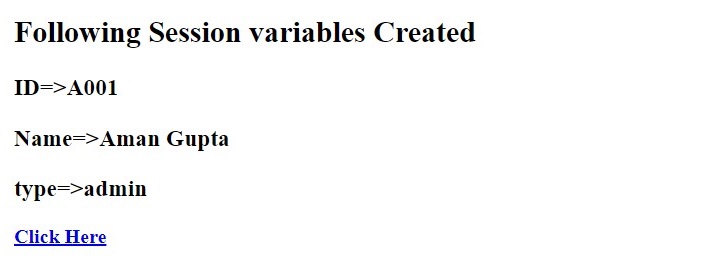
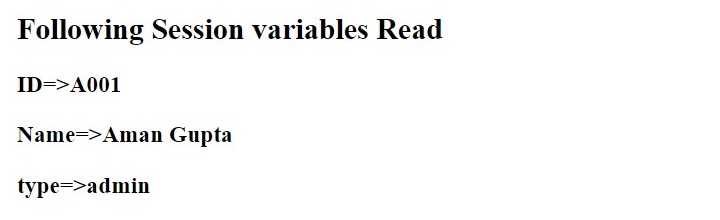
The following PHP script renders a HTML form. The form data is used to create three session variables. A hyperlink takes the browser to another page, which reads back the session variables.
The worldwide web is powered by HTTP protocol, which is a stateless protocol. The mechanism of Cookies helps the server maintain the information of previous requests. PHP transparently supports HTTP cookies.
When a client first sends its request, the server includes a small piece of data along with its response as cookies. PHP provides the setcookie() method to inject cookies in the response.
This cookie data is stored in the client’s machine as text files. On subsequent visits of the same client, these cookies are included as a part of the request header.
The server populates the PHP superglobal variable “$_COOKIE” with all the cookies present in the client request.
This chapter will teach you how to set cookies, how to access them and how to delete them.
The Anatomy of a Cookie
Cookies are usually set in an HTTP header (although JavaScript can also set a cookie directly on a browser). A PHP script that sets a cookie might send headers that look something like this −
HTTP/1.1 200 OK
Date: Fri, 04 Feb 2000 21:03:38 GMT
Server: Apache/1.3.9 (UNIX) PHP/4.0b3
Set-Cookie: name=xyz; expires=Friday, 04-Feb-07 22:03:38 GMT;
path=/; domain=tutorialspoint.com
Connection: close
Content-Type: text/html
As you can see, the Set-Cookie header contains a name value pair, a GMT date, a path and a domain. The name and value will be URL encoded. The expires field is an instruction to the browser to “forget” the cookie after the given time and date.
If the browser is configured to store cookies, it will then keep this information until the expiry date. If the user points the browser at any page that matches the path and domain of the cookie, it will resend the cookie to the server.The browser’s headers might look something like this −
GET / HTTP/1.0
Connection: Keep-Alive
User-Agent: Mozilla/4.6 (X11; I; Linux 2.2.6-15apmac ppc)
Host: zink.demon.co.uk:1126
Accept: image/gif, */*
Accept-Encoding: gzip
Accept-Language: en
Accept-Charset: iso-8859-1,*,utf-8
Cookie: name=xyz
A PHP script will then have access to the cookie in the environmental variables $_COOKIE or $HTTP_COOKIE_VARS[] which holds all cookie names and values. Above cookie can be accessed using $HTTP_COOKIE_VARS[“name”].
How to Set a Cookie in PHP?
PHP contains the setcookie function to create a cookie object to be sent to the client along with HTTP response.
Name − This sets the name of the cookie and is stored in an environment variable called HTTP_COOKIE_VARS. This variable is used while accessing cookies.
Value − This sets the value of the named variable and is the content that you actually want to store.
Expiry − This specify a future time in seconds since 00:00:00 GMT on 1st Jan 1970. After this time cookie will become inaccessible. If this parameter is not set then cookie will automatically expire when the Web Browser is closed.
Path − This specifies the directories for which the cookie is valid. A single forward slash character permits the cookie to be valid for all directories.
Domain − This can be used to specify the domain name in very large domains and must contain at least two periods to be valid. All cookies are only valid for the host and domain which created them.
Security − This can be set to 1 to specify that the cookie should only be sent by secure transmission using HTTPS otherwise set to 0 which mean cookie can be sent by regular HTTP.
Example
The PHP script give below checks if the cookie named username is already set, and retrieves its value, if so. If not, a new cookie username is set.
setcookie("username", "MohanKumar");
echo "<h2>Cookie username is now set</h2>";
}
?>
Run this script from the document root of the Apache server. You should see this message −
Cookie username is now set
If this script is re-executed, the cookie is now already set.
Cookie username already set: MohanKumar
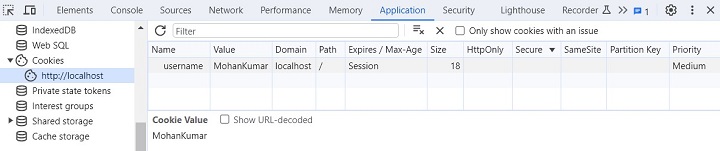
Your browser’s developer tool is a very useful facility. You can set, retrieve and delete cookies with its help. The cookie set by the above program can be viewed under the Application tab of the browser’s developer tools.
A foreach loop as below retrieves all the cookies −
<?php
   $arr=$_COOKIE;
   foreach ($arr as $key=>$val);
   echo "<h2>$key=>$val </h2>";
?>
The following script contains an HTML form. It sends the form data to setcookie.php script, that sets the cookies with the use of data retrieved from the $_POST array.
With another getcookie.php code, we can retrieve the cookies set.
if(isset($_COOKIE["name"])echo"Cookie: name => ".$_COOKIE["name"]."<br>";if(isset($_COOKIE["age"])echo"Cookie: age => ".$_COOKIE["age"]."<br>";
Explore our latest online courses and learn new skills at your own pace. Enroll and become a certified expert to boost your career.
Accessing Cookies with PHP
PHP provides many ways to access cookies. Simplest way is to use either $_COOKIE or $HTTP_COOKIE_VARS variables. Following example will access all the cookies set in above example.
<?php
   echo $_COOKIE["name"]. "<br />";

   /* is equivalent to */
   echo $HTTP_COOKIE_VARS["name"]. "<br />";

   echo $_COOKIE["age"] . "<br />";

   /* is equivalent to */
   echo $HTTP_COOKIE_VARS["age"] . "<br />";
?>
You can use isset() function to check if a cookie is set or not.
If the cookie name contains dots (.), PHP replaces them with underscores (_).
Although the main purpose behind the concept of cookies is to help web developers provide a more personalized and convenient user experience, it may pose a risk to your privacy and personal information.
In some cases, the application may deny you full access you don’t accept their cookies. In such cases, periodically clearing the cookie related data from your browser’s cache is advised.
One of the common features required in a typical PHP web application is the provision of letting the user upload files. Uploading files from a client is very easy in PHP. In this chapter, we shall learn how to use PHP script for the file upload process.
The process of uploading a file follows these steps −
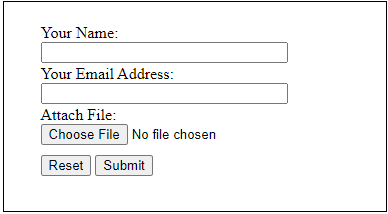
The user opens the page containing a HTML form featuring a text files, a browse button and a submit button.
The user clicks the browse button and selects a file to upload from the local PC.
The full path to the selected file appears in the text filed then the user clicks the submit button.
The selected file is sent to the temporary directory on the server.
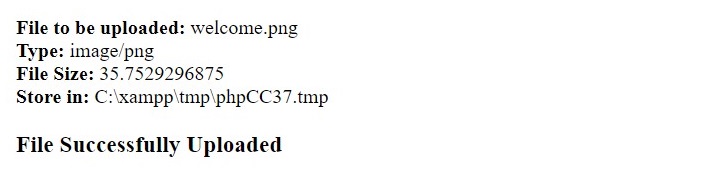
The PHP script that was specified as the form handler in the form’s action attribute checks that the file has arrived and then copies the file into an intended directory.
The PHP script confirms the success to the user.
In order to perform this activity, we must first ensure that configuration settings related to file upload are enabled in “php.ini”.
Open the “php.ini” file and ensure that the following settings are enabled by removing the leading semicolon (;) symbol in file_uploads, upload_tmp_dir, upload_max_filesize and max_file_uploads parameters −
;;;;;;;;;;;;;;;;; File Uploads ;;;;;;;;;;;;;;;;;; Whether to allow HTTP file uploads.; http://php.net/file-uploads
file_uploads=On

; Temporary directory forHTTP uploaded files(will usesystem;defaultif not specified).; http://php.net/upload-tmp-dir
upload_tmp_dir="C:\xampp\tmp"; Maximum allowed size for uploaded files.; http://php.net/upload-max-filesize
upload_max_filesize=40M

; Maximum number of files that can be uploaded via a single request
max_file_uploads=20
It is necessary that the folders for both temporary and final locations have permissions set that enable file writing. If either is set to be read-only then process will fail.
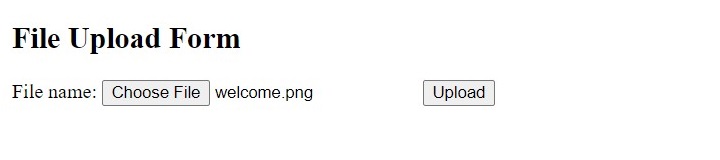
Creating a File Upload Form
Next, we need to design a HTML form for file upload. The form’s method attribute must be POST and enctype must be multipart/form-data. Use the input type as file to let the user browse and select the file to be uploaded.
The uploadfile.php script receives the uploaded file. The file data is collected in a suparglobal variable $_FILES. Fetch the name, file type, size and the tmp_name attributes of the uploaded file.
The move_uploaded_file() function copies the selected file to the document folder.
Since PHP is mostly used for web application development, the data sent by the browser client is mainly with the GET and POST types of HTTP request methods. The HTTP protocol also defines other methods for sending the request to the server. They are PUT, DELETE, HEAD and OPTIONS (in addition to GET and POST methods). In this chapter, we shall concentrate on how PHP handles the GET and POST methods.
The GET Method
The GET method sends the encoded user information appended to the page request. The page and the encoded information are separated by the ? character.
The GET method produces a long string that appears in your server logs, in the browser’s Location: box.
The GET method is restricted to send upto 1024 characters only.
Never use GET method if you have password or other sensitive information to be sent to the server.
GET can’t be used to send binary data, like images or word documents, to the server.
The data sent by GET method can be accessed using QUERY_STRING environment variable.
The PHP provides $_GET associative array to access all the sent information using GET method.
Try out following example by putting the source code in test.php script.
<?php
if( $_GET["name"] || $_GET["age"] ) {
echo "Welcome ". $_GET['name']. "<br />";
echo "You are ". $_GET['age']. " years old.";
exit();
}
?><form action = "<?php <b>$_PHP_SELF</b> ?>" method = "GET">
Name: <input type = "text" name = "name" />
Age: <input type = "text" name = "age" /><input type = "submit" /></form>
It will produce the following result −
The POST Method
The POST method transfers information via HTTP headers. The information is encoded as described in case of GET method and put into a header called QUERY_STRING.
The POST method does not have any restriction on data size to be sent.
The POST method can be used to send ASCII as well as binary data.
The data sent by POST method goes through HTTP header so security depends on HTTP protocol. By using Secure HTTP you can make sure that your information is secure.
The PHP provides $_POST associative array to access all the sent information using POST method.
Try out following example by putting the source code in test.php script.
<?php
if( $_POST["name"] || $_POST["age"] ) {
if (preg_match("/[^A-Za-z'-]/",$_POST['name'] )) {
die ("invalid name and name should be alpha");
}
echo "Welcome ". $_POST['name']. "<br />";
echo "You are ". $_POST['age']. " years old.";
exit();
}
?><form action = "<?php <b>$_PHP_SELF</b> ?>" method = "POST">
Name: <input type = "text" name = "name" />
Age: <input type = "text" name = "age" /><input type = "submit" /></form>
It will produce the following result −
Explore our latest online courses and learn new skills at your own pace. Enroll and become a certified expert to boost your career.
Difference between GET and POST
The main difference between the GET and POST methods is that while the request parameters appended to the URL are exposed in the browser’s URL, the POST data is included in the message body, and not revealed in the URL. Hence, the GET method shouldn’t be used to send sensitive data to the server.
Secondly, the request data in GET method cannot exceed 2048 characters and can consist of ASCII characters only, while with POST method, there is no limit to the request data which can be in binary also (the default maximum size of POST data is determined by post_max_size setting in php.ini file)
PHP provides the following three superglobals to retrieve and process the request parameters −
$_GET − an associative array to access all the sent information using GET method.
$_POST − an associative array to access all the sent information using POST method.
$_REQUEST − an associative array that can be used to get the result from form data sent with both the GET and POST methods.
$_GET Array
You can pass the request parameters in the form of query string directly appended to the URL.
Save the following PHP script in the document root folder (htdocs) as “hello.php” −
Enter http://localhost/hello.php?first_name=Amar&last_name=Sharma as the URL in a browser window (ensure that the PHP server is running).
The $_GET array is populated from the request and the output is displayed as below −
First name: Amar Last Name: Sharma
You can also populate the $_GET array with the HTML form data if its method attribute is GET.
Use the following HTML form to collect the data and send it to “hello.php”. Under the document root, save the following script as “hello.html” −
Open Compiler
<form action="hello.php" method="get">
   First Name: <input type="text" name="first_name"/><br/>
   Last Name: <input type="text" name="last_name" /><input type="submit" value="Submit" /></form>
In your browser, enter the URL “http://localhost/hello.html” −
You should get the similar output in the browser window.
$_POST Array
The easiest way to send data to a server with the POST request is specifying the method attribute of HTML form as POST. Assuming that the URL in the browser is “http://localhost/hello.php”, method=POST is set in a HTML form “hello.html” as in the earlier example −
<form action="hello.php" method="post">
   First Name: <input type="text" name="first_name"/><br/>
   Last Name: <input type="text" name="last_name" /><input type="submit" value="Submit" /></form>
The “hello.php” script (in document root folder) retrieves the form data in the $_POST array and renders it as the HTTP response back to the browser −
Open “http://localhost/hello.html” in your browser. The data entered is retrieved by the server, and rendered back to the client, as in the earlier example.
You can include the content of a PHP file into another PHP file before the server executes it. There are two PHP functions which can be used to included one PHP file into another PHP file.
The include() Function
The require() Function
This is a strong point of PHP which helps in creating functions, headers, footers, or elements that can be reused on multiple pages. This will help developers to make it easy to change the layout of complete website with minimal effort. If there is any change required then instead of changing thousand of files just change included file.
The include() Function
The include() function takes all the text in a specified file and copies it into the file that uses the include function. If there is any problem in loading a file then the include() function generates a warning but the script will continue execution.
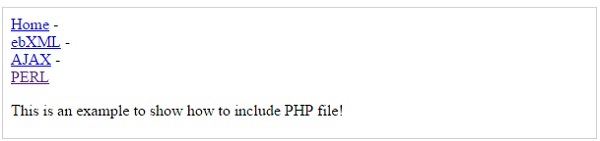
Assume you want to create a common menu for your website. Then create a file menu.php with the following content.
Now create as many pages as you like and include this file to create header. For example now your test.php file can have following content.
<?php <b>include("menu.php");</b> ?><p>This is an example to show how to include PHP file!</p>
It will produce the following result −
The require() Function
The require() function takes all the text in a specified file and copies it into the file that uses the include function. If there is any problem in loading a file then the require() function generates a fatal error and halt the execution of the script.
So there is no difference in require() and include() except they handle error conditions. It is recommended to use the require() function instead of include(), because scripts should not continue executing if files are missing or misnamed.
You can try using above example with require() function and it will generate same result. But if you will try following two examples where file does not exist then you will get different results.
<?php include("xxmenu.php"); ?><p>This is an example to show how to include wrong PHP file!</p>
This will produce the following result −
This is an example to show how to include wrong PHP file!
Now lets try same example with require() function.
<?php <b>require("xxmenu.php");</b> ?><p>This is an example to show how to include wrong PHP file!</p>
This time file execution halts and nothing is displayed.
NOTE − You may get plain warning messages or fatal error messages or nothing at all. This depends on your PHP Server configuration.