Category: 02. Ethereum

https://cdn-icons-png.flaticon.com/512/6001/6001368.png

  • Creating Contract Users

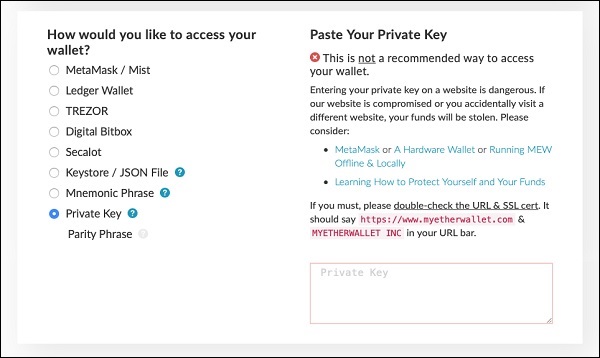
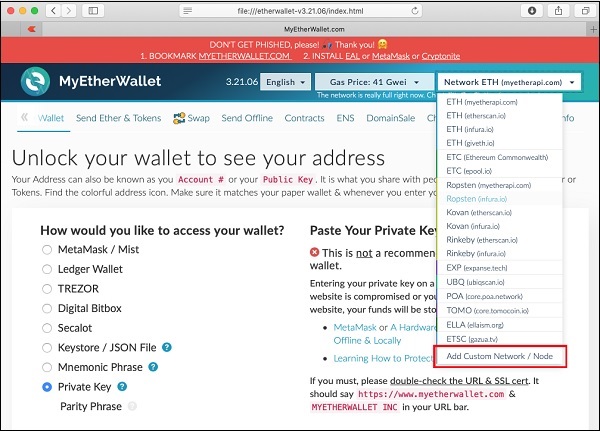
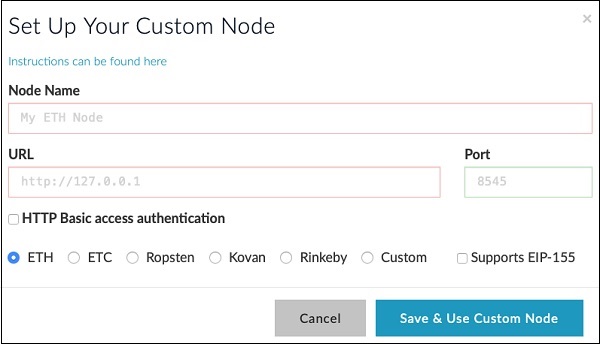
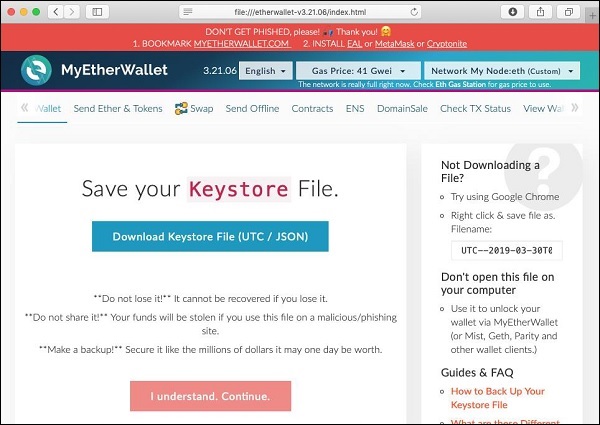
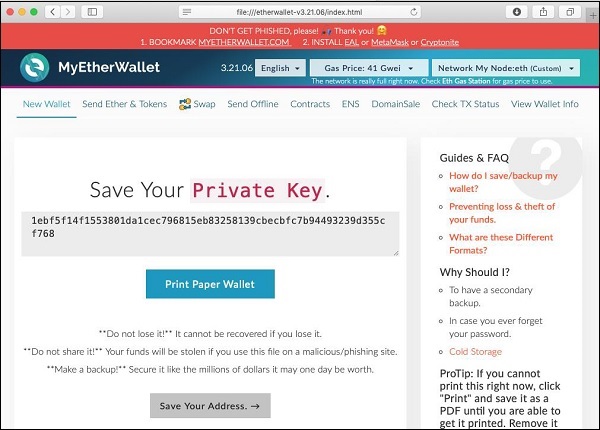
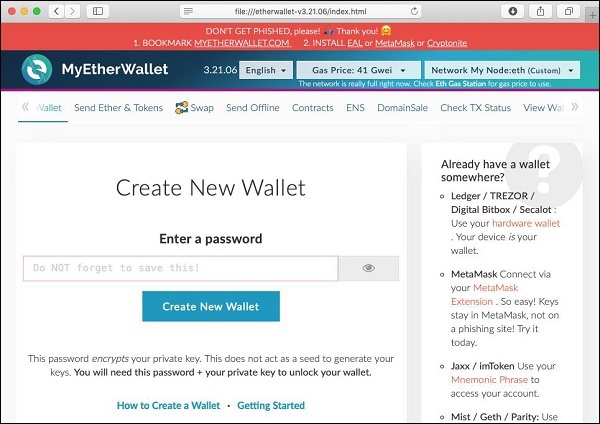
    In this chapter, we will learn the creation of contract users on Ethereum. To create a user for our published contract, we will create another MyEtherWallet client attached to the same Ganache Blockchain that you have been using in the previous steps. Go to the MyEtherWallet screen and create a new wallet.

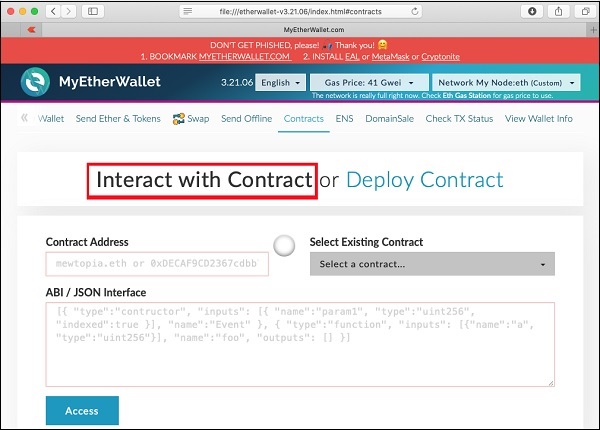
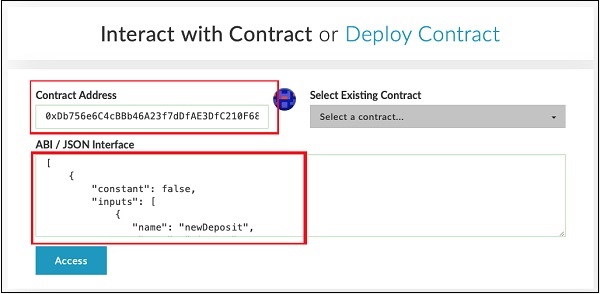
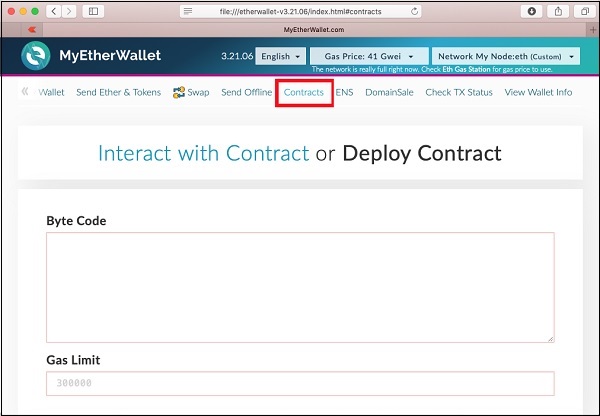
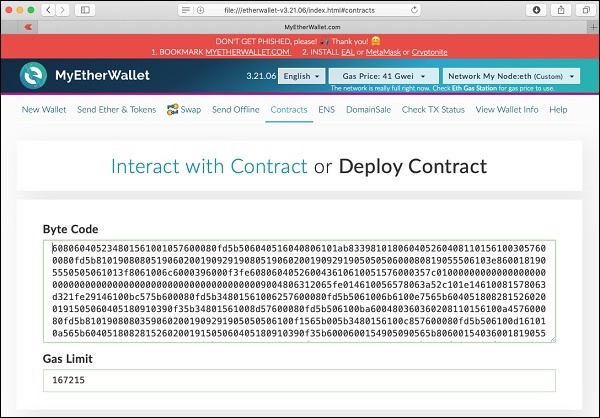
    Click on the contracts menu and select the “Interact with Contract” option as in the earlier case. Note that this new user is going to simply interact with the already published contract and not deploying his own contract. Specify the contract address and the ABI that you used in the earlier case.

    Interact with Contract Address

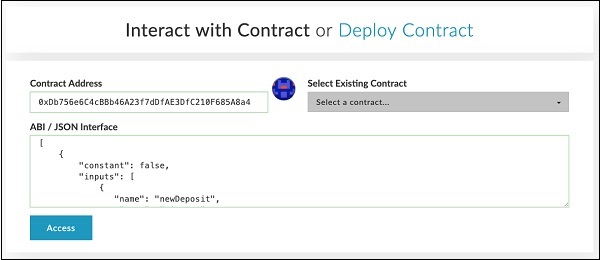
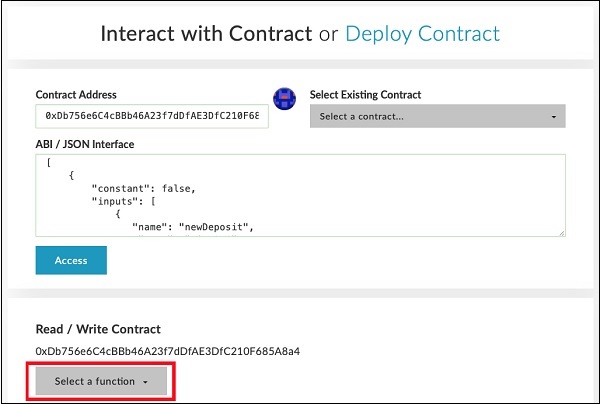
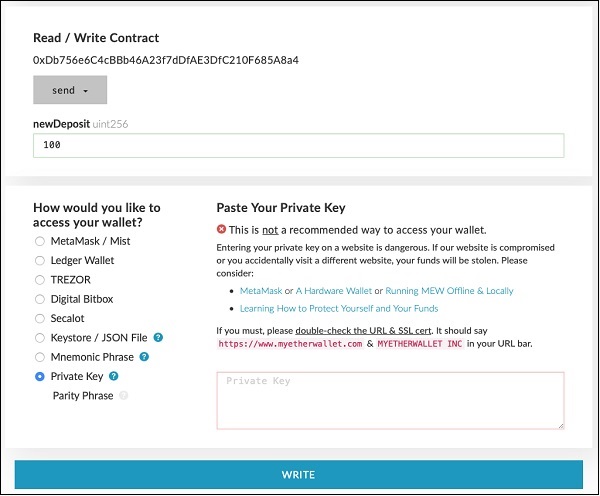
    Now, click Access button and invoke send method. When asked, input some value say 100 ETH to be sent. Submit the transaction. Upon submission, the following screen will appear.

    Interact with Contract Access

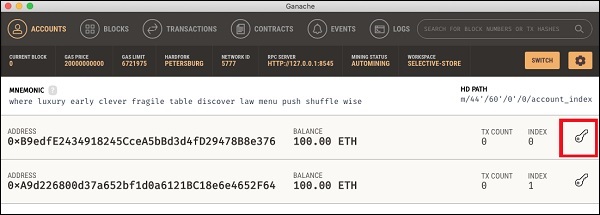
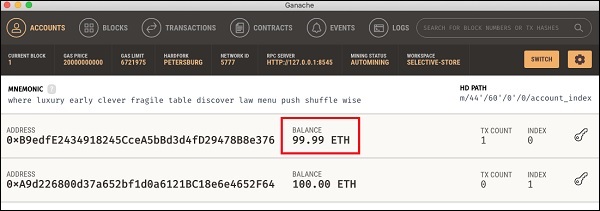
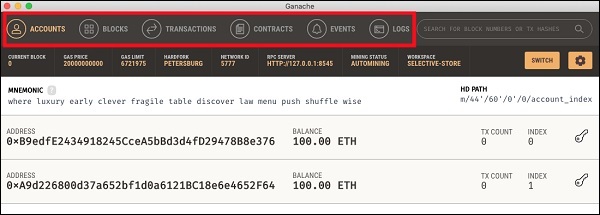
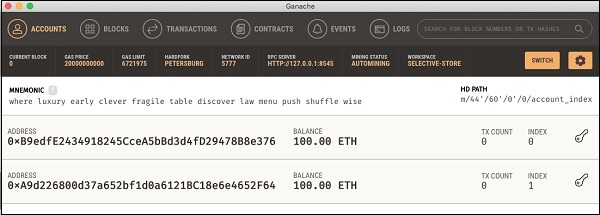
    To attach this new client to our Ganache Blockchain, go to Ganache Console. Click on the keys icon of account # 2 as shown in the following screenshot −

    Ganache Console Screenshot

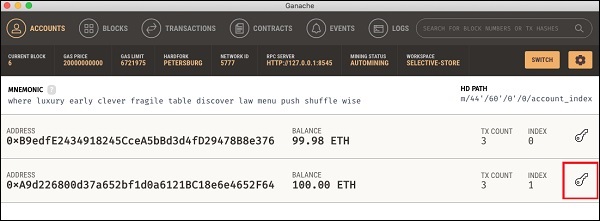
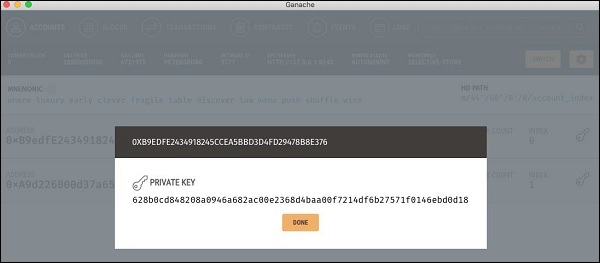
    You will get the private key for account # 2.

    Ganache Console private key

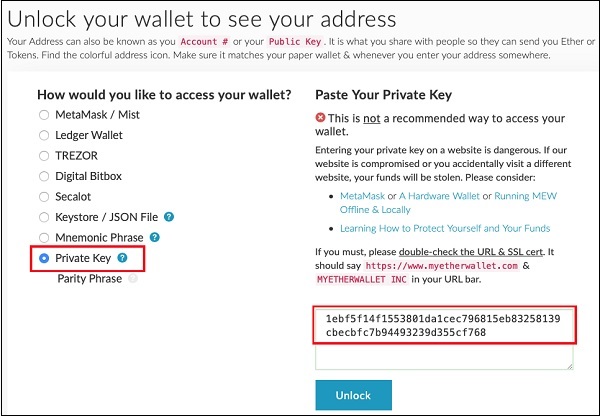
    Copy the key that you receive and use it in your newly created wallet as shown here −

    Newly Created Wallet

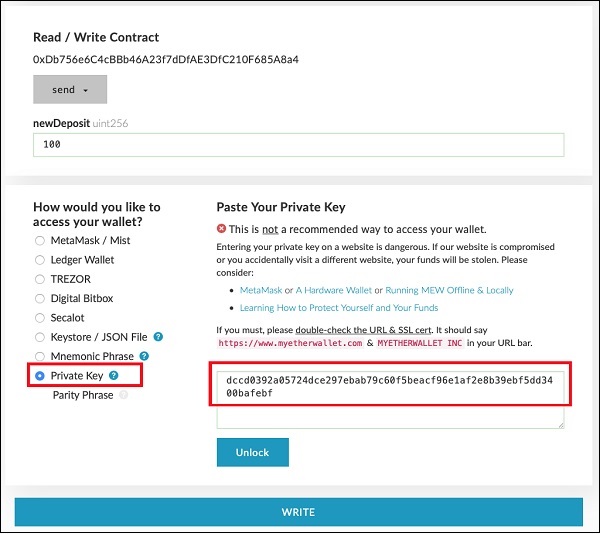
    Click on the Unlock button to attach the wallet.

    When the wallet is successfully unlocked, write the desired send transaction.

    Wallet Successfully Unlocked

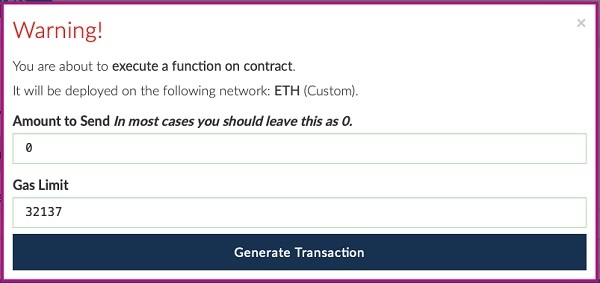
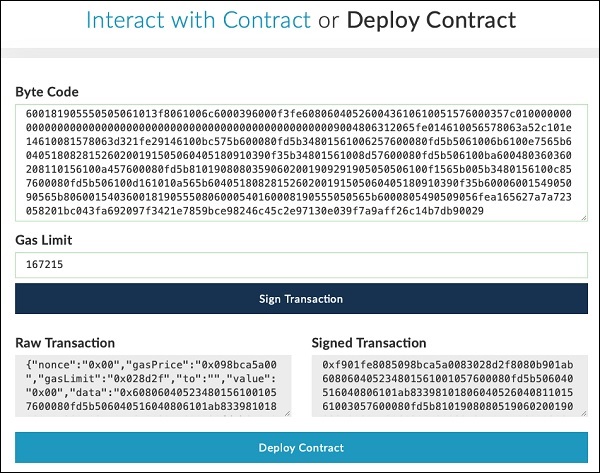
    Generate the transaction by clicking on the “Generate Transaction” button.

    Generate Transaction

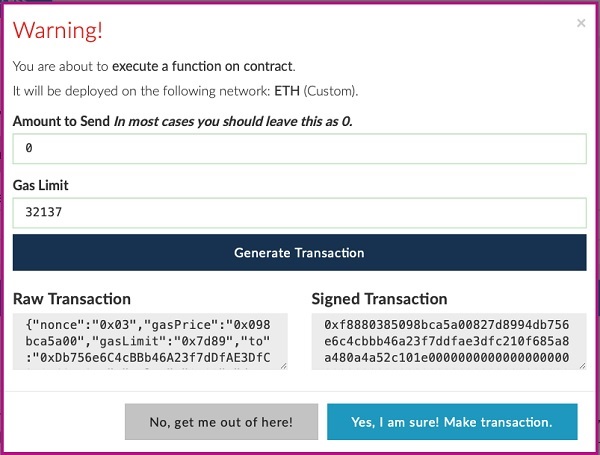
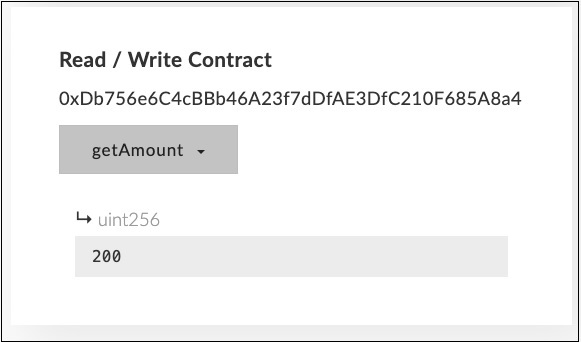
    Make the transaction and wait for some time for it to reflect in the Blockchain. Now, execute “getAmount”, the amount shown should be 200 now.

    Generate get Amount

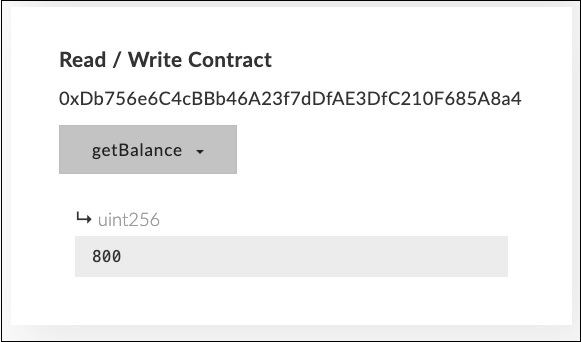
    Execute “getBalance”. The value field should now be 800.

    Generate get Balance

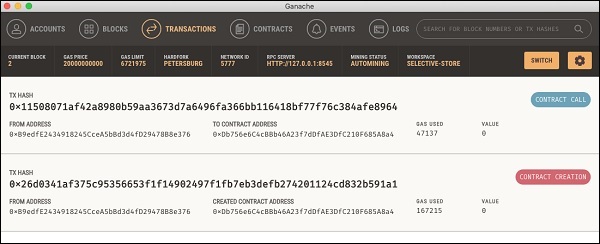
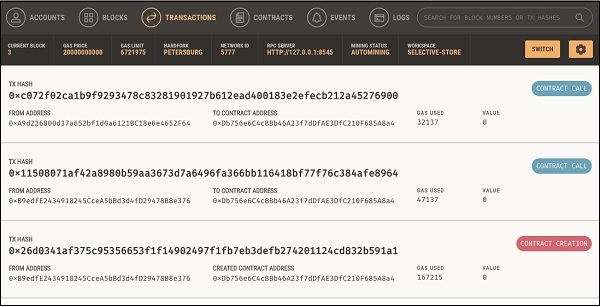
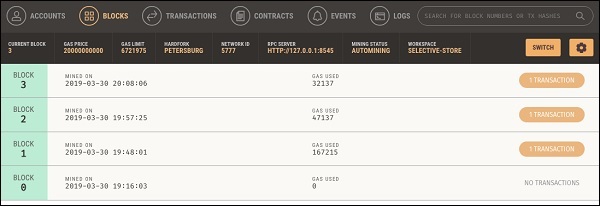
    Examine the transaction log to see the various transactions performed by different users.

    Examine The Transaction
  • Interacting with Deployed Contract

    Now, you are ready to interact with the contract that you have deployed. Go back to MyEtherWallet desktop and click on the “Interact with Contract” tab as shown in the screenshot below −

    Interact With Contract

    Paste the contract address that you previously copied in the “Contract Address” field. You also need to paste the “ABI / JSON Interface” of the contract on the above screen.

    To get the ABI, go to the Remix window and click on the ABI button as shown in the screenshot below.

    ABI button

    The ABI / JSON interface will be copied to the clipboard. Paste this in your favorite editor to examine the generated interface, which is shown below −

    ABI / JSON Interface
    [
       {
    
      "constant": false,
      "inputs": [
         {
            "name": "newDeposit",
            "type": "uint256"
         }
      ],
      "name": "send",
      "outputs": [],
      "payable": false,
      "stateMutability": "nonpayable",
      "type": "function"
    }, {
      "inputs": [
         {
            "name": "initialAmount",
            "type": "uint256"
         },
         {
            "name": "initialValue",
            "type": "uint256"
         }
      ],
      "payable": false,
      "stateMutability": "nonpayable",
      "type": "constructor"
    }, {
      "constant": true,
      "inputs": [],
      "name": "getAmount",
      "outputs": [
         {
            "name": "",
            "type": "uint256"
         }
      ],
      "payable": false,
      "stateMutability": "view",
      "type": "function"
    }, {
      "constant": true,
      "inputs": [],
      "name": "getBalance",
      "outputs": [
         {
            "name": "",
            "type": "uint256"
         }
      ],
      "payable": false,
      "stateMutability": "view",
      "type": "function"
    } ]

    After you paste this JSON in the MyEtherWallet interface, you will notice that the ACCESS button below the JSON interface is now activated, as shown below −

    My Ether Wallet

    Click Access button to access the contract.

    Upon clicking the Access button, the contract address and function selection dropdown will appear on the screen like in the Remix editor. This is shown in the screenshot below −

    Access button

    You may check the various functions of the contract as in the case of Remix deployment. Note that the contact is now deployed on an external Ganache Blockchain. Check the getAmount function; you will get the Amount value of zero and the getBalance will show a balance of 1000.

    Now try sending some money. It will present you a textedit control for entering the amount. When you write the contract, some “gas” would be used and you will be asked to confirm the transaction before writing it to the Blockchain. The transaction would be executed in a short while depending on the mining timing set by you on the Ganache server. After this, you can reexamine the value and the amount fields of the contract to verify that these are indeed modified.

    You may now examine the Ganache desktop to view the transactions that you have performed so far. A sample output is shown below −

    sample output

    So far, you were both the contract creator and the contract executor. This does not make much sense, as you expect others to use your contract. For this, we will create another client for our Ganache Blockchain and send some money from the newly created account # 2 to the contract creator at account # 1.

  • Deploying Contract

    To deploy the contract, select the Contracts menu option as shown in the screenshot below −

    Select Contracts Menu

    You will need to enter the contract’s bytecode on this screen. Remember, when you compile your Solidity contract code, it generated a bytecode that runs on EVM. You will now need to obtain this bytecode from Remix IDE.

    Go to the Remix IDE screen, your earlier typed contract should be there in the code window. If not, retype the contract in the code window. Click on the Bytecode button as shown in the following screenshot −

    Remix IDE Screen

    The bytecode for your compiled source is copied to the clipboard along with some other information. Paste the copied code into your favorite text editor. Following is the screenshot of the text editor −

    Remix bytecode

    The value of the object tag contains the desired bytecode. Copy this carefully making sure that you do not copy the enclosing quotes. The bytecode is really long, so make sure that you copy right upto the last byte inclusive of it. Now, paste this bytecode in the Deploy Contract screen as shown below −

    Desired Bytecode

    The Gas Limit field is automatically set.

    Below the Gas Limit field, you will find the selection for accessing the wallet.

    Accessing Wallet

    Now, access the wallet using the Private Key of the Ganache account on which this contract will be deployed. To get this private key, go back to the Ganache window. Click on the keys icon of the first account as shown below −

    First Account

    You will see the private key of the user account # 1 as seen in the screenshot below −

    First Account Private Key

    Copy this private key and paste it in the “Paste Your Private Key” section as shown below −

    Paste Your Private Key

    You will see the “Unlock” button at the bottom of the screen. After unlocking, a “success” message will appear at the bottom of the screen. At this point, your wallet is attached to account #1 of the Ganache Blockchain.

    Now, you are ready to sign and deploy the contract. Click on the “Sign Transaction” button as shown in the screenshot below −

    Sign Transaction

    Signing the transaction generates and displays both Raw and Signed transactions. Click on the “Deploy Contract” button to deploy the contract on the Ganache Blockchain. Remember the contract is deployed by account # 1 user of the Ganache Blockchain. Therefore, account # 1 user becomes the contract creator. Before the contract is deployed, you will be asked to confirm the transaction as it may cost you some real money if you were to deploy this contract on a public real Ethereum Blockchain. Do not worry, for the current private Blockchain running on your local machine, there is no real money involved. Click on the Make transaction button as shown in the screenshot below −

    Private Blockchain Running

    Examine the Ganache console; you will see that the ETH balance in the account # 1 has reduced as seen in the screenshot below −

    Ganache console

    Now, click on the TRANSACTIONS menu as shown in the screenshot below −

    Ganache Transactions Screenshot

    You will see the transaction details.

    Ganache Transactions Details

    On this screen, you will find the contract’s published address. The address is marked in the above screenshot. You will distribute this address publicly to let others know that your contract is available at this specified address to which they can connect and execute the contract methods, such as sending money to you – the contract creator. Copy this contract address for your own reference as you are going to need it in the next step.

  • Attaching Wallet to Ganache Blockchain

    You have now created a wallet; this wallet is a client interface to the Blockchain. We will attach the wallet to the Ganache Blockchain that you have started in the earlier lesson. To do so, click on the Network dropdown box as shown in the screenshot below −

    Network Dropdown

    Go to the bottom of the list. You will see an option for “Add Custom Network / Node”. Select this item.

    Now, a screen will appear asking for the Ganache server address and the port to which it is listening.

    Add Custom Network

    Type your Ganache server details – http://127.0.0.1 and Port: 8545. These would be the values set by you in the Ganache server setup. Give a name of your choice to this node. Click on the “Save & Use Custom Node” button. You will see the connected message at the bottom of the screen. At this point, your wallet is successfully connected to the Ganache Blockchain.

    You are now ready to deploy the contract on this connected Blockchain.

  • Creating Wallet

    In this chapter, we will learn how to create Ethereum wallet. To create a new wallet, enter a password of your choice and then click on the “Create New Wallet” button. When you do so, a Wallet would be created. A digital wallet is essentially the generation of a public/private key pair that you need to store in a safe place. The wallet creation results in the following screen −

    Create New Wallet

    Click on the “Download Keystore File (UTC / JSON)” button to save the generated keys. Now, click on the “I understand. Continue” button. Your private key will appear on the screen as seen in the screenshot below −

    Download KeyStore

    Click on the “Print Paper Wallet” button to keep a physical record of your wallet’s private key. You will need this later for unlocking the wallet. You will see the following screen. Do not lose this output.

    Print Paper Wallet

    To unlock your wallet, click on the “Save Your Address” button. You will see the following screen.

    Unlock Your Wallet

    The wallet can be unlocked using the Private Key option as highlighted in the above screen. Cut-n-paste the private key from the previous screenshot and click the Unlock button. Your wallet will be unlocked and you will see a message appear at the bottom of the screen. As the wallet does not contain anything as of now, unlocking the wallet is not really useful to us at this point.

  • MyEtherWallet

    For client application, you will use MyEtherWallet.

    Download MyEtherWallet software from the following URL −

    https://github.com/kvhnuke/etherwallet/releases/tag/v3.21.06

    If required, unzip the downloaded file and open index.html. You will see the following interface for creating a new wallet.

    MyEtherWallet
  • A Quick Walkthrough

    We will now briefly understand what is available on the Ganache desktop. On the Desktop, at the top we have several menu options out of which a few are of immediate relevance to us. The menu bar is highlighted in the screenshot below −

    Ganache Menu Options

    Clicking on the TRANSACTIONS menu shows all the transactions performed so far. You will be performing transactions very soon. Now, come back to the above screen and check the transactions from time to time. A typical transaction screen is as shown below −

    Ganache TRANSACTIONS

    Likewise, when you click on the BLOCKS menu, you will see the various mined blocks. Consider the following screenshot to understand how the BLOCKS menu looks like −

    Ganache Blocks

    Click on the LOGS menu. It will open the system log for you. Here, you can examine the various operations that you have performed on the Ethereum Blockchain.

    Now, as you have understood how to use Ganache for setting up a private Ethereum Blockchain, you will now create a few clients who would use this Blockchain.

  • Ganache Server Settings

    Click on the settings icon at the top right hand side of the screen as shown in the screenshot below −

    Ganache Settings

    The server settings screen will appear as shown below −

    Server Settings

    Here, you will be able to set the values of server address and the port number for your Ganache server. For the time being, leave these to their default values. The Network ID is an internal Blockchain identifier of Ganache server; leave this to its default value. The Automine button is in the ON state indicating that the transactions would be processed instantly. If you switched this off, it will ask you to enter the time in seconds after which the blocks would be mined.

    Account and Keys

    When you click on the Accounts & Keys menu option, you will see the following screen −

    Account and Keys

    Here you would be able to set the default balance for each account. The default value is 100. This now explains why you saw 100 ETH displayed for each account in the Desktop screenshot. You can also set the number of accounts on this screen. The value displayed in this screenshot is 2 and that is why the desktop showed only two accounts.

    Now, we will work out with the two settings’ screen; the knowledge of how these two work would suffice. Restart the server by clicking on the RESTART button in the right hand side of the screen. You will now return to the Desktop screen. Try inputting different values in the above two fields, restart the server and see its effect.

  • Ganache for Blockchain

    Ganache is used for setting up a personal Ethereum Blockchain for testing your Solidity contracts. It provides more features when compared to Remix. You will learn about the features when you work out with Ganache. Before you begin using Ganache, you must first download and install the Blockchain on your local machine.

    Downloading Ganache

    You may download Ganache from the following URL −https://truffleframework.com/ganache

    Ganache is available on several platforms. We developed and tested this entire tutorial on Mac. Thus, the screenshots below will show Mac installation. When you open the installation URL given above, it automatically detects your machine’s OS and directs you to the appropriate binary installation. The screenshot below shows the Mac installation.

    Downloading Ganache

    When you click on the DOWNLOAD button, it will begin downloading the DMG file for Mac installation.

    Ezoic

    Installing Ganache

    Locate the “Ganache-2.0.0.dmg” in your Downloads folder and double-click on it to install Ganache. Upon successful installation, the following screen will appear −

    Installing Ganache

    Drag Ganache icon to the Application folder. Now, Ganache is available as an application on your Mac.

    If you are using some other OS, follow the instructions provided for successful installation.

    Explore our latest online courses and learn new skills at your own pace. Enroll and become a certified expert to boost your career.

    Starting Ganache

    Now locate Ganache in your Application folder and double-click on its icon to start Ganache.

    Ganache Desktop

    When Ganache starts, the Ganache screen will appear as shown below −

    Ganache Desktop

    Click QUICKSTART to start Ganache. You will see Ganache console as shown below −

    QUICKSTART

    The console in the above screenshot shows two user accounts with balance of 100 ETH (Ether – a currency for transaction on Ethereum platform). It also shows a transaction count of zero for each account. As the user has not performed any transactions so far, this count is obviously zero.

    We will now get an overview of a few important screens of Ganache that are of immediate relevance to us.

  • Limitations of Remix

    The Remix IDE that you have used so far is good enough for development and initial testing of your contract. For real-life contracts, you need to test your functionality against various parameters. Remix cannot create real (non-test) user accounts to transfer funds between them. You have no control over the configuration of the Blockchain created by Remix. You cannot even monitor the execution of the transactions.

    Remix misses out on several advanced operations. Thus, we need to deploy our contract on a more sophisticated Blockchain that provides all these features. One such Blockchain is Ganache that you will learn about in our subsequent chapter.