Category: 10. Angular Routing

https://static.vecteezy.com/system/resources/previews/014/060/026/non_2x/route-point-3d-rendering-isometric-icon-png.png

  • Router Reference

    This angular chapter will “highlight” (cover) the core or important routing concepts starting from the basic as follows:

    • Router Imports
    • Configuration
    • Router Outlet
    • Router Links
    • Active Router Links
    • Router State
    • Activated Route
    • Router Events
    • Router Terminology
    • MCQ’s

    Router Imports

    In Angular, the Router is an optional feature or a service that represents a particular component (section) view for the given URL. For example, the URL localhost:4200/dashboard will represent the DashboardComponent.

    However it is not a part of the Angular core, but it has its own library package;@angualr/router. In case to use it as another angular package you need to import it as follows:

    import{ provideRouter }from'@angular/router';

    Also, add it in the “providers array” as well located in the app.config.ts file:

    providers:[provideRouter(routes)]

    Configuration

    An Angular application with routing has a single instance of the Router service. When the browser URL changes, the router searches for a matching Route to determine the component to display.

    A router has no routes until we configure it, which means we must define the paths. The following example defines five different routes, and configures them via the provideRouter method, and adds the routes to the routes array in the app.routes.ts file:

    import{ Routes, UrlSegment }from'@angular/router';import{ ViewComponent }from'./view/view.component';import{ DashboardComponent }from'./dashboard/dashboard.component';import{ ProfileComponent }from'./profile/profile.component';import{ PagenotfoundComponent }from'./pagenotfound/pagenotfound.component';exportconst routes: Routes =[{path:'dashboard', component: DashboardComponent},{path:'view/:id', component: ViewComponent},{
    
        path:'profile', component: ProfileComponent, 
        data:{title:'User Profile'}},{path:'', redirectTo:'/dashboard', pathMatch:'full'},{path:"**", component: PagenotfoundComponent}];</pre>

    The above routes array contains multiple routes for the application to navigate through various components when the user interacts. Let's explain them one by one:

    • In the above routes array, each Route maps a URL path to a component. There are no leading slashes in the path.
    • The :id in the second route is a token for the route parameter. This is used whenever you want to view specific details (such as user or customer details). For example, in the URL localhost:4200/user/view/10, the value of the id parameter is 10.
    • The data property in the third route is a place to store arbitrary data associated with this specific route. It is used to store items such as "titles", "static" "data", etc.
    • The empty path (path: ' ') in the fourth route represents the default path for the application. It is the "place to go" when the path in the URL is empty at the start. It redirects to the /dashboard and later navigates to the Dashboard component.
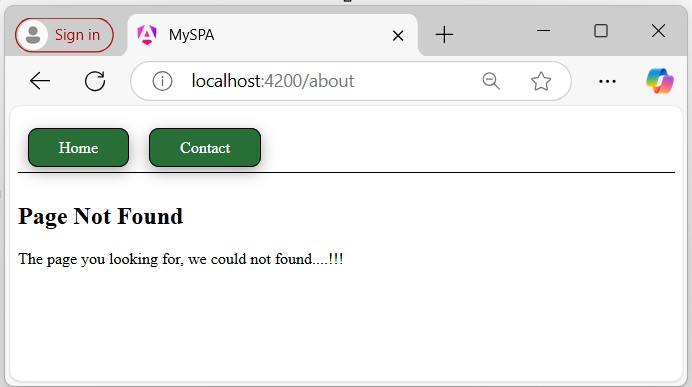
    • In the last route, path: "**" (known as a wildcard route), it redirects to PageNotFound when an incorrect URL is entered in the browser, such as localhost:4200/wrongurl. It should always be defined at the end of the routes.

    Router Outlet

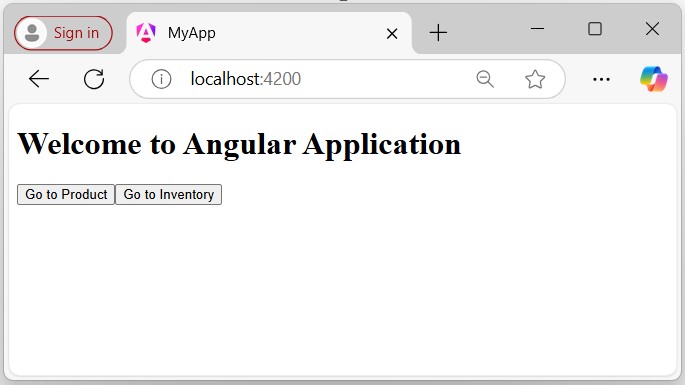
    In Angular, the RouterOutlet is a directive that belongs to the router library, but it is used as a component. It is commonly placed in the root component (app.component.html) to make a "spot or a location" where the router should display the loaded component.

    If the router-outlet is not used, the routing will not work until you use the selector (e.g., selector: 'app-dashboard') of a component in the root component.

    This means that without the router-outlet, you need to directly place the "component's selector" in the root component to ensure it is displayed.

    <router-outlet></router-outlet>

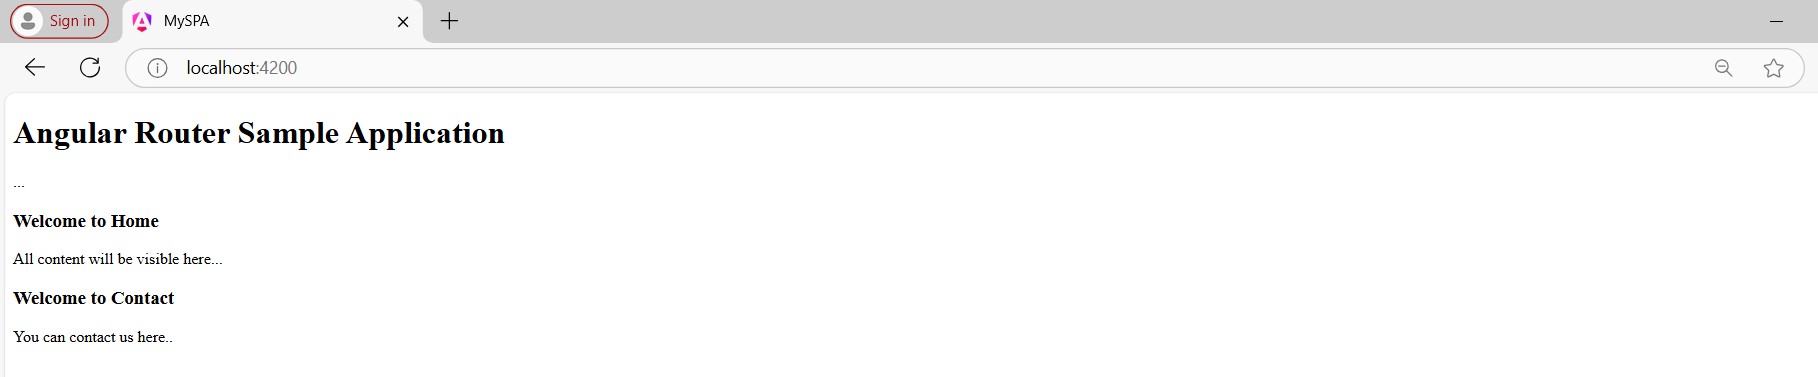
    When the browser URL for an application requests /dashboard, this path will match the router path "/dashboard" and display the DashboardComponent as a "sibling" element of the RouterOutlet.

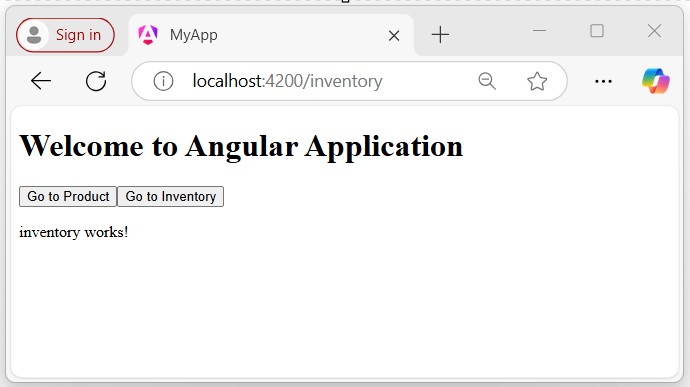
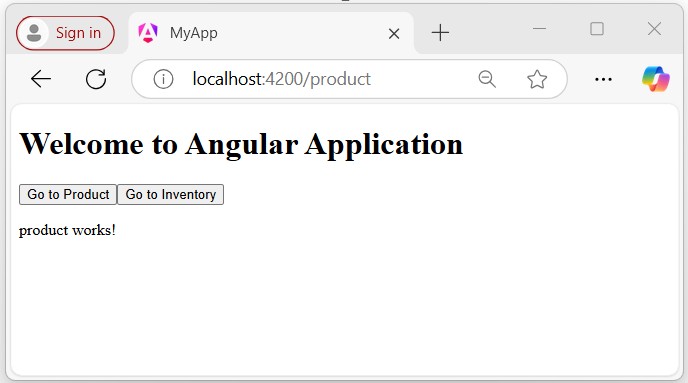
    To navigate users from one component to another, Angular uses the routerLinkdirective, which is used to set the path for a specific route. This directive binds a URL path to a clickable element, like a button or a link, allowing navigation within your Angular application.

    <h3>Angular RouterLink</h3><nav><a routerLink="/home">Home</a><a routerLink="/about">About</a></nav><router-outlet></router-outlet>

    The routerLink directive in the anchor (<a>) element gives control over that element.

    The RouterLinkActive is a directive that toggles (adds or removes) CSS classes for the active RouterLink based on the current RouterState or when the link is active.

    You may see the property binding on each anchor tag to the RouterLinkActive as follows:

    <a routerLink ="" routerLinkActive="...">Link</a>

    The expression to the right of the equal sign (=) contains a space-delimited string of CSS classes. The Router adds these classes when the link is "active" and removes them when the link is "inactive".

    You set the RouterLinkActive directive to a string of classes such as routerLinkActive = "active myLink" (where myLink is a CSS class) or bind it to a component property that returns such a string, as shown below:

    routerLinkActive="componentStringProperty"
    

    Router State

    The RouterState is a class that represents the current state of the router. It's part of the Angular Router module and provides information about the current route, including the activated routes.

    After each successful navigation lifecycle, the router builds the tree ofActivatedRouteobjects that make the current state of the router. You can access the currentRouterStatefrom anywhere in the application using the"Routerservice" and its"properties".

    In addition, each ActivatedRoute in the RouterState provides methods to traverse up and down the route tree to get information from "parent", "child", and "sibling" routes.

    Activated Route

    The route path and parameters are available through an injected router service called ActivatedRoute. Using this service, you can read the URL parameter data. For example, given the URL http://localhost:4200/user/view/userId?=se32sd, you can retrieve the user ID as follows:

    import{ CommonModule }from'@angular/common';import{ Component, OnInit }from'@angular/core';import{ ActivatedRoute }from'@angular/router';@Component({
      selector:'app-view',
      standalone:true,
      imports:[CommonModule],
      templateUrl:'./view.component.html',
      styleUrl:'./view.component.css'})exportclassViewComponentimplementsOnInit{constructor(private route: ActivatedRoute){}
      userId:any;ngOnInit():void{this.route.params.subscribe(response =>{this.userId = response['id'];console.log(this.userId);});}}

    Following is a list of important properties of the ActivatedRoute −

    PropertyDescriptions
    urlAn Observable of the route paths is an array of strings, each representing a part of the route path.
    dataAnObservablethat contains thedataobject provided for the route.
    paramsAnObservablethat contains the required and optional parameters specific to the route.
    paramMapAnObservablethat contains amapof the required and optional parameters specific to the route.
    queryParamMapAnObservablethat contains amapof the query parameters available to all routes.
    queryParamsAnObservablethat contains the query parameters available to all routes.

    Router Events

    While navigating, theRouteremits navigation events through theRouter.eventsproperty. Below is a list of important router events and their descriptions:

    Router EventDescriptions
    NavigationStartThis event is triggered when navigation starts.
    RoutesRecognizedTriggered when the Router parses the URL and the routes are recognized.
    GuardsCheckStartIt is triggered when the Router begins the guards phase of routing.
    GuardsCheckEndIt triggered, when the Router finishes the Guards phase of routing successfully.
    ResolveStartIt is triggered when the Router begins the resolve phase of routing.
    ResolveEndTriggered when the Router finishes the resolve phase of routing successfully.
    NavigationEndThis event is triggered when navigation ends successfully.
    NavigationCancelIt is triggered when navigation is canceled.
    NavigationErrorTriggered when navigation fails due to an unexpected error.

    Router Terminology

    Following is a list of a few router terms and their meanings:

    Router part (term)Descriptions
    RouterThe router manages the navigation from one component to the other and displays the application component for active URL.
    provideRouterfunction provides the necessary service providers for navigating through the application view.
    RouterModulemodule provides necessary services and directives for managing application navigation and routing.
    RoutesIt defines an array of route configuration objects that define the navigation paths and their corresponding components.
    RouteIt defines how the router should navigate to a component based on a URL pattern.
    RouterOutletdirective (<router-outlet>) that spots places where the router displays a view (or loaded components).
    RouterLinkdirective used for binding a clickable HTML element (links, buttons, etc.) to a route.
    RouterLinkActivedirective used for toggling (adding or removing) classes from an HTML element when an associatedrouterLinkcontained on or inside the element becomes active or inactive.
    ActivatedRouteservice provided to each route component that contains route-specific information such as route parameters (e.g., path = "view/:id"), static data, resolve data, etc.
    RouterStateAn object that represents the current state of the router, containing information about the active routes and their hierarchy.
  • Custom Route Matches

    What is Custom Route Matches?

    In Angular, the custom route matches allow you to define a “specific condition” under which certain routes are matched. This is useful while controlling the application navigation when the URLs are more complicated.

    Creating Custom Route Matches

    The router in Angular supports a powerful matching strategy that you can use to help users navigate various sections in your application. This matching strategy supports static routes, variable routes with parameters (i.e., /:parameter), wildcard routes (i.e., **), and so on. Also, you can build your own custom pattern matching for situations in which the URLs are more complicated.

    In this chapter, we will build a custom route matcher using AngularUrlMatcher. In Angular, UrlMatcher is a “function” used to define custom URL-matching logic for routes.

    Let’s create a sample Angular application to perform the creation of the custom router matcher.

    Creating a Sample Application

    We will use the Angular CLI to create a new sample application named angular-custom-route. In addition to the application creation, we will create a dashboard component.

    Note: Make sure the Angular CLI is installed;if not,see this.

    Step 1: Create a new Angular project, angular-custom-route as follows:

    ng new angular-custom-route
    

    Once you enter or write the above command in your IDE’s terminal or node.js command prompt, it will ask a few questions as follows:

    • ? Which stylesheet format would you like to use?, select CSS
    • Do you want to enable Server-Side Rendering (SSR) and Static Site Generation (SSG/Prerendering)?, select N

    After a few seconds, your new Angular project will be ready; you can see it in your code editor with the name angular-custom-route.

    Angular Project

    Step 2: From your IDE terminal navigate to your application directory as follows:

    cd angular-custom-route
    

    Step 3: Create a component with the name dashboard as follows:

    ng generate component dashboard
    

    Step 4: In your code editor open the dashboard.component.html file and replace the below HTML code:

    <h3>Welcome to Dashboard</h3><p>Hello {{ dashboard }}!</p>

    Step 5: In your code editor locate the app.component.html file, and replace the below code with:

    <h3>Routing with Custom Matching</h3>
    Navigate to <a routerLink="/@Dashboard">my dashboard</a><router-outlet></router-outlet>

    Configure Routes for your Application

    Next, you need to add routing capabilities to theapp.config.tsfile. As a part of this process, we will create a custom URL matcher that looks for a Twitter handle in the URL. This handle is identified by a preceding@symbol.

    Step 1: In your IDE (code editor) open the app.config.ts file.

    Step 2: Add the following import statements:

    import{ provideRouter, withComponentInputBinding }from'@angular/router';import{routes}from'./app.routes';

    Step 3: In the given array, add the provideRouter(routes, withComponentInputBinding()) statement as follows:

    import{ ApplicationConfig }from'@angular/core';import{ provideRouter, withComponentInputBinding }from'@angular/router';import{ routes }from'./app.routes';exportconst appConfig: ApplicationConfig ={
      providers:[provideRouter(routes,withComponentInputBinding())]};

    Step 4: Now, open the app.routes.ts file and define the “custom route matcher” as follows:

    import{ Routes, UrlSegment }from'@angular/router';import{ DashboardComponent }from'./dashboard/dashboard.component';exportconst routes: Routes =[{matcher:(url)=>{if(url.length ===1&& url[0].path.match(/^@[\w]+$/gm)){return{
    
    			consumed: url, 
    			posParams:{
    			dashboard:newUrlSegment(url[0].path.slice(1),{})}};}else{returnnull;}},
        component: DashboardComponent
    }];</pre>

    As we know the custom matcher is a function which is performed the following tasks as follws:

    • Thematcherverifies that the array contains only "one" element.
    • The matcher uses a regular expression to ensure that the format of the "dashboard" is a match.
    • If there is a match found, the function returns the "entire URL", defining a dashboard route parameter as a substring of the path.
    • If there is no match found, the function returns null, and the router continues to "look for other routes" that match the URL.

    Reading the Route Parameters

    As we created a link in our app.component.html file to redirect to the dashboard component, now we will bind the route parameter with the Dashboard component.

    Step 1: Open the dashboard.component.ts file in your code editor and create an Input matching the dashboard parameter.

    Note: As we imported withComponentInputBinding in our provideRouter. It will allow the Router to bind information directly to the route components.

    import{ Component, Input }from'@angular/core';@Component({
      selector:'app-dashboard',
      standalone:true,
      imports:[],
      templateUrl:'./dashboard.component.html',
      styleUrl:'./dashboard.component.css'})exportclassDashboardComponent{@Input() dashboard!:string;}

    Step 2: Now run your application to check your custom URL matcher as follows:

    ng serve
    

    The output is as follows:

    Custom Route
  • Routing in Single-Page Applications

    What is Single-Page Application?

    single-page Application (SPA) is a web application or website that interacts with the user by dynamically rewriting the current page rather than loading entire new pages from the server. The routing features in Angular allow developers to develop and design a single-page application.

    Create a Sample Application

    Let’s create a sample Angular application with two different components to demonstrate how to achieve a single-page application (SPA) by setting up routing.

    We will use the Angular CLI to create a new sample angular application. Use the following steps to create a new application:

    Step 1: Open the node.js command or IDE’s terminal (such as VS code) and go to your favorite workspace as follows:

    cd /go/to/your/favorite/workspace
    

    Step 2: Install the Angular CLI using the following command (see more):

    install @angular/cli
    
    or for latest version
    install @angular/cli@latest
    

    Step 3: Create a new angular application as follows(see more):

    ng new mySPA
    

    Enable the stylesheet by choosing the following option:

    ? Which stylesheet format would you like to use?(Use arrow keys)->CSSSCSS[ https://sass-lang.com/documentation/syntax#scss                ]
      Sass   [ https://sass-lang.com/documentation/syntax#the-indented-syntax ]
      Less   [ http://lesscss.org                                             ]

    When prompted with Do you want to enable Server-Side Rendering, select No.

    Now go to your newly created application using the cd mySPA command.

    Step 4: Create a component with the name Home as follows:

    ng generate component Home
    

    In your IDE (code editor), locate the file,home.component.html, and replace the placeholder content with the following HTML code:

    <h3>Welcome to Home</h3><p>All content will be visible here...</p>

    Step 5: Create a component with the name Contact as follows:

    ng generate component Contact
    

    In your IDE (code editor), locate the file,contact.component.html, and replace the placeholder content with the following HTML code:

    <h3>Welcome to Contact</h3><p>You can contact us here..</p>

    Step 6: Now, in your code editor open the app.component.html file and replace its code with as follows:

    <h1>Angular Router Sample Application</h1>
    ...
    <app-home></app-crisis-list><app-contact></app-heroes-list>

    Step 7: Verify that your newly created application runs as expected by running thefollowing command:

    ng serve
    

    Step 8: Open the browser and navigate to localhost:4200.

    You should see a single web page, consisting of a title and the HTML of your two components.

    Spa

    Define Routes

    In this section, we will define two routes as follows:

    • The router /home will open the HomeComponent.
    • The router /contact will open the ContactComponent.

    In Angular, a route defines the path for different sections (components). Each route has two properties. The first property,path, is a string that specifies the URL path for the route. The second property,component, is a string that specifies what component your application should display for that path.

    Step 1: In your IDE, open the app.routes.ts file (create it manually, if does not exist) as follows:

    import{ Routes }from'@angular/router';exportconst routes: Routes =[];

    Step 2: Add routes for the two-component you have created:

    import{ Routes }from'@angular/router';import{ HomeComponent }from'./home/home.component';import{ ContactComponent }from'./contact/contact.component';exportconst routes: Routes =[{path:'home', component: HomeComponent},{path:'contact', component: ContactComponent}];

    This routes list is an array of objects (i.e., JavaScript objects), with each object defining the properties (path and component) of a route.

    Import provideRouter

    To add this functionality to your sample application, you need to update theapp.config.tsfile to use the router providers function,and import provideRouter as follows:

    import{ ApplicationConfig }from'@angular/core';import{ provideRouter }from'@angular/router';import{ routes }from'./app.routes';exportconst appConfig: ApplicationConfig ={
      providers:[provideRouter(routes)]};

    Note: For@NgModule-based applications (i.e., older version), put theprovideRouterin theprovider’slist of theAppModule (i.e., app.module.ts) or wherever the module is passed tobootstrapModulein the application.

    Update the Component with router-outlet

    To ensure that your defined routes work and dynamically load components based on the URL, you need to update your app.component.html file with the router-outlet directive. This directive acts as a placeholder for the routed components to be displayed.

    Step 1: In your code editor, open the app.component.html file and delete the following

    <h1>Angular Router Sample Application</h1>
    ...
    <app-home></app-crisis-list><app-contact></app-heroes-list>

    Step 2: Add the router-outlet directive to your app.component.html file:

    <router-outlet></router-outlet>

    Step 3: Import the RouterOutlet in your app.component.ts file as follows:

    import{ Component }from'@angular/core';import{ CommonModule }from'@angular/common';import{ RouterOutlet }from'@angular/router';import{ HomeComponent }from'./home/home.component';import{ ContactComponent }from'./contact/contact.component';@Component({
      selector:'app-root',
      standalone:true,
      imports:[CommonModule, RouterOutlet, HomeComponent, ContactComponent],
      templateUrl:'./app.component.html',
      styleUrl:'./app.component.css'})exportclassAppComponent{
      title ='mySPA';}

    Look at your updated application in your browser. To view the Home component, add /home to the end of the http://localhost:4200 URL:

    http://localhost:4200/home
    

    You can notice that thehomecomponent is displayed. Angular is using the route you defined to dynamically load the component. You can load theContactcomponent in the same way:

    http://localhost:4200/contact
    

    Controlling Navigation with Template

    The application we have developed supports two routes. However, the only way for the user to navigate between different components is by manually changing the URL.

    In this tutorial section, we will learn how to navigate through the different components without changing the URL manually.

    We will create two links that users can click to navigate between the Home and Contact components. We will add some CSS to these links that will give more clarity about the currently loaded page.

    Step 1: Open the app.component.html file and add the below code:

    <nav><a routerLink="/home" class="my-link">Home</a><a routerLink="/contact" class="my-link">Contact</a></nav><div class="load"><router-outlet></router-outlet></div>

    Step 2: Open the app.component.css file and add the code below:

    nav{padding: 20px 0px;border-bottom: 1px solid black;}nav .my-link{margin: 10px 10px;position: relative;top: 5px;text-decoration: none;background-color:rgb(39, 110, 55);color: white;padding: 10px 30px;border-radius: 10px;border: 1px solid black;box-shadow: 0px 5px 15px rgba(0, 0, 0, 0.35);}.load{margin: 30px 0px;}

    If you view your application in the browser, you should see these two links. When you click on a link, the corresponding component will load dynamically:

    Control Navigation

    Adding a Redirect

    In this section of the tutorial, we will add a route that redirects you to the /home component directly when you navigate to http://localhost:4200.

    Step 1: In your code editor open the app.route.ts file.

    Step 2: Update the existing code with the following:

    import{ Routes }from'@angular/router';import{ HomeComponent }from'./home/home.component';import{ ContactComponent }from'./contact/contact.component';exportconst routes: Routes =[{path:'', redirectTo:'home', pathMatch:'full'},{path:'home', component: HomeComponent},{path:'contact', component: ContactComponent}];

    As you can see, we have added new routes with an empty path (”). In addition, it replaces the component property with two new properties as follows:

    • redirectTo: This property instructs Angular to redirect from an empty (”) path to the ‘home’ path.
    • pathMatch: This property instructs Angular on how much of the URL to match. If you keep it as a “full”,it will match the entire path.

    Note: Now, when you open your application (navigate on browser localhost:4200), it displays the Home component by default as follows:

    Redirecto

    Adding 404 page

    A user can try to access a route that you have not defined. To acknowledge this behavior, the best practice is to display a 404 page. In this section, we’ll create a 404 page (component) and update our route configuration to show that page for any unspecified routes.

    Step 1: From your code editor terminal, create a new component with the name pageNotFound as follows:

    ng generate ccomponent pageNotFound
    

    Step 2: In your code editor, open the page-not-found.component.html file and replace its contents with the following HTML code:

    <h2>Page Not Found</h2><p>The page you looking for, we could not found....!!!</p>

    Step 3: Open the app.routes.ts file and add the following route to the routes list at the end (if not other routes will not work properly):

    {path:'**', component: PageNotFoundComponent}

    The new route uses a path as “**”. This path is how Angular identifies a wildcard route. Any route that does not match an existing route in your configuration will use this route in the application.

    Make sure that the wildcard route (**) is placed at the end of the array. The order of your routes is important, as Angular applies routes in order and uses the first match it finds; otherwise, the routes will not work properly.

    Now, try to navigate the non-existing route, for example, localhost:4200/about, it will redirect you to the page-not-found component, as the “/about” route does not match with any defined routes in your app.routes.ts file.

    Page not Found
  • Navigation

    What is Navigation?

    Navigation in web applications refers to the process of moving (navigating) through different pages or views within an application. It allows users to interact with various components, access different sections, and use application features.

    Let’s consider a simple login page in an application. On this login page, users can see links for Sign Up and Forgot Password. These links allow users to navigate to the Sign-Up and Forgot Password sections or components.

    Navigation in Angular

    In Angular, navigation is a feature that allows users to move between different sections or components within an application. This can be done by defining routing for an individual click requests without using the routerLink directive from the RouterModule.

    In this chapter, we will discuss how to manually set the navigation without using the routerLink directive. In Angular, the router service provides the navigate() method to programmatically navigate to different routes within the application.

    Sample Example

    To manually set navigation and navigate through different components in Angular, follow these steps:

    Step 1: Open the node.js command or terminal in your IDE (such as VS code) and go to your favorite workspace as follows:

    cd /go/to/your/favorite/workspace
    

    Step 2: Install CLI and create a new application using the command below:

    npm install @angular/cli
    
    ng new myApp
    

    Step 3: Now, navigate to your newly created application as follows:

    cd myApp
    

    Step 4: Open theapp.component.htmlfile and remove everything leaving only the following:

    <router-outlet></router-outlet>
    

    Step 5: Run the application using the below command to ensure that the application is created successfully:

    ng serve
    

    Step 6: Create two components using the command below:

    ng generate component product
    
    ng generate component inventory
    

    Step 7: Open the app.component.html file and place the below code:

    <h1>Welcome to Angular Application</h1><button (click)="open('product')">Go to Product</button><button (click)="open('inventory')">Go to Inventory</button><router-outlet></router-outlet>

    Step 8: Open the app.component.ts file and place the below code:

    import{ Component }from'@angular/core';import{ CommonModule }from'@angular/common';import{ RouterModule, RouterOutlet, Router }from'@angular/router';@Component({
      selector:'app-root',
      standalone:true,
      imports:[CommonModule, RouterOutlet, RouterModule],
      templateUrl:'./app.component.html',
      styleUrl:'./app.component.css'})exportclassAppComponent{
      title ='myApp';constructor(private router: Router){}open(data:any){if(data ==="product"){//here used navigate() to set navigation manuallythis.router.navigate(["/product"]);}elseif(data ==="inventory"){this.router.navigate(["/inventory"]);}}}

    Step 9: Now open the app.routes.ts file and place the code below:

    import{ Routes }from'@angular/router';import{ ProductComponent }from'./product/product.component';import{ InventoryComponent }from'./inventory/inventory.component';exportconst routes: Routes =[{path:'product', component: ProductComponent},{path:'inventory', component: InventoryComponent}];

    Step 10: Finally, run the application using the following command:

    ng serve
    

    Step 11: Navigate to http://localhost:4200/ in your browser to see the first view of the application as follows:

    Navigation App

    Click the Go to Inventory button to navigate the Inventory Page as follows:

    Inventory

    Click the Go to Product button, you will get the following output which takes you to the Products page.

    Back to Product
  • Nested Routes

    Nested Routes in Angular

    In Angular, nested routes are used to define hierarchical routes for components. This technique allows you to load a specific child component only when its parent component is loaded.

    For example, if you want to load all the items within the ItemsComponent, you can use a route like /items/item-lists/, where the “item-list” is nested within the “items routes”.

    When the <router-outlet> directive is used in a component other than the root component, it allows you to display child routes within that component, and those routes will be considered child routes of the parent component. This concept is known as nested routing, and it can be achieved by implementing nested routes.

    Syntax of Angular Nested Routes

    Below is the syntax to create Nested Routes in Angular −

    const routes: Routes =[{
    
    path:'parent',
    component: ParentComponent,
    children:[{
        path:'child1',
        component: Child1Component
      },{
        path:'child2',
        component: Child2Component
      }]}];</pre>

    Here,

    • path: It specifies the URL segment for the route.
    • component: It defines the component to be rendered for the route.
    • children: An array of child routes nested under the parent route.

    Note: The nested URL will be: "/parent/child1" and "/parent/child2".

    Example of Angular Nested Routes

    Below is a example of using the Nested Routes in a Angular project −

    Step 1: Define Nested Routes for your application

    import{ Routes }from'@angular/router';import{ HomeComponent }from'./home/home.component';import{ AboutComponent }from'./about/about.component';import{ ViewItemComponent }from'./view-item/view-item.component';import{ PagenotfoundComponent }from'./pagenotfound/pagenotfound.component';import{ EditItemComponent }from'./edit-item/edit-item.component';exportconst routes: Routes =[{path:'home', component: HomeComponent},{path:'about', component: AboutComponent},{path:'item', children:[{path:'view/:id', component: ViewItemComponent},{path:'edit/:id', component: EditItemComponent},]},{path:'**', component: PagenotfoundComponent}];

    Step 2: Add your routes to your application

    <h1>Angular Routing</h1><a routerLink="/home">Home</a><br><a routerLink="/about">About</a>
    Item1: <a routerLink="/item/view/1">View Item1</a><a routerLink="item/edit/1">Edit Item1</a><br>
    Item2: <a routerLink="item/view/2">View Item2</a><a routerLink="item/edit/2">Edit Item2</a><br><router-outlet></router-outlet>

    Step 2: Add the 'router-outlet' directive to your ItemComponent

    <p>item works!>/p>
    <router-outlet></router-outlet>

    Step 3: Access 'id' parameter in ViewItemComponent and EditItemComponent

    import{ Component, OnInit }from'@angular/core';import{ ActivatedRoute }from'@angular/router';@Component({
      selector:'app-view-item',
      imports:[],
      templateUrl:'./view-item.component.html',
      styleUrl:'./view-item.component.css'})exportclassViewItemComponentimplementsOnInit{
      id:any;constructor(private route: ActivatedRoute){}ngOnInit():void{this.route.paramMap.subscribe(res=>{this.id = res.get('id');});}}

    EditItemComponent:

    import{ Component }from'@angular/core';import{ ActivatedRoute }from'@angular/router';@Component({
      selector:'app-edit-item',
      imports:[],
      templateUrl:'./edit-item.component.html',
      styleUrl:'./edit-item.component.css'})exportclassEditItemComponent{
      id:any;constructor(private route: ActivatedRoute){}ngOnInit():void{this.route.paramMap.subscribe(res=>{this.id = res.get('id');});}}

    Now run the application and see the output:

    Nested Routes

    By observing the URL in the above GIF, you can clearly see that the View and Edit components are only loaded when the Item route is activated. In the context of Angular, the child components (View and Edit) are rendered only within the parent Item route.

  • Wildcard Routes

    Wildcard Routes in Angular

    In Angular, wildcard routes are used to match any path, whether it is valid or not. If the user navigates to an “invalid” or “undefined URL”, you can use a wildcard route to catch that URL and navigate to a specified fallback component, such as HomeLogin, or PageNotFound, depending on your application’s needs.

    Wildcard routes are defined using a double asterisk (**) symbols. This special route matches any URL that doesn’t match any of the predefined routes in the route configuration.

    Real-time Scenario

    For example, if a user tries to access a path like /dashboard, which is not defined in the routes array, the wildcard route will match and can redirect them to a default or error component, such as a PageNotFound component.

    Syntax of Angular Wildcard Routes

    Below is the syntax to create a Angular Wildcard Routes −

    const routes: Routes =[{ path:'**', component: SomeComponent }];

    Here,

    • **: The wildcard path that matches any URL, whether valid or invalid.
    • SomeComponent: The component that will be rendered when the URL is invalid (e.g., Login, Home, or PageNotFound).

    Example of Angular Wildcard Routes

    Below is a example of using the Wildcard Routes in a Angular project −

    Step 1: Create a pagenotfound component

    ng generate ccomponent pagenotfound
    

    Step 2: Define wildcard route

    import{ Routes }from'@angular/router';import{ HomeComponent }from'./home/home.component';import{ AboutComponent }from'./about/about.component';import{ ViewItemComponent }from'./view-item/view-item.component';import{ PagenotfoundComponent }from'./pagenotfound/pagenotfound.component';exportconst routes: Routes =[{path:'home', component: HomeComponent},{path:'about', component: AboutComponent},{path:'view/:id', component: ViewItemComponent},{path:'**', component: PagenotfoundComponent}];

    Step 2: Add your routes to your application

    <h1>Angular Routing</h1><a routerLink="/home">Home</a><br><a routerLink="/about">About</a><a routerLink="/view/1">View Item1</a><br><a routerLink="/view/2">View Item2</a><router-outlet></router-outlet>

    Now run the application and try to enter an invalid URL:

    Wildcard routes

    By observing the URL in the above GIF, you can see that whenever a user tries to access an invalid or undefined URL, it will automatically redirect to the “page not found” page.

  • Dynamic Routes

    Dynamic Routes in Angular

    In Angular, dynamic routes are used to load a specific data or entity within a component based on the route parameters.

    For example, in a streaming platform having multiple videos, the application could use dynamic routes to load each video within the VideosComponent by passing the video ID as a route parameter.

    This way, each time a user navigates to a new video (e.g., /videos/:id), the corresponding video data is fetched and displayed dynamically.

    Note: Dynamic routing refers to the overall technique or approach of implementing dynamic routes.

    Syntax of Angular Dynamic Routes

    Below is the syntax to create Dynamic Routes in Angular −

    const routes: Routes =[{ path:'route-path/:parameterName', component: SomeComponent }];

    Here,

    • route-path: This represents the name of the route path that will be used to access the current component.
    • parameterName: The name of the parameter that you want to access, such as id.
    • SomeComponent: The name of the component that should be loaded based on the current path and parameter.

    The ‘parameterName’ can be accessed in the component using two techniques, which are:

    • Using Observable.
    • Using snapshot (non-observable option).

    Using Observable

    Angular provides a special interface named paramMap to access the parameters of the path (URL). parmaMap has the following methods −

    • has(name): Returns true if the specified name is available in the path (parameter list).
    • get(name): Returns the value of the specified name in the path (parameter list).
    • getAll(name): Returns the multiple value of the specified name in the path. The get() method returns only the first value when multiple values are available.
    • keys: Returns all parameters available in the path.

    The Steps to access the parameter using paramMap are as follows −

    • Import paramMap available in @angular/router package.
    • Use paramMap in the ngOnInit() to access the parameter and set it to a local variable.
    ngOnInit(){this.route.paramMap.subscribe(params =>{this.parameterName = params.get('parameterName);});}

    We can use it directly in the rest service using the pipe method.

    this.item$ =this.route.paramMap.pipe(switchMap(params =>{this.selectedId =Number(params.get('parameterName'));returnthis.service.getItem(this.selectedId);}));

    Using snapshot

    The snapshot is similar to Observable, but it does not support observable and gets the parameter value immediately.

    let id =this.route.snapshot.paramMap.get('parameterName');

    Example of Angular Dynamic Routes

    Below is a example of using the Dynamic Routes in a Angular project −

    Step 1: Define dynmiac route

    import{ Routes }from'@angular/router';import{ HomeComponent }from'./home/home.component';import{ AboutComponent }from'./about/about.component';import{ ViewItemComponent }from'./view-item/view-item.component';exportconst routes: Routes =[{path:'home', component: HomeComponent},{path:'about', component: AboutComponent},{path:'view/:id', component: ViewItemComponent}];

    Step 2: Add your routes to your application

    <h1>Angular Routing</h1><a routerLink="/home">Home</a><br><a routerLink="/about">About</a><a routerLink="/view/1">View Item1</a><br><a routerLink="/view/2">View Item2</a><router-outlet></router-outlet>

    Step 3: Access ‘id’ parameter in ViewItemComponent

    import{ Component, OnInit }from'@angular/core';import{ ActivatedRoute }from'@angular/router';@Component({
      selector:'app-view-item',
      imports:[],
      templateUrl:'./view-item.component.html',
      styleUrl:'./view-item.component.css'})exportclassViewItemComponentimplementsOnInit{
      id:any;constructor(private route: ActivatedRoute){}ngOnInit():void{this.route.paramMap.subscribe(res=>{this.id = res.get('id');});}}

    Step 4: Display the current Item based on it’s id

    <p>View item{{id}}</p>

    Now run the application and see the output:

    Dynamic Routes

    By observing the URL in the above GIF, you can clearly see that the items are loaded dynamically based on changes to their ID parameter in the routes.

  • Routing

    What is Routing?

    In web development, routing is a technique for navigating between different views or pages in a an application. It allows the application to determine which page to display based on the URL requested by the user.

    Routing in Angular

    In Angular, routing is used to develop a single-page applications (SPAs). Although, an SPA does not support multipage navigation, it allows navigation from one view (component) to another without reloading the entire page. You can define the routes for different components to navigate when the URL changes.

    Below is the snippet of code of how routes are defined for different components:

    routes =[{path:'home', component: HomeComponent},{path:'about', component: AboutComponent}]

    Here,

    • routes: An array contains all the routes for different components.
    • path: A path, which you can access on the URL to load the target component.
    • component: A target component will be loaded when the path is active on the URL.

    When you create a new application, an app.routes.ts file will automatically generated, where you can define these routes for navigation.

    The diagram below will give you a clear understanding of how routing works in Angular when the user clicks on a link to navigate to a different component:

    Routing

    Types of routes in Angular

    • Static routes: These are the simple routes that map a specific URL path to a component.
    {path: 'path-name', component: component-name}
    

    Dynamic routes: A routes allow you to load different data or entities (such as products in an e-commerce application or videos in a streaming platform) based on the values in the URL.

    These routes are use parameters in the URL to dynamically load different entities of a components based on current paramter pased in URL:

    {path: 'path-name/:parameter', component: component-name}
    

    Wildcard routes: These routes matches any URL path, which does not matched by other routes.

    {path: '**', component: component-name}
    

    Nested routes: A routes defined within other routes allow for hierarchical navigation structures. Sometimes, we want a page (child route) to load only when its parent route is loaded first. For example, in the route /settings/profile, the “settings” are the “parent route”, and the “profile” is the “child route”. The profile page will only be accessible and displayed after the settings page has been loaded:

    {
      path: 'parent-path', loadChildren: 
    
     [
        {path: 'child-path1', component: component-name},
        {path: 'child-path2', component: component-name}
     ]
    }

    Configure Routing in Angular

    To configure a static (basic) routing in our Angular application, the Angular CLI (command line interface) provides comprehensive support for setting up routing both during the application creation process and while working on an existing application.

    Let’s create a new application with routing enabled using the command below:

    ng new routing-app --routing
    

    Even if you do not provide the –routing flag, the above command will generate a new file named app.routes.ts by default:

    import{ Routes }from'@angular/router';exportconst routes: Routes =[];

    Here,

    • Imports Routes from ‘@angular/router’ package.
    • Routes provides functionality to configure and execute routing in the application.
    • Routes is the type used to setup the navigation rules.
    • Routes is the local variable (of type Routes) used to configure the actual navigation rules of the application.

    Defining Routes

    To define routes in your Angular application that redirect to different components when the URL changes, follow the steps below:

    Step 1: Add your routes to your application

    Open the app.routes.ts file and place the below code:

    import{ Routes }from'@angular/router';import{ HomeComponent }from'./home/home.component';import{ AboutComponent }from'./about/about.component';exportconst routes: Routes =[{path:'home', component: HomeComponent},{path:'about', component: AboutComponent}];

    Here,

    • home and about are paths that will be used in the URL to navigate to the “Home” and “About” components.
    • HomeComponent and AboutComponent are the target component or destination.
    • When the URL changes “/home” and “/about”, the matched component will be called and rendered.

    Adding routes in Configuration file

    Make sure that the generated routes are added in the Configuration file (app.config.ts) otherwise, you might get an error:

    import{ ApplicationConfig }from'@angular/core';import{ provideRouter }from'@angular/router';import{ routes }from'./app.routes';import{ provideClientHydration }from'@angular/platform-browser';exportconst appConfig: ApplicationConfig ={
      providers:[provideRouter(routes),provideClientHydration()]};

    Adding ‘router-outlet’ in root Component

    To work with routing, you need to include the <router-outlet> directive in your root component (recommended to add in app.component.html.), where you want to display the loaded components.

    Including the “router-outlet” directive in app.component.html:

    <h1>Angular Routing</h1><router-outlet></router-outlet>

    Testing the Routing

    To test the routing, run the application and try to navigate to “/home” and “/about” by changing the URL:

    Angular Routing

    Using RouterLink for Navigation

    Rather than changing the URL manually, you can use the RouterLink directive. The RouterLink directive is used to set a path for navigating between views or components in an Angular application.

    Binding a specified path in app.routes.ts with an anchor element (<a>) to handle navigation when links are clicked:

    <h1>Angular Routing</h1><a routerLink="/home">Home</a><br><a routerLink="/about">About</a><router-outlet></router-outlet>

    The output will look like:

    Angular Routing1

    Here,

    • routerLink set the route to be called using the path.