Authentication is the process of identifying the user credentials. In web applications, authentication is managed by sessions which take the input parameters such as email or username and password, for user identification. If these parameters match, the user is said to be authenticated.
Command
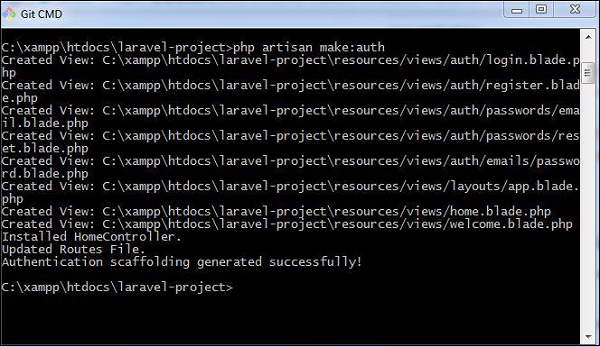
Laravel uses the following command to create forms and the associated controllers to perform authentication −
php artisan make:auth
This command helps in creating authentication scaffolding successfully, as shown in the following screenshot −
Controller
The controller which is used for the authentication process is HomeController.
<?php
namespace App\Http\Controllers;
use App\Http\Requests;
use Illuminate\Http\Request;
class HomeController extends Controller{
/**
* Create a new controller instance.
*
* @return void
*/
public function __construct() {
$this->middleware('auth');
}
/**
* Show the application dashboard.
*
* @return \Illuminate\Http\Response
*/
public function index() {
return view('home');
}
}
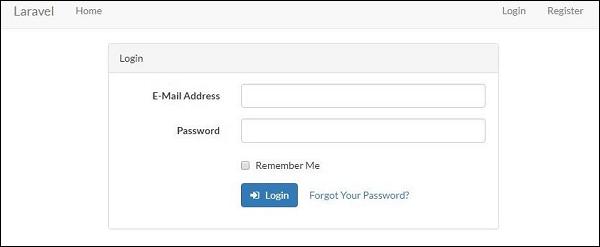
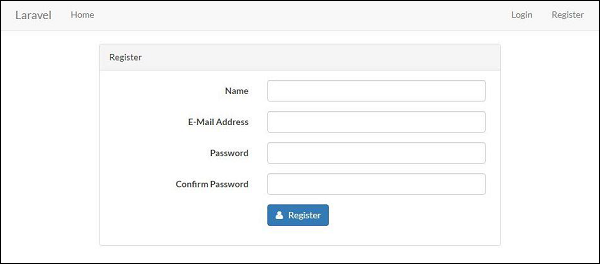
As a result, the scaffold application generated creates the login page and the registration page for performing authentication. They are as shown below −
Login
Registration
Explore our latest online courses and learn new skills at your own pace. Enroll and become a certified expert to boost your career.
Manually Authenticating Users
Laravel uses the Auth façade which helps in manually authenticating the users. It includes the attempt method to verify their email and password.
Consider the following lines of code for LoginController which includes all the functions for authentication −
<?php
// Authentication mechanism
namespace App\Http\Controllers;
use Illuminate\Support\Facades\Auth;
class LoginController extends Controller{
/**
CSRF refers to Cross Site Forgery attacks on web applications. CSRF attacks are the unauthorized activities which the authenticated users of the system perform. As such, many web applications are prone to these attacks.
Laravel offers CSRF protection in the following way −
Laravel includes an in built CSRF plug-in, that generates tokens for each active user session. These tokens verify that the operations or requests are sent by the concerned authenticated user.
Implementation
The implementation of CSRF protection in Laravel is discussed in detail in this section. The following points are notable before proceeding further on CSRF protection −
CSRF is implemented within HTML forms declared inside the web applications. You have to include a hidden validated CSRF token in the form, so that the CSRF protection middleware of Laravel can validate the request. The syntax is shown below −
You can conveniently build JavaScript driven applications using JavaScript HTTP library, as this includes CSRF token to every outgoing request.
The file namely resources/assets/js/bootstrap.js registers all the tokens for Laravel applications and includes meta tag which stores csrf-token with Axios HTTP library.
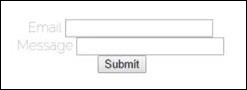
Form without CSRF token
Consider the following lines of code. They show a form which takes two parameters as input: email and message.
<form>
<label> Email </label>
<input type = "text" name = "email"/>
<br/>
<label> Message </label> <input type="text" name = "message"/>
<input type = ”submit” name = ”submitButton” value = ”submit”>
</form>
The result of the above code is the form shown below which the end user can view −
The form shown above will accept any input information from an authorized user. This may make the web application prone to various attacks.
Please note that the submit button includes functionality in the controller section. The postContact function is used in controllers for that associated views. It is shown below −
public function postContact(Request $request) {
   return $request-> all();
}
Observe that the form does not include any CSRF tokens so the sensitive information shared as input parameters are prone to various attacks.
Form with CSRF token
The following lines of code shows you the form re-designed using CSRF tokens −
<form method = ”post” >
   {{ csrf_field() }}
   <label> Email </label>
   <input type = "text" name = "email"/>
   <br/>
   <label> Message </label>
   <input type = "text" name = "message"/>
   <input type = ”submit” name = ”submitButton” value = ”submit”>
</form>
The output achieved will return JSON with a token as given below −
Laravel contracts are a set of interfaces with various functionalities and core services provided by the framework.
For example, Illuminate\Contracts\Queue\Queue contract uses a method which is needed for queuing jobs and Illuminate\Contracts\Mail\Mailer uses the method for sending emails.
Every contract defined includes corresponding implementation of the framework. All the Laravel contracts are available in the GitHub repository as mentioned below −
This repository provides a variety of contracts available in the Laravel framework which can be downloaded and used accordingly.
Important Points
While working with Laravel contracts, please note the following important points −
It is mandatory to define facades in the constructor of a class.
Contracts are explicitly defined in the classes and you need not define the contracts in constructors.
Example
Consider the contract used for Authorization in Laravel which is mentioned below −
* Determine if the entity has a given ability.
*
* @param string $ability
* @param array|mixed $arguments
* @return bool
*/
public function can($ability, $arguments = []);
}
The contract uses a function can which includes a parameter named ability and arguments which uses the user identification in the form of an array.
You will have to define a contract as shown in the syntax below −
interface <contract-name>
Contracts are used like facades for creating robust, well-tested Laravel applications. There are various practical differences with usage of contracts and facades.
The following code shows using a contract for caching a repository −
<?php
namespace App\Orders;
use Illuminate\Contracts\Cache\Repository as Cache;
class Repository{
/**
* The cache instance.
*/
protected $cache;
/**
* Create a new repository instance.
*
* @param Cache $cache
* @return void
*/
public function __construct(Cache $cache) {
$this->cache = $cache;
}
}
Contract contains no implementation and new dependencies; it is easy to write an alternative implementation of a specified contract, thus a user can replace cache implementation without modifying any code base.
Facades provide a static interface to classes that are available in the application’s service container. Laravel facades serve as static proxies to underlying classes in the service container, providing the benefit of a terse, expressive syntax while maintaining more testability and flexibility than traditional static methods.
How to create Facade
The following are the steps to create Facade in Laravel −
Step 1 − Create PHP Class File.
Step 2 − Bind that class to Service Provider.
Step 3 − Register that ServiceProvider toConfig\app.php as providers.
Step 4 − Create Class which is this class extends tolluminate\Support\Facades\Facade.
Step 5 − Register point 4 to Config\app.php as aliases.
Facade Class Reference
Laravel ships with many Facades. The following table show the in-built Facade class references −
Facade
Class
Service Container Binding
App
Illuminate\Foundation\Application
app
Artisan
Illuminate\Contracts\Console\Kernel
artisan
Auth
Illuminate\Auth\AuthManager
auth
Auth (Instance)
Illuminate\Auth\Guard
Blade
Illuminate\View\Compilers\BladeCompiler
blade.compiler
Bus
Illuminate\Contracts\Bus\Dispatcher
Cache
Illuminate\Cache\Repository
cache
Config
Illuminate\Config\Repository
config
Cookie
Illuminate\Cookie\CookieJar
cookie
Crypt
Illuminate\Encryption\Encrypter
encrypter
DB
Illuminate\Database\DatabaseManager
db
DB (Instance)
Illuminate\Database\Connection
Event
Illuminate\Events\Dispatcher
events
File
Illuminate\Filesystem\Filesystem
files
Gate
Illuminate\Contracts\Auth\Access\Gate
Hash
Illuminate\Contracts\Hashing\Hasher
hash
Input
Illuminate\Http\Request
request
Lang
Illuminate\Translation\Translator
translator
Log
Illuminate\Log\Writer
log
Mail
Illuminate\Mail\Mailer
mailer
Password
Illuminate\Auth\Passwords\PasswordBroker
auth.password
Queue
Illuminate\Queue\QueueManager
queue
Queue (Instance)
Illuminate\Queue\QueueInterface
Queue (Base Class)
Illuminate\Queue\Queue
Redirect
Illuminate\Routing\Redirector
redirect
Redis
Illuminate\Redis\Database
redis
Request
Illuminate\Http\Request
request
Response
Illuminate\Contracts\Routing\ResponseFactory
Route
Illuminate\Routing\Router
router
Schema
Illuminate\Database\Schema\Blueprint
Session
Illuminate\Session\SessionManager
session
Session (Instance)
Illuminate\Session\Store
Storage
Illuminate\Contracts\Filesystem\Factory
filesystem
URL
Illuminate\Routing\UrlGenerator
url
Validator
Illuminate\Validation\Factory
validator
Validator (Instance)
Illuminate\Validation\Validator
View
Illuminate\View\Factory
view
View (Instance)
Illuminate\View\View
Example
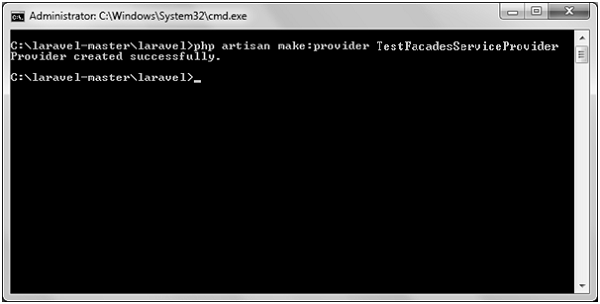
Step 1 − Create a service provider called TestFacadesServiceProvider by executing the following command.
Step 2 − After successful execution, you will receive the following output −
Step 3 − Create a class called TestFacades.php at App/Test.
App/Test/TestFacades.php
<?php
namespace App\Test;
class TestFacades{
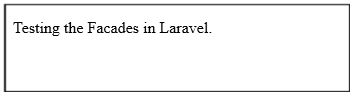
public function testingFacades() {
echo "Testing the Facades in Laravel.";
}
}
?>
Step 4 − Create a Facade class called “TestFacades.php” at “App/Test/Facades”.
App/Test/Facades/TestFacades.php
<?php

namespace app\Test\Facades;

use Illuminate\Support\Facades\Facade;

class TestFacades extends Facade {
   protected static function getFacadeAccessor() { return 'test'; }
}
Step 5 − Create a Facade class called TestFacadesServiceProviders.php at App/Test/Facades.
App/Providers/TestFacadesServiceProviders.php
<?php

namespace App\Providers;

use App;
use Illuminate\Support\ServiceProvider;

class TestFacadesServiceProvider extends ServiceProvider {
   public function boot() {
  //   }
   public function register() {
  App::bind('test',function() {
     return new \App\Test\TestFacades;
  });   }
}
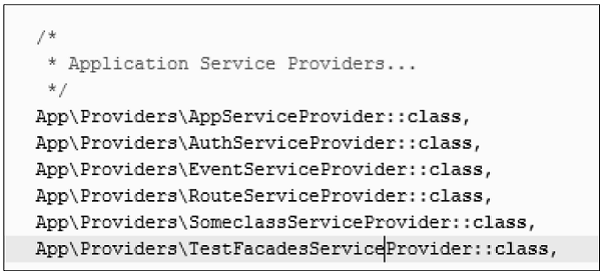
Step 6 − Add a service provider in a file config/app.php as shown in the below figure.
config/app.php
Step 7 − Add an alias in a file config/app.php as shown in the below figure.
config/app.php
Step 8 − Add the following lines in app/Http/routes.php.
Events provide a simple observer implementation which allows a user to subscribe and listen to various events triggered in the web application. All the event classes in Laravel are stored in the app/Events folder and the listeners are stored in the app/Listeners folder.
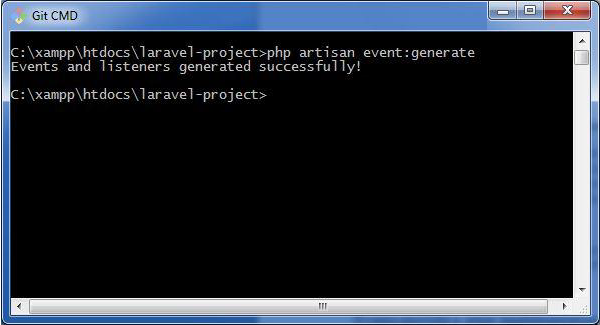
The artisan command for generating events and listeners in your web application is shown below −
php artisan event:generate
This command generates the events and listeners to the respective folders as discussed above.
Events and Listeners serve a great way to decouple a web application, since one event can have multiple listeners which are independent of each other. The events folder created by the artisan command includes the following two files: event.php and SomeEvent.php. They are shown here −
Event.php
<?php
namespace App\Events;
abstract class Event{
   //
}
As mentioned above, event.php includes the basic definition of class Event and calls for namespace App\Events. Please note that the user defined or custom events are created in this file.
SomeEvent.php
<?php
namespace App\Events;
use App\Events\Event;
use Illuminate\Queue\SerializesModels;
use Illuminate\Contracts\Broadcasting\ShouldBroadcast;
class SomeEvent extends Event{
use SerializesModels;
/**
* Create a new event instance.
*
* @return void
*/
public function __construct() {
//
}
/**
* Get the channels the event should be broadcast on.
*
* @return array
*/
public function broadcastOn() {
return [];
}
}
Observe that this file uses serialization for broadcasting events in a web application and that the necessary parameters are also initialized in this file.
For example, if we need to initialize order variable in the constructor for registering an event, we can do it in the following way −
public function __construct(Order $order) {
   $this->order = $order;
}
Listeners
Listeners handle all the activities mentioned in an event that is being registered. The artisan command event:generate creates all the listeners in the app/listeners directory. The Listeners folder includes a file EventListener.php which has all the methods required for handling listeners.
EventListener.php
<?php
namespace App\Listeners;
use App\Events\SomeEvent;
use Illuminate\Queue\InteractsWithQueue;
use Illuminate\Contracts\Queue\ShouldQueue;
class EventListener{
/**
As mentioned in the code, it includes handle function for managing various events. We can create various independent listeners that target a single event.
Most web applications have specific mechanisms for error handling. Using these, they track errors and exceptions, and log them to analyze the performance. In this chapter, you will read about error handling in Laravel applications.
Important Points
Before proceeding further to learn in detail about error handling in Laravel, please note the following important points −
For any new project, Laravel logs errors and exceptions in the App\Exceptions\Handler class, by default. They are then submitted back to the user for analysis.
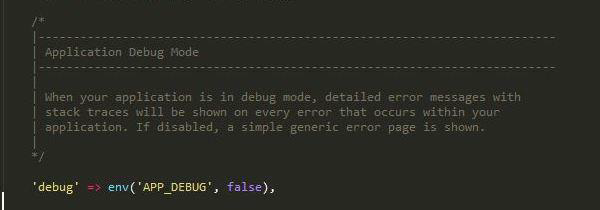
When your Laravel application is set in debug mode, detailed error messages with stack traces will be shown on every error that occurs within your web application.
By default, debug mode is set to false and you can change it to true. This enables the user to track all errors with stack traces.
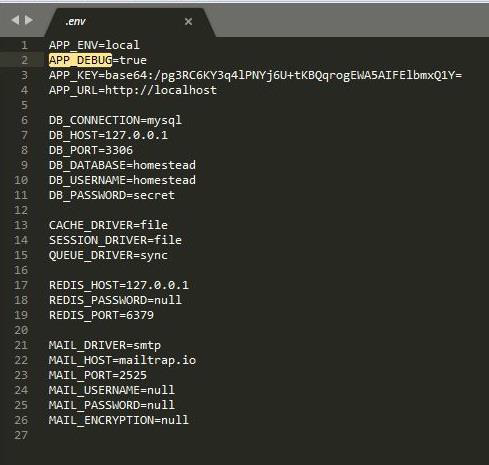
The configuration of Laravel project includes the debug option which determines how much information about an error is to be displayed to the user. By default in a web application, the option is set to the value defined in the environment variables of the .env file.
The value is set to true in a local development environment and is set to false in a production environment.
If the value is set to true in a production environment, the risk of sharing sensitive information with the end users is higher.
Error Log
Logging the errors in a web application helps to track them and in planning a strategy for removing them. The log information can be configured in the web application in config/app.php file. Please note the following points while dealing with Error Log in Laravel −
Laravel uses monolog PHP logging library.
The logging parameters used for error tracking are single, daily, syslog and errorlog.
For example, if you wish to log the error messages in log files, you should set the log value in your app configuration to daily as shown in the command below −
'log' => env('APP_LOG',’daily’),
If the daily log mode is taken as the parameter, Laravel takes error log for a period of 5 days, by default. If you wish to change the maximum number of log files, you have to set the parameter of log_max_files in the configuration file to a desired value.
‘log_max_files’ => 25;
Severity Levels
As Laravel uses monolog PHP logging library, there are various parameters used for analyzing severity levels. Various severity levels that are available are error, critical, alert and emergency messages. You can set the severity level as shown in the command below −
Ajax (Asynchronous JavaScript and XML) is a set of web development techniques utilizing many web technologies used on the client-side to create asynchronous Web applications. Import jquery library in your view file to use ajax functions of jquery which will be used to send and receive data using ajax from the server. On the server side you can use the response() function to send response to client and to send response in JSON format you can chain the response function with json() function.
json() function syntax
json(string|array $data = array(), int $status = 200, array $headers = array(), int $options)
Example
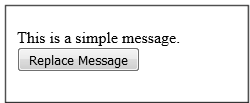
Step 1 − Create a view file called resources/views/message.php and copy the following code in that file.
<div id = 'msg'>This message will be replaced using Ajax.
Click the button to replace the message.</div>
<?php
echo Form::button('Replace Message',['onClick'=>'getMessage()']);
?>
</body>
</html>
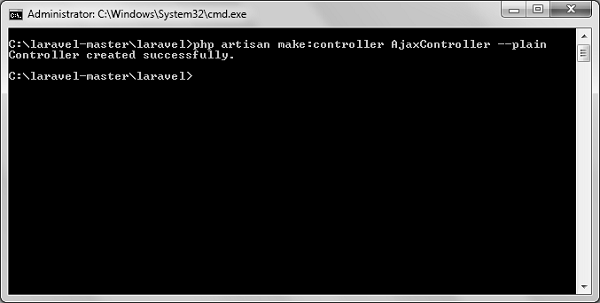
Step 2 − Create a controller called AjaxController by executing the following command.
Step 3 − After successful execution, you will receive the following output −
Step 4 − Copy the following code in
app/Http/Controllers/AjaxController.php file.
app/Http/Controllers/AjaxController.php
<?php
namespace App\Http\Controllers;
use Illuminate\Http\Request;
use App\Http\Requests;
use App\Http\Controllers\Controller;
class AjaxController extends Controller {
public function index() {
$msg = "This is a simple message.";
return response()->json(array('msg'=> $msg), 200);
}
}
Step 5 − Add the following lines in app/Http/routes.php.
Laravel uses free feature-rich library SwiftMailer to send emails. Using the library function, we can easily send emails without too many hassles. The e-mail templates are loaded in the same way as views, which means you can use the Blade syntax and inject data into your templates.
The following table shows the syntax and attributes of send function −
$view(string|array) − name of the view that contains email message$data(array) − array of data to pass to view$callback − a Closure callback which receives a message instance, allowing you to customize the recipients, subject, and other aspects of the mail message
Returns
nothing
Description
Sends email.
In the third argument, the $callback closure received message instance and with that instance we can also call the following functions and alter the message as shown below.
$message → subject(‘Welcome to the Tutorials Point’);
To attach or embed files, you can use the following methods −
$message → attach(‘path/to/attachment.txt’);
$message → embed(‘path/to/attachment.jpg’);
Mail can be sent as HTML or text. You can indicate the type of mail that you want to send in the first argument by passing an array as shown below. The default type is HTML. If you want to send plain text mail then use the following syntax.
In this syntax, the first argument takes an array. Use text as the key name of the view as value of the key.
Example
Step 1 − We will now send an email from Gmail account and for that you need to configure your Gmail account in Laravel environment file – .env file. Enable 2-step verification in your Gmail account and create an application specific password followed by changing the .env parameters as shown below.
Step 4 − After successful execution, you will receive the following output −
Step 5 − Copy the following code in
app/Http/Controllers/MailController.php file.
app/Http/Controllers/MailController.php
<?php
namespace App\Http\Controllers;
use Illuminate\Http\Request;
use Mail;
use App\Http\Requests;
use App\Http\Controllers\Controller;
class MailController extends Controller {
public function basic_email() {
Step 8 − Visit the following URL to test basic email.
http://localhost:8000/sendbasicemail
Step 9 − The output screen will look something like this. Check your inbox to see the basic email output.
Step 10 − Visit the following URL to test the HTML email.
http://localhost:8000/sendhtmlemail
Step 11 − The output screen will look something like this. Check your inbox to see the html email output.
Step 12 − Visit the following URL to test the HTML email with attachment.
http://localhost:8000/sendattachmentemail
Step 13 − You can see the following output
Note − In the MailController.php file the email address in the from method should be the email address from which you can send email address. Generally, it should be the email address configured on your server.
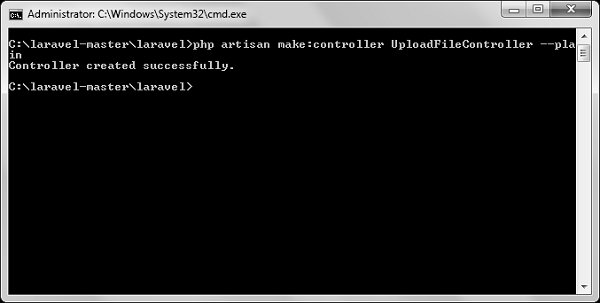
Uploading Files in Laravel is very easy. All we need to do is to create a view file where a user can select a file to be uploaded and a controller where uploaded files will be processed.
In a view file, we need to generate a file input by adding the following line of code.
Form::file('file_name');
In Form::open(), we need to add ‘files’=>’true’ as shown below. This facilitates the form to be uploaded in multiple parts.
<?php
namespace App\Http\Controllers;
use Illuminate\Http\Request;
use App\Http\Requests;
use App\Http\Controllers\Controller;
class UploadFileController extends Controller {
public function index() {
return view('uploadfile');
}
public function showUploadFile(Request $request) {
$file = $request->file('image');
//Display File Name
echo 'File Name: '.$file->getClientOriginalName();
echo '<br>';
Validation is the most important aspect while designing an application. It validates the incoming data. By default, base controller class uses a ValidatesRequests trait which provides a convenient method to validate incoming HTTP requests with a variety of powerful validation rules.
Available Validation Rules in Laravel
Laravel will always check for errors in the session data, and automatically bind them to the view if they are available. So, it is important to note that a $errors variable will always be available in all of your views on every request, allowing you to conveniently assume the $errors variable is always defined and can be safely used. The following table shows all available validation rules in Laravel.
Available Validation Rules in Laravel
Accepted
Active URL
After (Date)
Alpha
Alpha Dash
Alpha Numeric
Array
Before (Date)
Between
Boolean
Confirmed
Date
Date Format
Different
Digits
Digits Between
E-Mail
Exists (Database)
Image (File)
In
Integer
IP Address
JSON
Max
MIME Types(File)
Min
Not In
Numeric
Regular Expression
Required
Required If
Required Unless
Required With
Required With All
Required Without
Required Without All
Same
Size
String
Timezone
Unique (Database)
URL
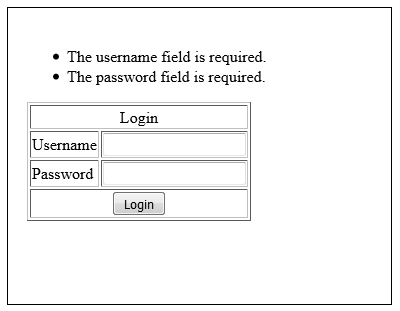
The $errors variable will be an instance of Illuminate\Support\MessageBag. Error message can be displayed in view file by adding the code as shown below.
@if (count($errors) > 0)
<div class = "alert alert-danger">
<ul>
@foreach ($errors->all() as $error)
<li>{{ $error }}</li>
@endforeach
</ul>
</div>
@endif
Example
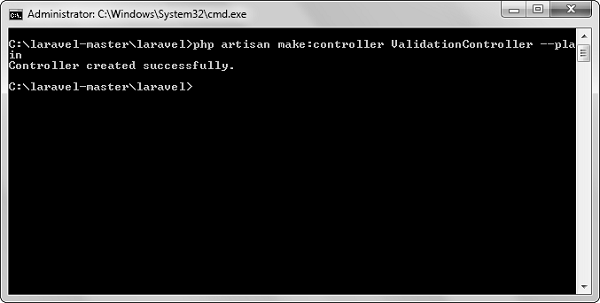
Step 1 − Create a controller called ValidationController by executing the following command.
<?php
namespace App\Http\Controllers;
use Illuminate\Http\Request;
use App\Http\Requests;
use App\Http\Controllers\Controller;
class ValidationController extends Controller {
public function showform() {
return view('login');
}
public function validateform(Request $request) {