Laravel 5.7 introduces a new feature called “callable action URL”. This feature is similar to the one in Laravel 5.6 which accepts string in action method. The main purpose of the new syntax introduced Laravel 5.7 is to directly enable you access the controller.
The syntax used in Laravel 5.6 version is as shown −
One advantage with the new callable array syntax format is the feature of ability to navigate to the controller directly if a developer uses a text editor or IDE that supports code navigation.
Laravel dump server comes with the version of Laravel 5.7. The previous versions do not include any dump server. Dump server will be a development dependency in laravel/laravel composer file.
With release of version 5.7, you’ll get this command which includes a concept out-of-thebox which allows user to dump data to the console or an HTML file instead of to the browser. The command execution is mentioned below −
php artisan dump-server
# Or send the output to an HTML file
php artisan dump-server --format=html > dump.html
Explanation
The command runs a server in the background which helps in collection of data sent from the application, that sends the output through the console. When the command is not running in the foreground, the dump() function is expected to work by default.
Laravel includes a feature of pagination which helps a user or a developer to include a pagination feature. Laravel paginator is integrated with the query builder and Eloquent ORM. The paginate method automatically takes care of setting the required limit and the defined offset. It accepts only one parameter to paginate i.e. the number of items to be displayed in one page.
Laravel 5.7 includes a new pagination method to customize the number of pages on each side of the paginator. The new method no longer needs a custom pagination view.
The custom pagination view code demonstration is mentioned below −
<?php
namespace App\Http\Controllers;
use Illuminate\Support\Facades\DB;
use App\Http\Controllers\Controller;
class UserController extends Controller{
/**
* Show all of the users for the application.
*
* @return Response
*/
public function index() {
Laravel 5.7 comes with new way of treating and testing new commands. It includes a new feature of testing artisan commands and the demonstration is mentioned below −
class ArtisanCommandTest extends TestCase{
   public function testBasicTest() {
  $this->artisan('nova:create', [
     'name' => 'My New Admin panel'
  ])
  ->expectsQuestion('Please enter your API key', 'apiKeySecret')
  ->expectsOutput('Authenticating...')
  ->expectsQuestion('Please select a version', 'v1.0')
  ->expectsOutput('Installing...')
  ->expectsQuestion('Do you want to compile the assets?', 'yes')
  ->expectsOutput('Compiling assets...')
  ->assertExitCode(0);   }
}
Explanation of Code
Here a new class named “ArtisanCommandTest” is created under test cases module. It includes a basic function testBasicTest which includes various functionalities of assertions.
The artisan command expectsQuestion includes two attributes. One with question and other with an apiKeySecret. Here, the artisan validates the apiKeySecret and verifies the input sent by user.
The same scenario applies for the question “Please select a version” where a user is expected to mention a specific version.
The Guest User Gates feature is an add-on to the latest 5.7 version released in September 2018. This feature is used to initiate the authorization process for specific users.
In Laravel 5.6, there was a procedure where it used to return false for unauthenticated users. In Laravel 5.7, we can allow guests to go authorization checks by using the specific nullable type hint within the specified controller as given below −
<?php
Gate::define('view-post', function (?User $user) {
   // Guests
});
Explanation of the Code
By using a nullable type hint the $user variable will be null when a guest user is passed to the gate. You can then make decisions about authorizing the action. If you allow nullable types and return true, then the guest will have authorization. If you don’t use a nullable type hint, guests will automatically get the 403 response for Laravel 5.7, which is displayed below −
The difference between 403 and 404 error is that 404 is displayed when user tries to access the unknown resource or URL and 403 error as mentioned in the snapshot above is displayed if unauthorized user accesses the website.
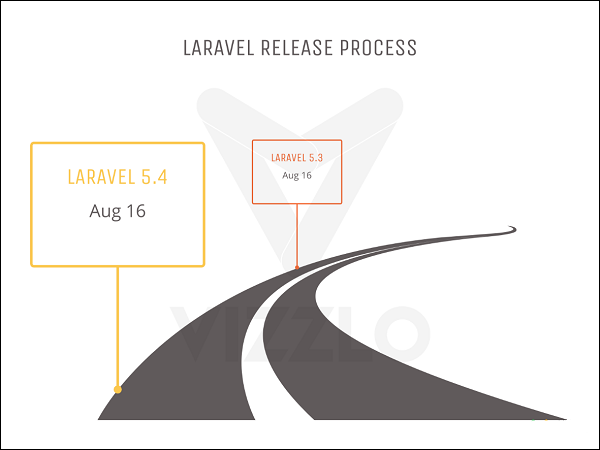
Every web application framework has its own version history and it is always being updated and maintained. Every latest version brings new functionality and functions which are either changed or deprecated, so it is important that you know which version will be suitable for your projects.
When it comes to Laravel, there are two active versions as given below −
Laravel 4- released in May 2013
Laravel 5.1- released in February 2015
Laravel 5.1 also includes various releases with the latest version of Laravel 5.1.5 which includes all the robust features for web development. The roadmap of Laravel or the version release is shown in the image below −
The following points are worth notable in the context of understanding the release process of Laravel −
The old directory of app/models is removed in Laravel 5.1.
All the controllers, middleware and requests are grouped within a directory under the app/Http folder.
A new folder namely Providers directory is replaced with the app/start files in the previous versions of Laravel 4.x.
All the language files and views are moved to the resources directory.
New artisan command route:cache is used for registration of new routes and is included with the release of Laravel 5.1 and further versions.
Laravel supports HTTP middleware and also includes CSRF tokens and authentication model.
All the authentication models are located under one directory namely resources/views/auth. It includes user registration, authentication and password controllers.
s the process of transforming a string of characters into a shorter fixed value or a key that represents the original string. Laravel uses the Hash facade which provides a secure way for storing passwords in a hashed manner.
Basic Usage
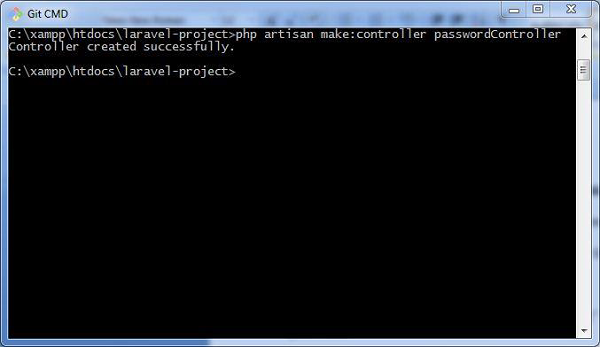
The following screenshot shows how to create a controller named passwordController which is used for storing and updating passwords −
The following lines of code explain the functionality and usage of the passwordController −
<?php
namespace App\Http\Controllers;
use Illuminate\Http\Request;
use Illuminate\Support\Facades\Hash;
use App\Http\Controllers\Controller
class passwordController extends Controller{
/**
* Updating the password for the user.
*
* @param Request $request
* @return Response
*/
public function update(Request $request) {
// Validate the new password length...
$request->user()->fill([
'password' => Hash::make($request->newPassword) // Hashing passwords
])->save();
}
}
The hashed passwords are stored using make method. This method allows managing the work factor of the bcrypt hashing algorithm, which is popularly used in Laravel.
Verification of Password against Hash
You should verify the password against hash to check the string which was used for conversion. For this you can use the check method. This is shown in the code given below −
if (Hash::check('plain-text', $hashedPassword)) {
   // The passwords match...
}
Note that the check method compares the plain-text with the hashedPassword variable and if the result is true, it returns a true value.
Encryption is a process of converting a plain text to a message using some algorithms such that any third user cannot read the information. This is helpful for transmitting sensitive information because there are fewer chances for an intruder to target the information transferred.
Encryption is performed using a process called Cryptography. The text which is to be encrypted is termed as Plain Text and the text or the message obtained after the encryption is called Cipher Text. The process of converting cipher text to plain text is called Decryption.
Laravel uses AES-256 and AES-128 encrypter, which uses Open SSL for encryption. All the values included in Laravel are signed using the protocol Message Authentication Code so that the underlying value cannot be tampered with once it is encrypted.
Configuration
The command used to generate the key in Laravel is shown below −
php artisan key:generate
Please note that this command uses the PHP secure random bytes’ generator and you can see the output as shown in the screenshot given below −
The command given above helps in generating the key which can be used in web application. Observe the screenshot shown below −
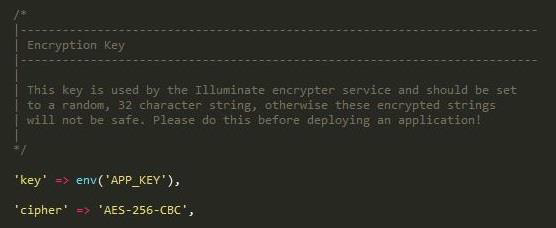
Note
The values for encryption are properly aligned in the config/app.php file, which includes two parameters for encryption namely key and cipher. If the value using this key is not properly aligned, all the values encrypted in Laravel will be insecure.
Encryption Process
Encryption of a value can be done by using the encrypt helper in the controllers of Laravel class. These values are encrypted using OpenSSL and AES-256 cipher. All the encrypted values are signed with Message Authentication code (MAC) to check for any modifications of the encrypted string.
The code shown below is mentioned in a controller and is used to store a secret or a sensitive message.
<?php
namespace App\Http\Controllers;
use Illuminate\Http\Request;
use App\Http\Controllers\Controller;
class DemoController extends Controller{
**
* Store a secret message for the user.
*
* @param Request $request
* @param int $id
* @return Response
*/
public function storeSecret(Request $request, $id) {
Laravel framework provides three primary tools for interaction through command-line namely: Artisan, Ticker and REPL. This chapter explains about Artisan in detail.
Introduction to Artisan
Artisan is the command line interface frequently used in Laravel and it includes a set of helpful commands for developing a web application.
Example
Here is a list of few commands in Artisan along with their respective functionalities −
To start Laravel project
php artisan serve
To enable caching mechanism
php artisan route:cache
To view the list of available commands supported by Artisan
php artisan list
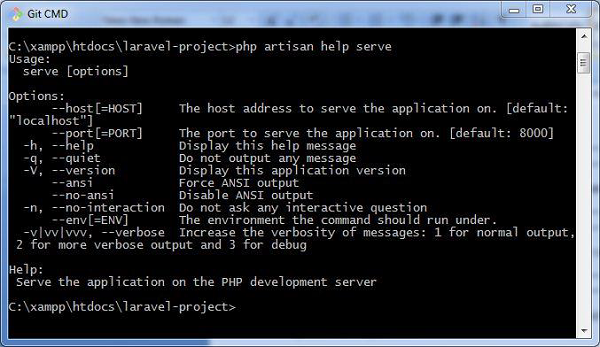
To view help about any command and view the available options and arguments
php artisan help serve
The following screenshot shows the output of the commands given above −
Explore our latest online courses and learn new skills at your own pace. Enroll and become a certified expert to boost your career.
Writing Commands
In addition to the commands listed in Artisan, a user can also create a custom command which can be used in the web application. Please note that commands are stored in app/console/commands directory.
The default command for creating user defined command is shown below −
php artisan make:console <name-of-command>
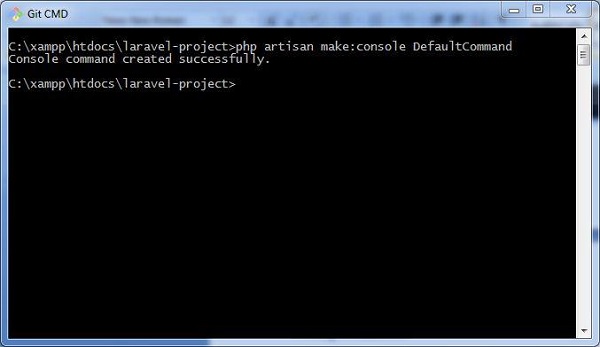
Once you type the above given command, you can see the output as shown in the screenshot given below −
The file created for DefaultCommand is named as DefaultCommand.php and is shown below −
<?php
namespace App\Console\Commands;
use Illuminate\Console\Command;
class DefaultCommand extends Command{
/**
* The name and signature of the console command.
*
* @var string
*/
protected $signature = 'command:name';
/**
* The console command description.
*
* @var string
This file includes the signature and description for the command that user defined. The public function named handle executes the functionalities when the command is executed. These commands are registered in the file Kernel.php in the same directory.
You can also create the schedule of tasks for the user defined command as shown in the following code −
<?php
namespace App\Console;
use Illuminate\Console\Scheduling\Schedule;
use Illuminate\Foundation\Console\Kernel as ConsoleKernel;
class Kernel extends ConsoleKernel {
/**
* The Artisan commands provided by your application.
*
* @var array
Note that the schedule of tasks for the given command is defined in the function named schedule, which includes a parameter for scheduling the tasks which takes hourly parameter.
The commands are registered in the array of commands, which includes the path and name of the commands.
Once the command is registered, it is listed in Artisan commands. The values included in the signature and description section will be displayed when you call for the help attribute of the specified command.
Let us see how to view the attributes of our command DefaultCommand. You should use the command as shown below −
In the previous chapter, we have studied about authentication process in Laravel. This chapter explains you the authorization process in Laravel.
Difference between Authentication and Authorization
Before proceeding further into learning about the authorization process in Laravel, let us understand the difference between authentication and authorization.
In authentication, the system or the web application identifies its users through the credentials they provide. If it finds that the credentials are valid, they are authenticated, or else they are not.
In authorization, the system or the web application checks if the authenticated users can access the resources that they are trying to access or make a request for. In other words, it checks their rights and permissions over the requested resources. If it finds that they can access the resources, it means that they are authorized.
Thus, authentication involves checking the validity of the user credentials, and authorization involves checking the rights and permissions over the resources that an authenticated user has.
Authorization Mechanism in Laravel
Laravel provides a simple mechanism for authorization that contains two primary ways, namely Gates and Policies.
Writing Gates and Policies
Gates are used to determine if a user is authorized to perform a specified action. They are typically defined in App/Providers/AuthServiceProvider.php using Gate facade. Gates are also functions which are declared for performing authorization mechanism.
Policies are declared within an array and are used within classes and methods which use authorization mechanism.
The following lines of code explain you how to use Gates and Policies for authorizing a user in a Laravel web application. Note that in this example, the boot function is used for authorizing the users.
<?php
namespace App\Providers;
use Illuminate\Contracts\Auth\Access\Gate as GateContract;
use Illuminate\Foundation\Support\Providers\AuthServiceProvider as ServiceProvider;
class AuthServiceProvider extends ServiceProvider{
/**
* The policy mappings for the application.
*
* @var array