So far, we’ve worked in our previous chapters mostly with the INBOX folder. This is the default folder in which most mail resides. Some systems might call it as INBOX and some other might call it by some other name. But,you can always access it from the JavaMail API using the name INBOX.
The JavaMail API represents folders as instances of the abstract Folder class:
public abstract class Folder extends Object
This class declares methods for requesting named folders from servers, deleting messages from folders, searching for particular messages in folders, listing the messages in a folder, and so forth.
Opening a Folder
We can’t create a folder directly as the only constructor in the Folder class is protected. We can get a Folder from:
a Session
a Store
or another Folder
All the above classes have a similar getFolder() method with similar signature:
public abstract Folder getFolder(String name) throws MessagingException
Some of the methods which help in getting the Folder object are:
Method
Description
boolean exists()
Checks if the folder really exists. Use this method before getting the Folder object.
abstract void open(int mode)
When you get a Folder, its closed. Use this method to open it. mode can be Folder.READ_ONLY or Folder.READ_WRITE.
abstract boolean isOpen()
This method returns true if the folder is open, false if it’s closed
abstract void close(boolean expunge)
Closes the folder. If the expunge argument is true, any deleted messages in the folder are deleted from the actual file on the server. Otherwise, they’re simply marked as deleted, but the messages can still be undeleted.
Basic Folder Info
Following are some of the methods in Folder class which return basic information about a folder:
Method
Description
abstract String getName()
Returns the name of the folder, such as “TutorialsPoint Mail”
abstract String getFullName()
Returns the complete hierarchical name from the root such as “books/Manisha/TutorialsPoint Mail”.
URLName getURLName()
Return a URLName representing this folder.
abstract Folder getParent()
Returns the name of the folder that contains this folder i.e the parent folder. E.g “Manisha” from the previous “TutorialsPoint Mail” example.
abstract int getType()
Returns an int indicating whether the folder can contain messages and/or other folders.
int getMode()
It returns one of the two named constants Folder.READ_ONLY or Folder.READ_WRITE or -1 when the mode is unknown.
Store getStore()
Returns the Store object from which this folder was retrieved.
abstract char getSeparator()
Return the delimiter character that separates this Folder’s pathname from the names of immediate subfolders.
Learn Java in-depth with real-world projects through our Java certification course. Enroll and become a certified expert to boost your career.
Managing Folder
Following are some of the methods which help manage the Folder:
Method
Description
abstract boolean create(int type)
This creates a new folder in this folder’s Store. Where type would be:Folder.HOLDS_MESSAGES or Folder.HOLDS_FOLDERS. Returns true if folder is successfully created else returns false.
abstract boolean delete(boolean recurse)
This deletes the folder only if the folder is closed. Otherwise, it throws an IllegalStateException. If recurse is true, then subfolders are deleted.
abstract boolean renameTo(Folder f)
This changes the name of this folder. A folder must be closed to be renamed. Otherwise, an IllegalStateException is thrown.
Managing Messages in Folders
Following are some of the methods that help manage the messages in Folder:
Method
Description
abstract void appendMessages(Message[] messages)
As the name implies, the messages in the array are placed at the end of this folder.
This copies messages from this folder into a specified folder given as an argument.
abstract Message[] expunge()
To delete a message from a folder, set its Flags.Flag.DELETED flag to true. To physically remove deleted messages from a folder, you have to call this method.
Listing the Contents of a Folder
There are four methods to list the folders that a folder contains:
Method
Description
Folder[] list()
This returns an array listing the folders that this folder contains.
Folder[] listSubscribed()
This returns an array listing all the subscribed folders that this folder contains.
abstract Folder[] list(String pattern)
This is similar to the list() method except that it allows you to specify a pattern. The pattern is a string giving the name of the folders that match.
Folder[] listSubscribed(String pattern)
This is similar to the listSubscribed() method except that it allows you to specify a pattern. The pattern is a string giving the name of the folders that match.
Checking for Mail
Method
Description
abstract int getMessageCount()
This method can be invoked on an open or closed folder. However, in the case of a closed folder, this method may (or may not) return -1 to indicate that the exact number of messages isn’t easily available.
abstract boolean hasNewMessages()
This returns true if new messages have been added to the folder since it was last opened.
int getNewMessageCount()
It returns the new message count by checking messages in the folder whose RECENT flag is set.
int getUnreadMessageCount()
This can be invoked on either an open or a closed folder. However, in the case of a closed folder, it may return -1 to indicate that the real answer would be too expensive to obtain.
Getting Messages from Folders
The Folder class provides four methods for retrieving messages from open folders:
Method
Description
abstract Message getMessage(int messageNumber)
This returns the nth message in the folder. The first message in the folder is number 1.
Message[] getMessages()
This returns an array of Message objects representing all the messages in this folder.
Message[] getMessages(int start, int end)
This returns an array of Message objects from the folder, beginning with start and finishing with end, inclusive.
Message[] getMessages(int[] messageNumbers)
This returns an array containing only those messages specifically identified by number in the messageNumbers array.
void fetch(Message[] messages, FetchProfile fp)
Prefetch the items specified in the FetchProfile for the given Messages. The FetchProfile argument specifies which headers in the messages to prefetch.
Searching Folders
If the server supports searching (as many IMAP servers do and most POP servers don’t), it’s easy to search a folder for the messages meeting certain criteria. The criteria are encoded in SearchTerm objects. Following are the two search methods:
Method
Description
Message[] search(SearchTerm term)
Search this Folder for messages matching the specified search criterion. Returns an array containing the matching messages. Returns an empty array if no matches were found.
Search the given array of messages for those that match the specified search criterion. Returns an array containing the matching messages. Returns an empty array if no matches were found. The the specified Message objects must belong to this folder.
Flags
Flag modification is useful when you need to change flags for the entire set of messages in a Folder. Following are the methods provided in the Folder class:
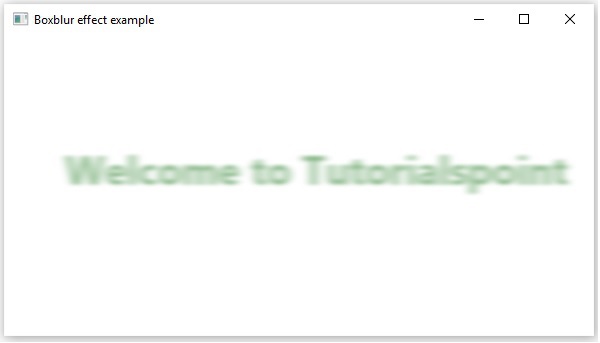
In general, Blur means becoming unclear, on applying blur effect to a node it is made unclear. Box Blur is a kind of blur effect provided by JavaFX. In this effect, to apply blur to node, a simple box filter is used.
The class named BoxBlur of the package javafx.scene.effect represents the BoxBlur effect, this class contains four properties, which are −
height − This property is of double type representing the vertical size of the effect.
width − This property is of double type representing the horizontal size of the effect.
input − This property is of the type effect and it represents an input to the BoxBlur effect.
iterations − This property is of an integer type representing the number of iterations of the effect, which are to be applied on the node. This is done to improve its quality or smoothness.
Example
Following is an example demonstrating the box blur effect. In here, we are drawing the text “Welcome to Tutorialspoint” filled with DARKSEAGREEN color and applying the Box Blur effect to it.
Save this code in a file with the name BoxBlurEffectExample.java.
importjavafx.application.Application;importjavafx.scene.Group;importjavafx.scene.Scene;importjavafx.scene.effect.BoxBlur;importjavafx.scene.paint.Color;importjavafx.stage.Stage;importjavafx.scene.text.Font;importjavafx.scene.text.FontWeight;importjavafx.scene.text.Text;publicclassBoxBlurEffectExampleextendsApplication{@Overridepublicvoidstart(Stage stage){//Creating a Text object Text text =newText();//Setting font to the text
text.setFont(Font.font(null,FontWeight.BOLD,40));//setting the position of the text
text.setX(60);
text.setY(150);//Setting the text to be added.
text.setText("Welcome to Tutorialspoint");//Setting the color of the text
text.setFill(Color.DARKSEAGREEN);//Instantiating the BoxBlur class BoxBlur boxblur =newBoxBlur();//Setting the width of the box filter
boxblur.setWidth(8.0f);//Setting the height of the box filter
boxblur.setHeight(3.0f);//Setting the no of iterations
boxblur.setIterations(3);//Applying BoxBlur effect to the text
text.setEffect(boxblur);//Creating a Group object Group root =newGroup(text);//Creating a scene object Scene scene =newScene(root,600,300);//Setting title to the Stage
stage.setTitle("Sample Application");//Adding scene to the stage
stage.setScene(scene);//Displaying the contents of the stage
stage.show();}publicstaticvoidmain(String args[]){launch(args);}}</code></pre>
Compile and execute the saved java file from the command prompt using the following commands.
Just like the Bloom Effect, the Glow Effect also makes the given input image to glow. This effect makes the pixels of the input much brighter.
The class named Glow of the package javafx.scene.effect represents the glow effect. This class contains two properties namely −
input − This property is of the type Effect and it represents an input to the glow effect.
level − This property is of the type double; it represents intensity of the glow. The range of the level value is 0.0 to 1.0.
Example
The following program is an example demonstrating the Glow Effect of JavaFX. In here, we are embedding the following image (Tutorialspoint Logo) in JavaFX scene using Image and ImageView classes. This will be done at the position 100, 70 and with fit height and fit width 200 and 400 respectively.
To this image, we are applying the Glow Effect with the level value 0.9. Save this code in a file with the name GlowEffectExample.java.
importjavafx.application.Application;importjavafx.scene.Group;importjavafx.scene.Scene;importjavafx.scene.effect.Glow;importjavafx.scene.image.Image;importjavafx.scene.image.ImageView;importjavafx.stage.Stage;publicclassGlowEffectExampleextendsApplication{@Overridepublicvoidstart(Stage stage){//Creating an image Image image =newImage("http://www.tutorialspoint.com/green/images/logo.png");//Setting the image view ImageView imageView =newImageView(image);//setting the fit width of the image view
imageView.setFitWidth(200);//Setting the preserve ratio of the image view
imageView.setPreserveRatio(true);//Instantiating the Glow class Glow glow =newGlow();//setting level of the glow effect
glow.setLevel(0.9);//Applying bloom effect to text
imageView.setEffect(glow);//Creating a Group object Group root =newGroup(imageView);//Creating a scene object Scene scene =newScene(root,600,300);//Setting title to the Stage
stage.setTitle("Sample Application");//Adding scene to the stage
stage.setScene(scene);//Displaying the contents of the stage
stage.show();}publicstaticvoidmain(String args[]){launch(args);}}</code></pre>
Compile and execute the saved java file from the command prompt using the following commands.
The Bloom effect in JavaFX will make the pixels in some portions of the node are made to glow.
The class named Bloom of the package javafx.scene.effect represents the bloom effect. This class contains two properties, which are −
input − This property is of the type Effect and it represents an input to the bloom effect.
threshold − This property is of the type double; this represents a threshold value of luminosity of the pixels of the node. All those pixels having luminosity greater than equal to this value are made to glow. The range of the threshold value is 0.0 to 1.0.
Example
Following is an example demonstrating the bloom effect. We will be drawing a text “Welcome to Tutorialspoint” and applying the bloom effect to it with a threshold value 1.0.
Save this code in a file with the name BloomEffectExample.java.
importjavafx.application.Application;importjavafx.scene.Group;importjavafx.scene.Scene;importjavafx.scene.effect.Bloom;importjavafx.scene.paint.Color;importjavafx.scene.shape.Rectangle;importjavafx.stage.Stage;importjavafx.scene.text.Font;importjavafx.scene.text.FontWeight;importjavafx.scene.text.Text;publicclassBloomEffectExampleextendsApplication{@Overridepublicvoidstart(Stage stage){//Creating a Text object Text text =newText();//Setting font to the text
text.setFont(Font.font(null,FontWeight.BOLD,40));//setting the position of the text
text.setX(60);
text.setY(150);//Setting the text to be embedded.
text.setText("Welcome to Tutorialspoint");//Setting the color of the text
text.setFill(Color.DARKSEAGREEN);//Instantiating the Rectangle class Rectangle rectangle =newRectangle();//Setting the position of the rectangle
rectangle.setX(50.0f);
rectangle.setY(80.0f);//Setting the width of the rectangle
rectangle.setWidth(500.0f);//Setting the height of the rectangle
rectangle.setHeight(120.0f);//Setting the color of the rectangle
rectangle.setFill(Color.TEAL);//Instantiating the Bloom class Bloom bloom =newBloom();//setting threshold for bloom
bloom.setThreshold(0.1);//Applying bloom effect to text
text.setEffect(bloom);//Creating a Group object Group root =newGroup(rectangle, text);//Creating a scene object Scene scene =newScene(root,600,300);//Setting title to the Stage
stage.setTitle("Sample Application");//Adding scene to the stage
stage.setScene(scene);//Displaying the contents of the stage
stage.show();}publicstaticvoidmain(String args[]){launch(args);}}</code></pre>
Compile and execute the saved java file from the command prompt using the following commands.
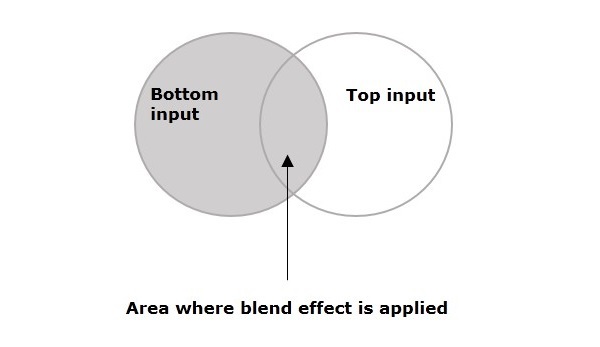
In general, blend means mixture of two or more different things or substances. If we apply the blend effect, it will take the pixels of two different inputs. This will be done at the same location and it produces a combined output based on the blend mode.
For example, if we draw two objects the top object covers the bottom one. On applying the blend effect, the pixels of the two objects in the overlap area are combined and displayed based on the input mode.
The class named Blend of the package javafx.scene.effect represents the blend effect, this class contains four properties, which are −
bottomInput − This property is of the type Effect and it represents the bottom input to the blend effect.
topInput − This property is of the type Effect and it represents the top input to the blend effect.
opacity − This property is of double type and it represents the opacity value modulated with the top input.
mode − This property is of the type BlendMode and it represents the mode used to blend the two inputs together.
Example
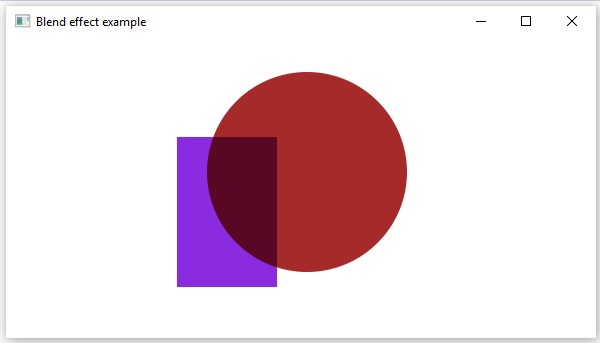
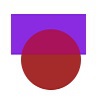
Following is an example demonstrating the blend effect. In here, we are drawing a circle filled with BROWN color, on top of it lies a BLUEVIOLET ColorInput.
We have applied the blend effect choosing a multiply mode In the overlap area, the colors of the two objects were multiplied and displayed.
Save this code in a file with the name BlendEffectExample.java.
importjavafx.application.Application;importjavafx.scene.Group;importjavafx.scene.Scene;importjavafx.stage.Stage;importjavafx.scene.shape.Circle;importjavafx.scene.effect.Blend;importjavafx.scene.effect.BlendMode;importjavafx.scene.effect.ColorInput;importjavafx.scene.paint.Color;publicclassBlendEffectExampleextendsApplication{@Overridepublicvoidstart(Stage stage){//Drawing a Circle Circle circle =newCircle();//Setting the center of the Circle
circle.setCenterX(75.0f);
circle.setCenterY(75.0f);//Setting radius of the circle
circle.setRadius(30.0f);//Setting the fill color of the circle
circle.setFill(Color.BROWN);//Instantiating the blend class Blend blend =newBlend();//Preparing the to input object ColorInput topInput =newColorInput(35,30,75,40,Color.BLUEVIOLET);//setting the top input to the blend object
blend.setTopInput(topInput);//setting the blend mode
blend.setMode(BlendMode.SRC_OVER);//Applying the blend effect to circle
circle.setEffect(blend);//Creating a Group object Group root =newGroup(circle);//Creating a scene object Scene scene =newScene(root,150,150);//Setting title to the Stage
stage.setTitle("Blend Example");//Adding scene to the stage
stage.setScene(scene);//Displaying the contents of the stage
stage.show();}publicstaticvoidmain(String args[]){launch(args);}}</code></pre>
Compile and execute the saved java file from the command prompt using the following commands.
On executing, the above program generates a JavaFX window as shown below.
Blend Modes
S.NO
Mode & Description
Output
1
ADDIn this mode, the color values of the top and bottom inputs are added and displayed.
2
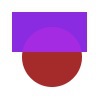
MULTIPLYIn this mode, the color values of the top and bottom inputs are multiplied and displayed.
3
DIFFERENCEIn this mode, among the color values of the top and bottom inputs, the darker one is subtracted from the lighter one and displayed.
4
REDIn this mode, the red components of the bottom input were replaced by the red components of the top input.
5
BLUEIn this mode, the blue components of the bottom input were replaced by the blue components of the top input.
6
GREENIn this mode, the green components of the bottom input were replaced by the green components of the top input.
7
EXCLUSIONIn this mode, the color components of the two inputs were multiplied and doubled. Then they are subtracted from the sum of the color components of the bottom input. The resultant is then displayed.
8
COLOR_BURNIn this mode, the inverse of the bottom input color component was divided by the top input color component. Thus, the obtained value is inverted and displayed.
9
COLOR_DODGEIn this mode, the bottom input color components were divided by the inverse of the top input color components and thus obtained value is inverted and displayed.
10
LIGHTENIn this mode, the lighter color component, among the both inputs are displayed.
11
DARKENIn this mode, the darker color component, among the top and bottom inputs is displayed.
12
SCREENIn this mode, the color components of the top and bottom inputs were inverted, multiplied and thus obtained value is inverted and displayed.
13
OVERLAYIn this mode, based on the bottom input color, the color components of the two input values were multiplied or screened and the resultant is displayed.
14
HARD_LIGHTIn this mode, based on the top input color, the color components of the two input values were multiplied or screened and the resultant is displayed.
15
SOFT_LIGHIn this mode, based on the top input color, the color components of the two input values were softened or lightened and the resultant is displayed.
16
SRC_ATOPIn this mode, the over lapping area is filled with the color component of the bottom input. While the nonoverlapping area is filled with the color component of the top input.
17
SRC_OVERIn this mode, the top input is drawn over the bottom input.
Image input effect in JavaFX just embeds an image to the JavaFX screen. Just like in the Color Input effect, it is used to pass the specified colored rectangular region as an input to another effect. An Image Input effect is used to pass the specified image as an input to another effect.
On applying this effect, the image specified will not be modified. This effect is applied to any node.
The class named ImageInput of the package javafx.scene.effect represents the Image Input effect, this class contains three properties, which are −
x − This property is of Double type; it represents the x coordinate of the position of the source image.
y − This property is of Double type; it represents the y coordinate of the position of the source image.
source − his property is of Image type; it represents image that is to be used as a source to this effect. (Passed as input)
Example
The following program is an example demonstrating the Image input effect. In here, we are creating an image input at the position 150, 100, and taking the following image (tutorialspoint logo) as a source for this effect.
We are creating a rectangle and applying this effect to it. Save this code in a file with the name ImageInputEffectExample.java.
importjavafx.application.Application;importjavafx.scene.Group;importjavafx.scene.Scene;importjavafx.scene.effect.ImageInput;importjavafx.scene.image.Image;importjavafx.scene.shape.Rectangle;importjavafx.stage.Stage;publicclassImageInputEffectExampleextendsApplication{@Overridepublicvoidstart(Stage stage){//Creating an image Image image =newImage("http://www.tutorialspoint.com/green/images/logo.png");//Instantiating the Rectangle class Rectangle rectangle =newRectangle();//Instantiating the ImageInput class ImageInput imageInput =newImageInput();//Setting the position of the image
imageInput.setX(150);
imageInput.setY(100);//Setting source for image input
imageInput.setSource(image);//Applying image input effect to the rectangle node
rectangle.setEffect(imageInput);//Creating a Group object Group root =newGroup(rectangle);//Creating a scene object Scene scene =newScene(root,600,300);//Setting title to the Stage
stage.setTitle("Sample Application");//Adding scene to the stage
stage.setScene(scene);//Displaying the contents of the stage
stage.show();}publicstaticvoidmain(String args[]){launch(args);}}</code></pre>
Compile and execute the saved java file from the command prompt using the following commands.
Color Input Effect gives the same output as drawing a rectangle and filling it with color. Unlike other effects, if this effect is applied to any node, it displays only a rectangular box (not the node). This effect is mostly used to pass as an input for other effects.
For example, while applying the blend effect, it requires an object of effect type as input. There we can pass this as an input.
The class named ColorInput of the package javafx.scene.effect represents the color input effect. This class contains four properties namely −
x − This property is of double type; it represents the x coordinate of the position of the color input.
y − This property is of double type; it represents the y coordinate of the position of the color input.
height − This property is of double type; it represents the height of the region that is to be filled with color.
width − This property is of double type; it represents the width of the region that is to be filled with color.
paint − This property is of Paint type; it represents the color with which the input region is to be filled.
Example
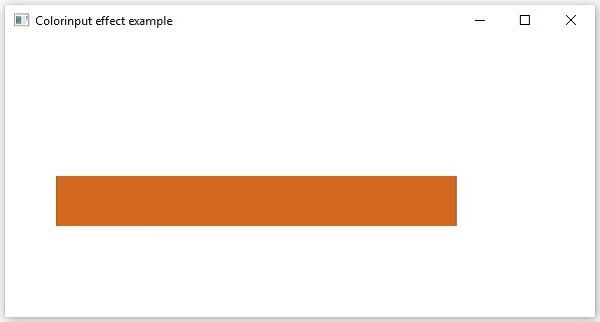
Following is an example demonstrating the color input effect. In here, we are creating a color input of the dimensions 50, 400 (height, width) at the position 50, 140, and filling it with the color CHOCOLATE.
We are creating rectangle and applying this effect to it. Save this code in a file with the name ColorInputEffectExample.java.
importjavafx.application.Application;importjavafx.scene.Group;importjavafx.scene.Scene;importjavafx.scene.effect.ColorInput;importjavafx.scene.paint.Color;importjavafx.scene.shape.Rectangle;importjavafx.stage.Stage;publicclassColorInputEffectExampleextendsApplication{@Overridepublicvoidstart(Stage stage){//creating a rectangle Rectangle rectangle =newRectangle();//Instantiating the Colorinput class ColorInput colorInput =newColorInput();//Setting the coordinates of the color input
colorInput.setX(50);
colorInput.setY(140);//Setting the height of the region of the collor input
colorInput.setHeight(50);//Setting the width of the region of the color input
colorInput.setWidth(400);//Setting the color the color input
colorInput.setPaint(Color.CHOCOLATE);//Applying coloradjust effect to the Rectangle
rectangle.setEffect(colorInput);//Creating a Group object Group root =newGroup(rectangle);//Creating a scene object Scene scene =newScene(root,600,300);//Setting title to the Stage
stage.setTitle("Sample Application");//Adding scene to the stage
stage.setScene(scene);//Displaying the contents of the stage
stage.show();}publicstaticvoidmain(String args[]){launch(args);}}</code></pre>
Compile and execute the saved java file from the command prompt using the following commands.
The most basic effect that can be performed on any image is adjusting its color. Various image processing applications allow you to do it. Similarly, JavaFX also allows you to adjust a color of an image in an application.
You can adjust the color of an image by applying the color adjust effect to it. This includes the adjustment of the Hue, Saturation, Brightness and Contrast on each pixel.
The class named ColorAdjust of the package javafx.scene.effect represents the color adjust effect, this class contains five properties namely −
input − This property is of the Effect type and it represents an input to the color adjust effect.
brightness − This property is of Double type and it represents the brightness adjustment value for this effect.
contrast − This property is of Double type and it represents the contrast adjustment value for this effect.
hue − This property is of Double type and it represents the hue adjustment value for this effect.
saturation − This property is of Double type and it represents the saturation adjustment value for this effect.
Example
The following program is an example of demonstrating the color adjust effect. In here, we are embedding an image (Tutorialspoint Logo) in JavaFX scene using Image and ImageView classes. This is being done at the position 100, 70 and with a fit height and fit width of 200 and 400 respectively.
We are adjusting the color of this image using the color adjust effect. With contrast, hue, brightness and saturation values as 0.4. -0.05, 0.9, 0.8.
Save this code in a file with the name ColorAdjustEffectExample.java.
importjavafx.application.Application;importjavafx.scene.Group;importjavafx.scene.Scene;importjavafx.scene.effect.ColorAdjust;importjavafx.scene.image.Image;importjavafx.scene.image.ImageView;importjavafx.stage.Stage;publicclassColorAdjustEffectExampleextendsApplication{@Overridepublicvoidstart(Stage stage){//Creating an image Image image =newImage("http://www.tutorialspoint.com/green/images/logo.png");//Setting the image view ImageView imageView =newImageView(image);//Setting the position of the image
imageView.setX(100);
imageView.setY(70);//setting the fit height and width of the image view
imageView.setFitHeight(200);
imageView.setFitWidth(400);//Setting the preserve ratio of the image view
imageView.setPreserveRatio(true);//Instantiating the ColorAdjust class ColorAdjust colorAdjust =newColorAdjust();//Setting the contrast value
colorAdjust.setContrast(0.4);//Setting the hue value
colorAdjust.setHue(-0.05);//Setting the brightness value
colorAdjust.setBrightness(0.9);//Setting the saturation value
colorAdjust.setSaturation(0.8);//Applying coloradjust effect to the ImageView node
imageView.setEffect(colorAdjust);//Creating a Group object Group root =newGroup(imageView);//Creating a scene object Scene scene =newScene(root,600,300);//Setting title to the Stage
stage.setTitle("Coloradjust effect example");//Adding scene to the stage
stage.setScene(scene);//Displaying the contents of the stage
stage.show();}publicstaticvoidmain(String args[]){launch(args);}}</code></pre>
Compile and execute the saved java file from the command prompt using the following commands.
An effect is any action that enhances the appearance of the graphics. In JavaFX, an effect is an algorithm that is applied on nodes to enhance their appearance visually. The effect property of the Node class is used to specify the effect.
In JavaFX, you can set various effects to a node such as bloom, blur and glow. Each of these effects are represented by a class and all these classes are available in a package named javafx.scene.effect.
Applying Effects to a Node
You can apply an effect to a node using the setEffect() method. To this method, you need to pass the object of the effect.
To apply an effect to a node, you need to −
Create the node.
Instantiate the respective class of the effect that is needed to be applied.
Set the properties of the effect.
Apply the effect to the node using the setEffect() method.
Creating the Nodes
First of all, create the nodes in a JavaFX application by instantiating their respective classes.
For example, if you want to apply glow effect to an image in your application. Firstly, you need to create an image node by instantiating the Image class and set its view as shown below.
Example
//Creating an image Image image =newImage("https://www.tutorialspoint.com/green/images/logo.png");//Setting the image view ImageView imageView =newImageView(image);//Setting the position of the image
imageView.setX(100);
imageView.setY(70);//setting the fit height and width of the image view
imageView.setFitHeight(200);
imageView.setFitWidth(400);//Setting the preserve ratio of the image view
imageView.setPreserveRatio(true);
Instantiating the Respective Class
Instantiate the class representing the effect that is needed to be applied to the created node.
For example − To apply the glow effect, you need to instantiate the Glow class as shown in the following code box −
Glow glow =newGlow();
Setting the Properties of the Effect
After instantiating the class, you need to set the properties for the effect using its setter methods.
For example − To draw a 3-Dimensional box, you need to pass its width, height and depth. You can specify these values using their respective setter methods as shown below −
//setting the level property
glow.setLevel(0.9);
Adding Effect to the Node
Finally, you can apply the required effect to the node using the setEffect() method. For example: To set the glow effect to the image node, you need to pass the object of the Glow class to this method as follows −
imageView.setEffect(glow);
Types of JavaFX Effects
The following table gives you the list of various effects (classes) provided by JavaFX. These classes exist in the package called javafx.scene.effect.
S.No
Effect and Description
1
Color AdjustYou can adjust the color of an image by applying the color adjust effect to it. This includes the adjustment of the hue, saturation, brightness and contrast on each pixelThe class named ColorAdjust of the package javafx.scene.effect represents the color adjust effect.
2
Color InputColor Input Effect gives the same output as drawing a rectangle and filling it with color. Unlike other effects, if this effect is applied to any node, it displays only a rectangular box (not the node). This effect is mostly used to pass as an input for other effects.The class named ColorInput of the package javafx.scene.effect represents the color input effect.
3
Image InputImage input effect in JavaFX just embeds an image to the JavaFX screen.Just like Color Input effect (It is used to pass the specified colored rectangular region as input to other effect), Image Input effect is used to pass the specified image as an input to another effect.The class named ImageInput of the package javafx.scene.effect represents the Image Input effect.
4
BlendIn general, blend means mixture of two or more different things or substances. If we apply this blend effect, it takes the pixels of two different inputs, at the same location and it produces a combined output based on the blend mode.The class named Blend of the package javafx.scene.effect represents the blend effect.
5
BloomOn applying bloom effect, pixels in some portions of the node are made to glow.The class named Bloom of the package javafx.scene.effect represents the bloom effect.
6
GlowJust like bloom, the Glow effect makes the given input image to glow, this effect makes the bright pixels of the input brighter.The class named Glow of the package javafx.scene.effect represents the glow effect.
7
Box BlurOn applying this blur effect to a node, it is made unclear. Box blur is a kind of blur effect provided by JavaFX. In this effect, when we apply blur to a node, a simple box filter is used.The class named BoxBlur of the package javafx.scene.effect represents the boxblur effect.
8
GaussianBlurJust like Box Blur Gaussian is an effect to blur the nodes in JavaFX. The only difference in the Gaussian Blur effect is that a Gaussian convolution kernel is used to produce a blurring effect.The class named GaussianBlur of the package javafx.scene.effect represents the Gaussian Blur effect.
9
MotionBlurJust like Gaussian Effects, Motion Blur is an effect to blur the nodes in JavaFX. It also uses a Gaussian convolution kernel to produce a blurring effect, but the difference is in this effect the Gaussian convolution kernel is used with a specified angle.The class named MotionBlur of the package javafx.scene.effect represents the Motion Blur effect.
10
ReflectionOn applying the reflection effect to a node in JavaFX, a reflection of it is added at the bottom of the node.The class named Reflection of the package javafx.scene.effect represents the reflection effect.
11
SepiaToneOn applying the Sepia tone effect to a node in JavaFX (image in general), it is toned with a reddish brown color.The class named SepiaTone of the package javafx.scene.effect represents the sepia tone effect.
12
ShadowThis effect creates a duplicate of the specified node with blurry edges.The class named Shadow of the package javafx.scene.effect represents the sepia tone effect.
13
DropShadowOn applying this effect to a node, a shadow will be created behind the specified node.The class named DropShadow of the package javafx.scene.effect represents the drop shadow effect.
14
InnerShadowOn applying this effect to a node, a shadow will be created inside the edges of the node.The class named InnerShadow of the package javafx.scene.effect represents the inner shadow effect.
15
LightingThe lighting effect is used to simulate a light from a light source. There are different kinds of light sources namely point, distant and spot.The class named Lighting of the package javafx.scene.effect represents the lighting effect.
16
Light.DistantOn applying this effect to a node, a light is simulated on it, as if it is being generated by a distant light source.Distant Light Source − A source which is at a far distance from the node. In here, the light is attenuated in one direction from the source.The class named Light.Distant of the package javafx.scene.effect represents the distant light source.
17
Light.SpotOn applying this effect to a node, a light is simulated on it, as if it is being generated by a spot light.Spot light Source − The light from this source attenuates in all directions. The intensity of the light depends on the distance of the object from the source.The class named Light.Spot of the package javafx.scene.effect represents the distant light source.
18
Point.SpotOn applying this effect to a node, a light is simulated on it, as if it is being generated by a point light source.Point Light Source − The light from this source attenuates in all directions from a single point. The intensity of the light depends on the distance of the object from the source.The class named Point.Spot of the package javafx.scene.effect represents the point light.
A JavaFX application can consist of a lot of elements including all kinds of media like images, videos, GIFs, and all dimensional shapes, text, etc. This is to improve the quality of user experience with the application. All these elements are represented by nodes on a JavaFX scene graph.
Previously, we have learned how to create both 2D and 3D shapes. But you can also create a Text element in JavaFX applications. The Text element is represented by a separate node and it can be altered with respect to its font, size, color, and some other properties.
In this chapter, we will learn how to display a Text node on an application using JavaFX.
JavaFX Text Node
The text node in JavaFX is represented by the class named Text, which belongs to the package javafx.scene.text.
This class contains several properties to create text in JavaFX and modify its appearance. This class also inherits the Shape class which belongs to the package javafx.scene.shape.
Therefore, in addition to the properties of the text like font, alignment, line spacing, text, etc. It also inherits the basic shape node properties such as strokeFill, stroke, strokeWidth, strokeType etc.
Creating a Text Node
Since the class Text of the package javafx.scene.text represents the text node in JavaFX, you can create a text by instantiating this class as follows −
Text text =newText();
The class Text contains a property named text of string type, which represents the text that is to be created.
After instantiating the Text class, you need to set value to this property using the setText() method as shown below.
String text ="Hello how are you"Text.setText(text);
You can also set the position (origin) of the text by specifying the values to the properties x and y using their respective setter methods namely setX() and setY() as shown in the following code block −
text.setX(50);
text.setY(50);
Example
The following program is an example demonstrating how to create a text node in JavaFX. Save this code in a file with name TextExample.java.
importjavafx.application.Application;importjavafx.scene.Group;importjavafx.scene.Scene;importjavafx.stage.Stage;importjavafx.scene.text.Text;publicclassTextExampleextendsApplication{@Overridepublicvoidstart(Stage stage){//Creating a Text object Text text =newText();//Setting the text to be added.
text.setText("Hello how are you");//setting the position of the text
text.setX(50);
text.setY(50);//Creating a Group object Group root =newGroup(text);//Creating a scene object Scene scene =newScene(root,600,300);//Setting title to the Stage
stage.setTitle("Sample Application");//Adding scene to the stage
stage.setScene(scene);//Displaying the contents of the stage
stage.show();}publicstaticvoidmain(String args[]){launch(args);}}</code></pre>
Compile and execute the saved java file from the command prompt using the following commands.
On executing, the above program generates a JavaFX window displaying the specified text as follows −
Example
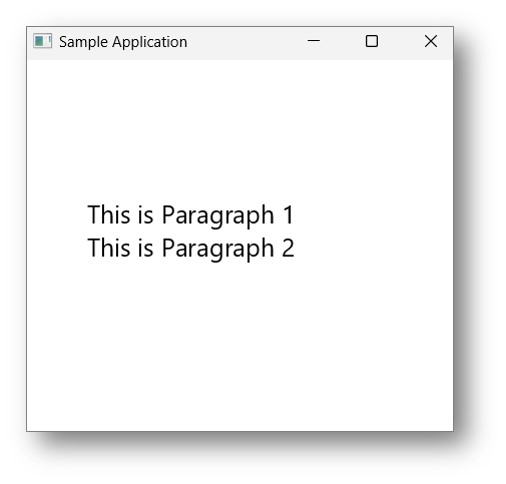
Let us see another example where we are trying to create a text node by applying various properties like Font, size, alignment, etc. on the said text. Save this code in a file with name TextExample1.java.
importjavafx.application.Application;importjavafx.scene.Group;importjavafx.scene.Scene;importjavafx.stage.Stage;importjavafx.scene.text.*;publicclassTextExample1extendsApplication{@Overridepublicvoidstart(Stage stage){//Creating a Text object Text text =newText();
text.setFont(newFont(20));
text.setWrappingWidth(200);
text.setTextAlignment(TextAlignment.JUSTIFY);
text.setText("This is Paragraph 1\nThis is Paragraph 2");//setting the position of the text
text.setX(50);
text.setY(130);//Creating a Group object Group root =newGroup(text);//Creating a scene object Scene scene =newScene(root,600,300);//Setting title to the Stage
stage.setTitle("Sample Application");//Adding scene to the stage
stage.setScene(scene);//Displaying the contents of the stage
stage.show();}publicstaticvoidmain(String args[]){launch(args);}}</code></pre>
Compile and execute the saved java file from the command prompt using the following commands.
On executing, the above program generates a JavaFX window displaying the specified text as follows −
Position & Font of a Text node
You can also add a Text Node in a JavaFX application. However, any text that can be added has some default values set to it, like the size of text, font, and its color (which is black). However, it becomes necessary to change the default values, as they are not suitable for all scenarios.
For instance, the default position of a text node in JavaFX application starts from the beginning of the screen. But, when the text content is longer and it goes out of display range, there arises a need to change its position to display all the content properly.
Changing the position and font of text will also allow the user to develop an application as per their own requirements.
The setFont() Method
You can change the font size and color of the text using the setFont() method. This method accepts an object of the Font class.
The class named Font of the package javafx.scene.text is used to define the font for the text. This class contains a static method named font().
This method accepts four parameters namely −
family − This is of a String type and represents the family of the font that we want to apply to the text.
weight − This property represents the weight of the font. It accepts 9 values, which are − FontWeight.BLACK, FontWeight.BOLD, FontWeight.EXTRA_BOLD, FontWeight.EXTRA_LIGHT, LIGHT, MEDIUM, NORMAL, SEMI_BOLD, THIN.
posture − This property represents the font posture (regular or italic). It accepts two values FontPosture.REGULAR and FontPosture.ITALIC.
size − This property is of type double and it represents the size of the font.
You can set font to the text by using the following method −
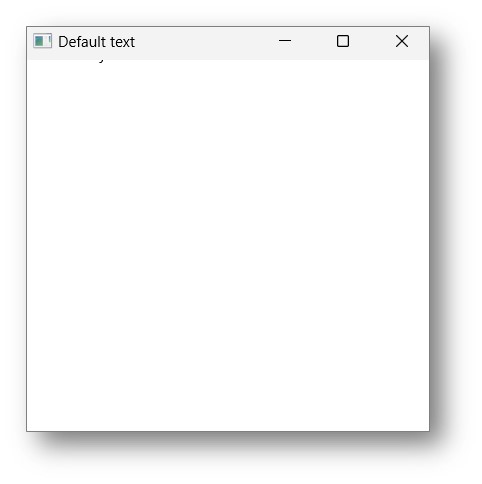
Before trying to set the desired position and font, let us see a program with default properties of a text node in a JavaFX application.
Save this code in a file with the name TextDefault.java.
importjavafx.application.Application;importjavafx.scene.Group;importjavafx.scene.Scene;importjavafx.stage.Stage;importjavafx.scene.text.*;publicclassTextDefaultextendsApplication{@Overridepublicvoidstart(Stage stage){//Creating a Text object Text text =newText();//Setting the text to be added.
text.setText("Hi how are you");//Creating a Group object Group root =newGroup(text);//Creating a scene object Scene scene =newScene(root,600,300);//Setting title to the Stage
stage.setTitle("Default text");//Adding scene to the stage
stage.setScene(scene);//Displaying the contents of the stage
stage.show();}publicstaticvoidmain(String args[]){launch(args);}}</code></pre>
Compile and execute the saved Java file from the command prompt using the following commands.
On executing, the above program generates a JavaFX window displaying the text with its default properties.
As you can see, the text is not correctly displayed within the application, hence, prompting the need for setting position and font properties.
Example
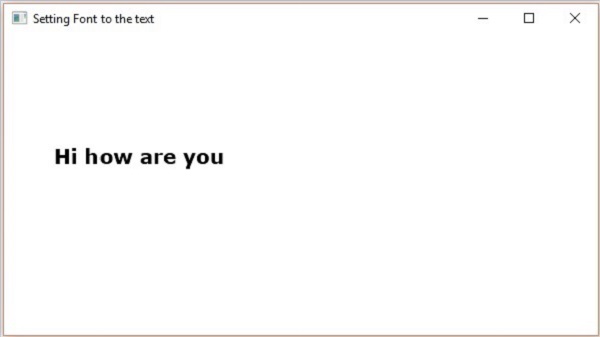
The following program is an example demonstrating how to set font of the text node in JavaFX. In here, we are setting the font to Verdana, weight to bold, posture to regular and size to 20.
Save this code in a file with the name TextFontExample.java.
importjavafx.application.Application;importjavafx.scene.Group;importjavafx.scene.Scene;importjavafx.stage.Stage;importjavafx.scene.text.Font;importjavafx.scene.text.FontPosture;importjavafx.scene.text.FontWeight;importjavafx.scene.text.Text;publicclassTextFontExampleextendsApplication{@Overridepublicvoidstart(Stage stage){//Creating a Text object Text text =newText();//Setting font to the text
text.setFont(Font.font("verdana",FontWeight.BOLD,FontPosture.REGULAR,20));//setting the position of the text
text.setX(50);
text.setY(130);//Setting the text to be added.
text.setText("Hi how are you");//Creating a Group object Group root =newGroup(text);//Creating a scene object Scene scene =newScene(root,600,300);//Setting title to the Stage
stage.setTitle("Setting Font to the text");//Adding scene to the stage
stage.setScene(scene);//Displaying the contents of the stage
stage.show();}publicstaticvoidmain(String args[]){launch(args);}}</code></pre>
Compile and execute the saved java file from the command prompt using the following commands.
On executing, the above program generates a JavaFX window displaying the text with the specified font as follows −
Learn Java in-depth with real-world projects through our Java certification course. Enroll and become a certified expert to boost your career.
Stroke and Color of a Text node
Every node in JavaFX has some default values assigned to it, in regards to the way they are displayed and positioned. For instance, any 3D shape like box, cylinder, sphere etc. has a diffuse color of light gray as its default color.
You can also change such default values of a JavaFX Text node. A Text node can be designed in various ways: underlined, bold, italic, the text can be written with either double strokes, or wider strokes, etc. All these improvements can be made with the JavaFX Application as well.
The setFill() Method
The Text class also inherits the class Shape of the package. Therefore, you can use javafx.scene.shape with which you can set the stroke and color to the text node too.
You can set the color to the text using the setFill() method of the shape (inherited) class as follows −
text.setFill(Color.BEIGE);
Similarly, you can set the stroke color of the text using the method setStroke(). While the width of the stroke can be set using the method setStrokeWidth() as follows −
//Setting the color
text.setFill(Color.BROWN);//Setting the Stroke
text.setStrokeWidth(2);//Setting the stroke color
text.setStroke(Color.BLUE);
Example
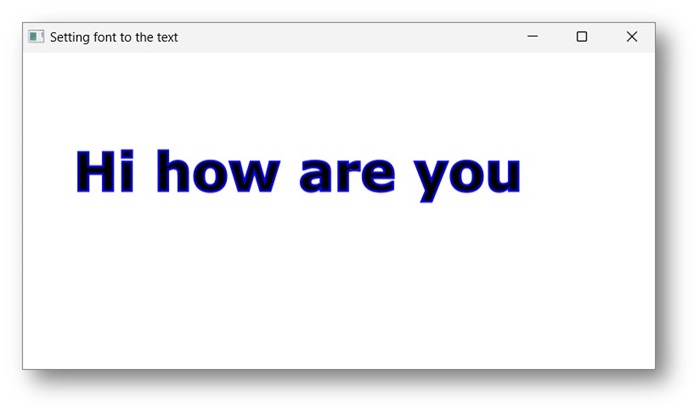
The following program is an example that demonstrates how to set the strokeWidth of the text node. In this code, we are setting the stroke width to "2".
Save this code in a file with the name StrokeExample.java.
importjavafx.application.Application;importjavafx.scene.Group;importjavafx.scene.Scene;importjavafx.stage.Stage;importjavafx.scene.paint.Color;importjavafx.scene.text.Font;importjavafx.scene.text.FontPosture;importjavafx.scene.text.FontWeight;importjavafx.scene.text.Text;publicclassStrokeExampleextendsApplication{@Overridepublicvoidstart(Stage stage){//Creating a Text object Text text =newText();//Setting font to the text
text.setFont(Font.font("verdana",FontWeight.BOLD,FontPosture.REGULAR,50));//setting the position of the text
text.setX(50);
text.setY(130);//Setting the Stroke
text.setStrokeWidth(2);// Setting the stroke color
text.setStroke(Color.BLUE);//Setting the text to be added.
text.setText("Hi how are you");//Creating a Group object Group root =newGroup(text);//Creating a scene object Scene scene =newScene(root,600,300);//Setting title to the Stage
stage.setTitle("Setting font to the text");//Adding scene to the stage
stage.setScene(scene);//Displaying the contents of the stage
stage.show();}publicstaticvoidmain(String args[]){launch(args);}}</code></pre>
Compile and execute the saved java file from the command prompt using the following commands.
On executing, the above program generates a JavaFX window displaying the text with the specified stroke and color attributes as follows −
Example
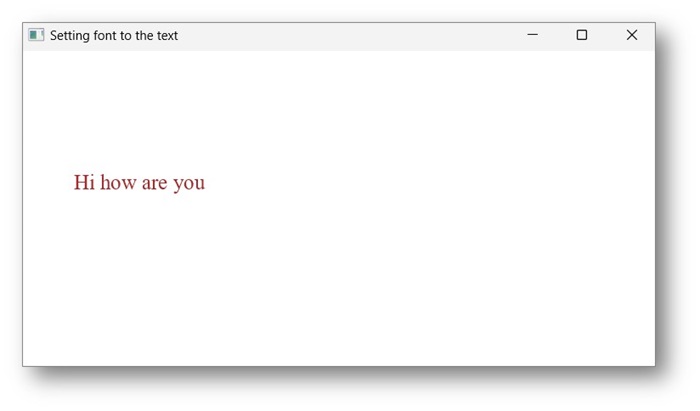
Let us try to color the Save this code in a file with the name ColorExample.java.
importjavafx.application.Application;importjavafx.scene.Group;importjavafx.scene.Scene;importjavafx.scene.paint.Color;importjavafx.stage.Stage;importjavafx.scene.text.*;publicclassColorExampleextendsApplication{@Overridepublicvoidstart(Stage stage){//Creating a Text object Text text =newText();//Setting font to the text
text.setFont(Font.font("Times New Roman",FontWeight.LIGHT,FontPosture.REGULAR,20));//setting the position of the text
text.setX(50);
text.setY(130);//Setting the color
text.setFill(Color.BROWN);//Setting the text to be added.
text.setText("Hi how are you");//Creating a Group object Group root =newGroup(text);//Creating a scene object Scene scene =newScene(root,600,300);//Setting title to the Stage
stage.setTitle("Setting font to the text");//Adding scene to the stage
stage.setScene(scene);//Displaying the contents of the stage
stage.show();}publicstaticvoidmain(String args[]){launch(args);}}</code></pre>
Compile and execute the saved java file from the command prompt using the following commands.
On executing, the above program generates a JavaFX window displaying the text with the specified stroke and color attributes as follows −
Applying Decorations to a Text node
You can also apply decorations such as strike through, in which case a line is passed through the text, and underlining a text using the methods of the Text class.
You can strike through the text using the method setStrikethrough(). This accepts a Boolean value, pass the value true to this method to strike through the text as shown in the following code box −
//Striking through the text
text1.setStrikethrough(true);
In the same way, you can underline a text by passing the value true to the method setUnderLine() as follows −
//underlining the text
text2.setUnderline(true);
Example
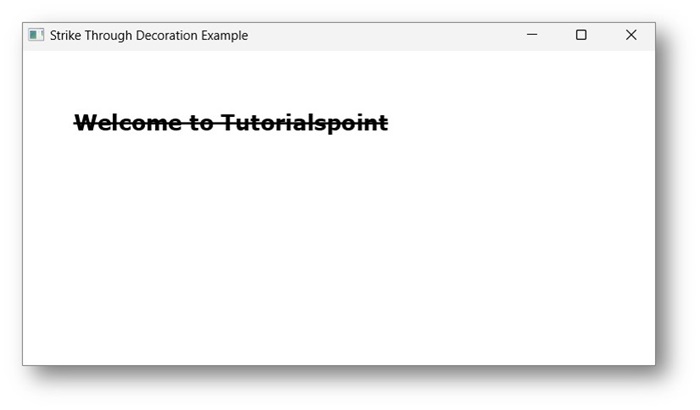
The following program is an example demonstrating how to apply strike through decoration to a text. Save this code in a file with the name StrikeThroughExample.java.
importjavafx.application.Application;importjavafx.scene.Group;importjavafx.scene.Scene;importjavafx.stage.Stage;importjavafx.scene.text.*;publicclassStrikeThroughExampleextendsApplication{@Overridepublicvoidstart(Stage stage){//Creating a Text_Example object Text text1 =newText("Welcome to Tutorialspoint");//Setting font to the text
text1.setFont(Font.font("verdana",FontWeight.BOLD,FontPosture.REGULAR,20));//setting the position of the text
text1.setX(50);
text1.setY(75);//strike through the text
text1.setStrikethrough(true);//Creating a Group object Group root =newGroup(text1);//Creating a scene objectScene scene =newScene(root,600,300);//Setting title to the Stage
stage.setTitle("Strike Through Decoration Example");//Adding scene to the stage
stage.setScene(scene);//Displaying the contents of the stage
stage.show();}publicstaticvoidmain(String args[]){launch(args);}}</code></pre>
Compile and execute the saved Java file from the command prompt using the following commands.
On executing, the above program generates a JavaFX window as shown below −
Example
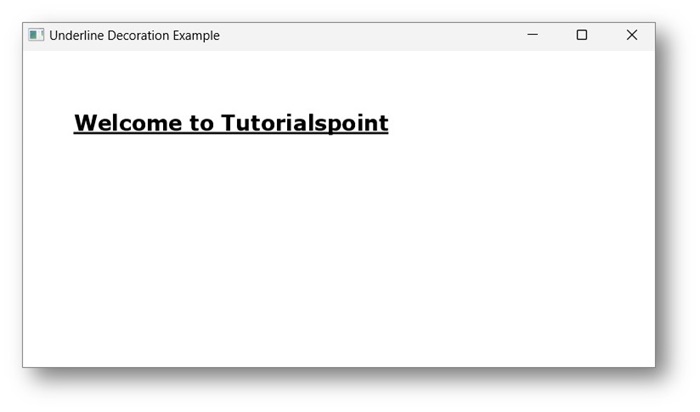
The following program is an example demonstrating how to apply underline decoration to a text. Save this code in a file with the name UnderlinesExample.java.
importjavafx.application.Application;importjavafx.scene.Group;importjavafx.scene.Scene;importjavafx.stage.Stage;importjavafx.scene.text.*;publicclassUnderlinesExampleextendsApplication{@Overridepublicvoidstart(Stage stage){//Creating a Text_Example object Text text1 =newText("Welcome to Tutorialspoint");//Setting font to the text
text1.setFont(Font.font("verdana",FontWeight.BOLD,FontPosture.REGULAR,20));//setting the position of the text
text1.setX(50);
text1.setY(75);//underlining the text
text1.setUnderline(true);//Creating a Group object Group root =newGroup(text1);//Creating a scene objectScene scene =newScene(root,600,300);//Setting title to the Stage
stage.setTitle("Underline Decoration Example");//Adding scene to the stage
stage.setScene(scene);//Displaying the contents of the stage
stage.show();}publicstaticvoidmain(String args[]){launch(args);}}</code></pre>
Compile and execute the saved Java file from the command prompt using the following commands.