Category: 01. Java Digital Image Processing

https://cdn3d.iconscout.com/3d/premium/thumb/image-processing-chip-3d-icon-download-in-png-blend-fbx-gltf-file-formats–processor-artificial-intelligence-pack-science-technology-icons-8306835.png?f=webp

  • Image Compression Technique

    An image can easily be compressed and stored through Java. Compression of image involves converting an image into jpg and storing it.

    In order to compress an image, we read the image and convert into BufferedImage object.

    Further, we get an ImageWriter from getImageWritersByFormatName() method found in the ImageIO class. From this ImageWriter, create an ImageWriteParam object. Its syntax is given below −

    Iterator<ImageWriter> list = ImageIO.getImageWritersByFormatName("jpg");
    ImageWriteParam obj = writer_From_List.getDefaultWriteParam();
    

    From this ImageWriteParam object, you can set the compression by calling these two methods which are setCompressionMode() and setCompressionQuality(). Their syntaxes are as given below −

    obj.setCompressionMode(ImageWriteParam.MODE_EXPLICIT);
    obj.setCompressionQuality(0.05f);
    

    The setCompressionMode() method takes Mode_EXPLICIT as the parameter. Some of the other MODES are described briefly −

    Sr.No.Modes
    1MODE_DEFAULTIt is a constant value that may be passed into methods to enable that feature for future writes.
    2MODE_DISABLEDIt is a constant value that may be passed into methods to disable that feature for future writes.
    3MODE_EXPLICITIt is a constant value that may be passed into methods to enable that feature for future writes.

    Apart from the compressions methods, there are other methods provided by the ImageWriteParam class. They are described briefly −

    Sr.No.Method & Description
    1canOffsetTiles()It returns true if the writer can perform tiling with non-zero grid offsets while writing.
    2getBitRate(float quality)It returns a float indicating an estimate of the number of bits of output data for each bit of input image data at the given quality level.
    3getLocale()It returns the currently set Locale, or null if only a default Locale is supported.
    4isCompressionLossless()It returns true if the current compression type provides lossless compression.
    5unsetCompression()It removes any previous compression type and quality settings.
    6unsetTiling()It removes any previous tile grid parameters specified by calls to setTiling.

    Example

    The following example demonstrates the use of ImageWriteParam class to compress an image −

    import java.io.*;
    import java.util.*;
    import java.awt.image.*;
    
    import javax.imageio.*;
    import javax.imageio.stream.ImageOutputStream;
    
    class Compression {
    
       public static void main(String[] args) throws IOException {
       
    
      File input = new File("digital_image_processing.jpg");
      BufferedImage image = ImageIO.read(input);
      File compressedImageFile = new File("compress.jpg");
      OutputStream os =new FileOutputStream(compressedImageFile);
      Iterator&lt;ImageWriter&gt;writers =  ImageIO.getImageWritersByFormatName("jpg");
      ImageWriter writer = (ImageWriter) writers.next();
      ImageOutputStream ios = ImageIO.createImageOutputStream(os);
      writer.setOutput(ios);
      ImageWriteParam param = writer.getDefaultWriteParam();
      
      param.setCompressionMode(ImageWriteParam.MODE_EXPLICIT);
      param.setCompressionQuality(0.05f);
      writer.write(null, new IIOImage(image, null, null), param);
      
      os.close();
      ios.close();
      writer.dispose();
    } }

    Output

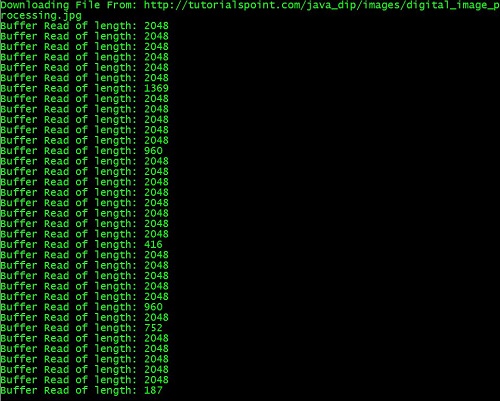
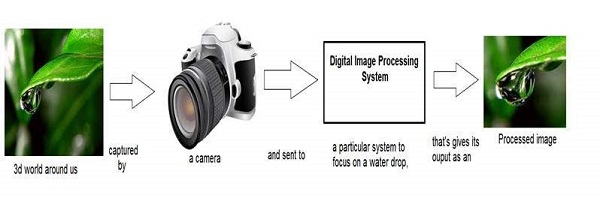
    When you execute the given code, it compresses the image digital_image_processing.jpg to its equivalent compressed image and writes it on the hard disk with the name compress.jpg.
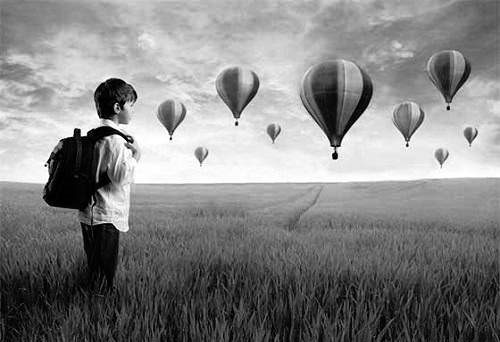
    Original Image

    Image Compression Technique Tutorials

    Compressed Image – Quality Factor − 0.05

    Image Compression Technique Tutorials

    Compressed Image – Quality Factor − 0.5

    Image Compression Technique Tutorials
  • Enhancing Image Sharpness

    In this chapter we learn to increase the sharpness of an image using Gaussian filter.

    First we use OpenCV function GaussianBlur. It can be found under Imgproc package. Its syntax is given below −

    Imgproc.GaussianBlur(source, destination, new Size(0,0), sigmaX);
    

    The parameters are described briefly −

    Sr.No.Parameter & Description
    1sourceIt is source image.
    2destinationIt is destination image.
    3SizeIt is Gaussian kernel size.
    4sigmaXIt is Gaussian kernel standard deviation in X direction.

    Further, we use OpenCV function addWeighted to apply image watermark to image. It can be found under Core package. Its syntax is given below −

    Core.addWeighted(InputArray src1, alpha, src2, beta, gamma, OutputArray dst);
    

    The parameters of this function are described below −

    Sr.No.Parameter & Description
    1src1It is first input array.
    2alphaIt is weight of the first array elements.
    3src2It is second input array of the same size and channel number as src1.
    4BetaIt is weight of the second array elements.
    5gammaIt is scalar added to each sum.
    6dstIt is output array that has the same size and number of channels as the input arrays.

    Apart from the GaussianBlur method, there are other methods provided by the Imgproc class. They are described briefly −

    Sr.No.Method & Description
    1cvtColor(Mat src, Mat dst, int code, int dstCn)It converts an image from one color space to another.
    2dilate(Mat src, Mat dst, Mat kernel)It dilates an image by using a specific structuring element.
    3equalizeHist(Mat src, Mat dst)It equalizes the histogram of a grayscale image.
    4filter2D(Mat src, Mat dst, int depth, Mat kernel, Point anchor, double delta)It convolves an image with the kernel.
    5GaussianBlur(Mat src, Mat dst, Size ksize, double sigmaX)It blurs an image using a Gaussian filter.
    6integral(Mat src, Mat sum)It calculates the integral of an image.

    Example

    The following example demonstrates the use of Imgproc and Core class to apply sharpening to an image −

    import org.opencv.core.Core;
    import org.opencv.core.Mat;
    import org.opencv.core.Size;
    import org.opencv.highgui.Highgui;
    import org.opencv.imgproc.Imgproc;
    
    public class Main {
       public static void main( String[] args ) {
    
      try{
         System.loadLibrary( Core.NATIVE_LIBRARY_NAME );
         Mat source = Highgui.imread("digital_image_processing.jpg",
         Highgui.CV_LOAD_IMAGE_COLOR);
         Mat destination = new Mat(source.rows(),source.cols(),source.type());
         Imgproc.GaussianBlur(source, destination, new Size(0,0), 10);
         Core.addWeighted(source, 1.5, destination, -0.5, 0, destination);
         Highgui.imwrite("sharp.jpg", destination);
      } catch (Exception e) {
      }
    } }

    Output

    When you execute the given code, the following output is seen −

    Original Image

    Sharped Image

  • Enhancing Image Contrast

    In this chapter learn how to enhance the contrast of an image using histogram equalization.

    We use the OpenCV function equalizeHist() method. It can be found under Imgproc package. Its syntax is given below −

    Imgproc.equalizeHist(source, destination);
    

    The parameters are described below −

    Sr.No.Parameter & Description
    1SourceIt is 8-bit single channel source image.
    2DestinationIt is the destination image.

    Apart from the equalizeHist() method, there are other methods provided by the Imgproc class. They are described briefly −

    Sr.No.Method & Description
    1cvtColor(Mat src, Mat dst, int code, int dstCn)It converts an image from one color space to another.
    2dilate(Mat src, Mat dst, Mat kernel)It dilates an image by using a specific structuring element.
    3equalizeHist(Mat src, Mat dst)It equalizes the histogram of a grayscale image.
    4filter2D(Mat src, Mat dst, int ddepth, Mat kernel, Point anchor, double delta)It convolves an image with the kernel.
    5GaussianBlur(Mat src, Mat dst, Size ksize, double sigmaX)It blurs an image using a Gaussian filter.
    6integral(Mat src, Mat sum)It calculates the integral of an image.

    Example

    The following example demonstrates the use of Imgproc class to enhance contrast of an image −

    import org.opencv.core.Core;
    import org.opencv.core.Mat;
    import org.opencv.highgui.Highgui;
    import org.opencv.imgproc.Imgproc;
    
    public class Main {
    
       static int width;
       static int height;
       static double alpha = 2;
       static double beta = 50;
       
       public static void main( String[] args ) {
       
    
      try {
         System.loadLibrary( Core.NATIVE_LIBRARY_NAME );
         Mat source = Highgui.imread("grayscale.jpg", 
         Highgui.CV_LOAD_IMAGE_GRAYSCALE);
         Mat destination = new Mat(source.rows(),source.cols(),source.type());
         
         Imgproc.equalizeHist(source, destination);
         Highgui.imwrite("contrast.jpg", destination);
         
      } catch (Exception e) {
         System.out.println("error: " + e.getMessage());
      }
    } }

    Output

    When you execute the given code, the following output is seen −

    Original Image

    Enhanced Contrast Image

  • GrayScale Conversion

    In order to convert a color image to Grayscale image, you need to read pixels or data of the image using File and ImageIO objects, and store the image in BufferedImage object. Its syntax is given below −

    File input = new File("digital_image_processing.jpg");
    BufferedImage image = ImageIO.read(input);	
    

    Further, get the pixel value using method getRGB() and perform GrayScale() method on it. The method getRGB() takes row and column index as parameter.

    Color c = new Color(image.getRGB(j, i));
    int red = (c.getRed() * 0.299);
    int green =(c.getGreen() * 0.587);
    int blue = (c.getBlue() *0.114);
    

    Apart from these three methods, there are other methods available in the Color class as described briefly −

    Sr.No.Method & Description
    1brighter()It creates a new Color that is a brighter version of this Color.
    2darker()It creates a new Color that is a darker version of this Color.
    3getAlpha()It returns the alpha component in the range 0-255.
    4getHSBColor(float h, float s, float b)It creates a Color object based on the specified values for the HSB color model.
    5HSBtoRGB(float hue, float saturation, float brightness)It converts the components of a color, as specified by the HSB model, to an equivalent set of values for the default RGB model.
    6toString()It returns a string representation of this Color.

    The last step is to add all these three values and set it again to the corresponding pixel value. Its syntax is given below −

    int sum = red+green+blue;
    Color newColor = new Color(sum,sum,sum);
    image.setRGB(j,i,newColor.getRGB());
    

    Example

    The following example demonstrates the use of Java BufferedImage class that converts an image to Grayscale −

    import java.awt.*;
    import java.awt.image.BufferedImage;
    
    import java.io.*;
    
    import javax.imageio.ImageIO;
    import javax.swing.JFrame;
    
    public class GrayScale {
    
       BufferedImage  image;
       int width;
       int height;
       
       public GrayScale() {
       
    
      try {
         File input = new File("digital_image_processing.jpg");
         image = ImageIO.read(input);
         width = image.getWidth();
         height = image.getHeight();
         
         for(int i=0; i&lt;height; i++) {
         
            for(int j=0; j&lt;width; j++) {
            
               Color c = new Color(image.getRGB(j, i));
               int red = (int)(c.getRed() * 0.299);
               int green = (int)(c.getGreen() * 0.587);
               int blue = (int)(c.getBlue() *0.114);
               Color newColor = new Color(red+green+blue,
               
               red+green+blue,red+green+blue);
               
               image.setRGB(j,i,newColor.getRGB());
            }
         }
         
         File ouptut = new File("grayscale.jpg");
         ImageIO.write(image, "jpg", ouptut);
         
      } catch (Exception e) {}
    } static public void main(String args[]) throws Exception {
      GrayScale obj = new GrayScale();
    } }

    Output

    When you execute the given example, it converts the image digital_image_processing.jpg to its equivalent Grayscale image and write it on hard disk with the name grayscale.jpg.

    Original Image

    Grayscale Image

  • Image Pixels

    An image contains a two dimensional array of pixels. It is actually the value of those pixels that make up an image. Usually an image could be color or grayscale.

    In Java, the BufferedImage class is used to handle images. You need to call getRGB() method of the BufferedImage class to get the value of the pixel.

    Getting Pixel Value

    The pixel value can be received using the following syntax−

    Color c = new Color(image.getRGB(j, i));
    

    Getting RGB Values

    The method getRGB() takes the row and column index as a parameter and returns the appropriate pixel. In case of color image, it returns three values which are (Red, Green, Blue). They can be get as follows−

    c.getRed();
    c.getGreen();
    c.getBlue();
    

    Learn Java in-depth with real-world projects through our Java certification course. Enroll and become a certified expert to boost your career.

    Getting Width and Height of Image

    The height and width of the image can be get by calling the getWidth() and getHeight() methods of the BufferedImage class. Its syntax is given below−

    int width = image.getWidth();
    int height = image.getHeight();
    

    Apart from these methods, there are other methods supported in the BufferedImage class. They are described briefly−

    Sr.No.Method & Description
    1copyData(WritableRaster outRaster)It computes an arbitrary rectangular region of the BufferedImage and copies it into a specified WritableRaster.
    2getColorModel()It returns ColorModel of an image.
    3getData()It returns the image as one large tile.
    4getData(Rectangle rect)It computes and returns an arbitrary region of the BufferedImage.
    5getGraphics()This method returns a Graphics2D, but is here for backwards compatibility.
    6getHeight()It returns the height of the BufferedImage.
    7getMinX()It returns the minimum x coordinate of this BufferedImage.
    8getMinY()It returns the minimum y coordinate of this BufferedImage.
    9getRGB(int x, int y)It returns an integer pixel in the default RGB color model (TYPE_INT_ARGB) and default sRGB colorspace.
    10getType()It returns the image type.

    Example

    The following example demonstrates the use of java BufferedImage class that displays pixels of an image of size (100 x 100)−

    import java.awt.*;
    import java.awt.image.BufferedImage;
    
    import java.io.*;
    
    import javax.imageio.ImageIO;
    import javax.swing.JFrame;
    
    class Pixel {
       BufferedImage image;
       int width;
       int height;
       
       public Pixel() {
    
      try {
         File input = new File("blackandwhite.jpg");
         image = ImageIO.read(input);
         width = image.getWidth();
         height = image.getHeight();
         
         int count = 0;
         
         for(int i=0; i&lt;height; i++) {
         
            for(int j=0; j&lt;width; j++) {
            
               count++;
               Color c = new Color(image.getRGB(j, i));
               System.out.println("S.No: " + count + " Red: " + c.getRed() +"  Green: " + c.getGreen() + " Blue: " + c.getBlue());
            }
         }
      } catch (Exception e) {}
    } static public void main(String args[]) throws Exception {
      Pixel obj = new Pixel();
    } }

    Output

    When you execute the above example, it would print the pixels of the following image −

    Original Image

    Understand Image Pixel Tutorial

    Pixels Output

    Understand Image Pixel Tutorial

    If you scroll down the ouput, the following pattern is seen−

    Understand Image Pixel Tutorial
  • Downloading & Uploading Images

    In this chapter we are going to see how you can download an image from internet, perform some image processing techniques on the image, and then again upload the processed image to a server.

    Downloading an Image

    In order to download an image from a website, we use java class named URL, which can be found under java.net package. Its syntax is given below −

    String website = "http://tutorialspoint.com";
    URL url = new URL(website);				
    

    Apart from the above method, there are other methods available in class URL as described briefly −

    Sr.No.Method & Description
    1public String getPath()It returns the path of the URL.
    2public String getQuery()It returns the query part of the URL.
    3public String getAuthority()It returns the authority of the URL.
    4public int getPort()It returns the port of the URL.
    5public int getDefaultPort()It returns the default port for the protocol of the URL.
    6public String getProtocol()It returns the protocol of the URL.
    7public String getHost()It returns the host of the URL.

    Example

    The following example demonstrates the use of java URL class to download an image from the internet −

    import java.io.FileOutputStream;
    import java.io.IOException;
    import java.io.InputStream;
    import java.io.OutputStream;
    
    import java.net.URL;
    
    public class Download {
    
       public static void main(String[] args) throws Exception {
       
    
      try{
         String fileName = "digital_image_processing.jpg";
         String website = "http://tutorialspoint.com/java_dip/images/"+fileName;
         
         System.out.println("Downloading File From: " + website);
         
         URL url = new URL(website);
         InputStream inputStream = url.openStream();
         OutputStream outputStream = new FileOutputStream(fileName);
         byte&#91;] buffer = new byte&#91;2048];
         
         int length = 0;
         
         while ((length = inputStream.read(buffer)) != -1) {
            System.out.println("Buffer Read of length: " + length);
            outputStream.write(buffer, 0, length);
         }
         
         inputStream.close();
         outputStream.close();
         
      } catch(Exception e) {
         System.out.println("Exception: " + e.getMessage());
      }
    } }

    Output

    When you execute the given above, the following output is seen.

    Downloading & Uploading Images Tutorial

    It would download the following image from the server.

    Uploading an Image

    Let us see how to upload an image to a webserver. We convert a BufferedImage to byte array in order to send it to server.

    We use Java class ByteArrayOutputStream, which can be found under java.io package. Its syntax is given below −

    ByteArrayOutputStream baos = new ByteArrayOutputStream();
    ImageIO.write(image, "jpg", baos);
    

    In order to convert the image to byte array, we use toByteArray() method of ByteArrayOutputStream class. Its syntax is given below −

    byte[] bytes = baos.toByteArray();
    

    Apart from the above method, there are other methods available in the ByteArrayOutputStream class as described briefly −

    Sr.No.Method & Description
    1public void reset()This method resets the number of valid bytes of the byte array output stream to zero, so that all the accumulated output in the stream is discarded.
    2public byte[] toByteArray()This method creates a newly allocated Byte array. Its size would be the current size of the output stream and the contents of the buffer will be copied into it. It returns the current contents of the output stream as a byte array.
    3public String toString()Converts the buffer content into a string. Translation will be done according to the default character encoding. It returns the String translated from the buffer’s content.
    4public void write(int w)It writes the specified array to the output stream.
    5public void write(byte []b, int of, int len)It writes len number of bytes starting from offset off to the stream.
    6public void writeTo(OutputStream outSt)It writes the entire content of this Stream to the specified stream argument.

    Example

    The following example demonstrates ByteArrayOutputStream to upload an image to the server −

    Client Code

    import javax.swing.*;  
    import java.net.*; 
    import java.awt.image.*;
    import javax.imageio.*;
    import java.io.*;
    import java.awt.image.BufferedImage;
    import java.io.ByteArrayOutputStream;
    import java.io.File;
    import java.io.IOException;
    import javax.imageio.ImageIO;
    
    public class Client{
       public static void main(String args[]) throws Exception{
       
    
      Socket soc;
      BufferedImage img = null;
      soc=new Socket("localhost",4000);
      System.out.println("Client is running. ");
      
      try {
         System.out.println("Reading image from disk. ");
         img = ImageIO.read(new File("digital_image_processing.jpg"));
         ByteArrayOutputStream baos = new ByteArrayOutputStream();
         
         ImageIO.write(img, "jpg", baos);
         baos.flush();
         
         byte&#91;] bytes = baos.toByteArray();
         baos.close();
         
         System.out.println("Sending image to server. ");
         
         OutputStream out = soc.getOutputStream(); 
         DataOutputStream dos = new DataOutputStream(out);
         
         dos.writeInt(bytes.length);
         dos.write(bytes, 0, bytes.length);
         
         System.out.println("Image sent to server. ");
         dos.close();
         out.close();
         
      } catch (Exception e) {
         System.out.println("Exception: " + e.getMessage());
         soc.close();
      }
      soc.close();
    } }

    Server Code

    import java.net.*;
    import java.io.*;
    import java.awt.image.*;
    
    import javax.imageio.*; 
    import javax.swing.*; 
    
    class Server {
       public static void main(String  args[]) throws Exception{
    
      ServerSocket server=null;
      Socket socket;
      server = new ServerSocket(4000);
      System.out.println("Server Waiting for image");
      socket = server.accept();
      System.out.println("Client connected.");
      
      InputStream in = socket.getInputStream();
      DataInputStream dis = new DataInputStream(in);
      int len = dis.readInt();
      System.out.println("Image Size: " + len/1024 + "KB");
      
      byte&#91;] data = new byte&#91;len];
      dis.readFully(data);
      dis.close();
      in.close();
      InputStream ian = new ByteArrayInputStream(data);
      BufferedImage bImage = ImageIO.read(ian);
      JFrame f = new JFrame("Server");
      ImageIcon icon = new ImageIcon(bImage);
      JLabel l = new JLabel();
      
      l.setIcon(icon);
      f.add(l);
      f.pack();
      f.setVisible(true);
    } }

    Output

    Client Side Output

    When you execute the client code, the following output appears on client side −

    downloading uploading images

    Server Side Output

    When you execute the server code, the following ouptut appears on server side −

    downloading uploading images

    After receiving the image, the server displays the image as shown below −

  • Java BufferedImage Class

    Java BufferedImage class is a subclass of Image class. It is used to handle and manipulate the image data. A BufferedImage is made of ColorModel of image data. All BufferedImage objects have an upper left corner coordinate of (0, 0).

    Constructors

    This class supports three types of constructors.

    The first constructor constructs a new BufferedImage with a specified ColorModel and Raster.

    BufferedImage(ColorModel cm, WritableRaster raster, 
    boolean isRasterPremultiplied, Hashtable<?,?> properties)
    

    The second constructor constructs a BufferedImage of one of the predefined image types.

    BufferedImage(int width, int height, int imageType)
    

    The third constructor constructs a BufferedImage of one of the predefined image types: TYPE_BYTE_BINARY or TYPE_BYTE_INDEXED.

    BufferedImage(int width, int height, int imageType, IndexColorModel cm)
    
    Sr.NoMethod & Description
    1copyData(WritableRaster outRaster)It computes an arbitrary rectangular region of the BufferedImage and copies it into a specified WritableRaster.
    2getColorModel()It returns object of class ColorModel of an image.
    3getData()It returns the image as one large tile.
    4getData(Rectangle rect)It computes and returns an arbitrary region of the BufferedImage.
    5getGraphics()This method returns a Graphics2D, retains backwards compatibility.
    6getHeight()It returns the height of the BufferedImage.
    7getMinX()It returns the minimum x coordinate of this BufferedImage.
    8getMinY()It returns the minimum y coordinate of this BufferedImage.
    9getRGB(int x, int y)It returns an integer pixel in the default RGB color model (TYPE_INT_ARGB) and default sRGB colorspace.
    10getType()It returns the image type.

    Example

    The following example demonstrates the use of java BufferedImage class that draw some text on the screen using Graphics Object −

    import java.awt.Graphics;
    import java.awt.Image;
    import java.awt.image.BufferedImage;
    
    import javax.swing.JFrame;
    import javax.swing.JPanel;
    
    public class Test extends JPanel {
    
       public void paint(Graphics g) {
    
      Image img = createImageWithText();
      g.drawImage(img, 20,20,this);
    } private Image createImageWithText() {
      BufferedImage bufferedImage = new BufferedImage(200,200,BufferedImage.TYPE_INT_RGB);
      Graphics g = bufferedImage.getGraphics();
      g.drawString("www.tutorialspoint.com", 20,20);
      g.drawString("www.tutorialspoint.com", 20,40);
      g.drawString("www.tutorialspoint.com", 20,60);
      g.drawString("www.tutorialspoint.com", 20,80);
      g.drawString("www.tutorialspoint.com", 20,100);
      
      return bufferedImage;
    } public static void main(String[] args) {
      JFrame frame = new JFrame();
      frame.getContentPane().add(new Test());
      frame.setDefaultCloseOperation(JFrame.EXIT_ON_CLOSE);
      frame.setSize(200, 200);
      frame.setVisible(true);
    } }

    Learn Java in-depth with real-world projects through our Java certification course. Enroll and become a certified expert to boost your career.

    Output

    When you execute the given code, the following output is seen −

    Java Buffered Image Tutorial
  • Introduction

    Digital Image Processing (DIP) deals with manipulation of digital images using a digital computer. It is a sub field of signals and systems but focuses particularly on images. DIP focuses on developing a computer system that is able to perform processing on an image. The input of such system is a digital image. The system processes the image using efficient algorithms, and gives an image as an output.

    Introduction Image

    Java is a high level programming language that is widely used in the modern world. It can support and handle digital image processing efficiently using various functions.