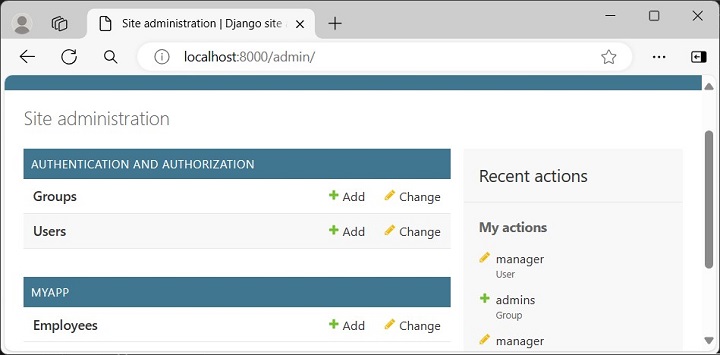
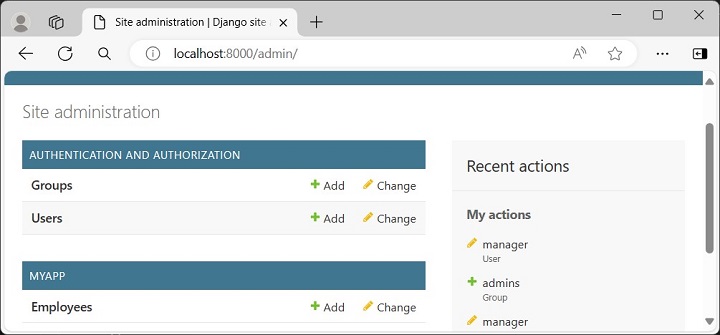
Once a model is registered with Django’s Admin app, we can easily perform CRUD operations on the model. In the previous chapter, we learned to register the Employee model. The homepage of admin site shows it under the MYAPP section −
Display The List of Objects
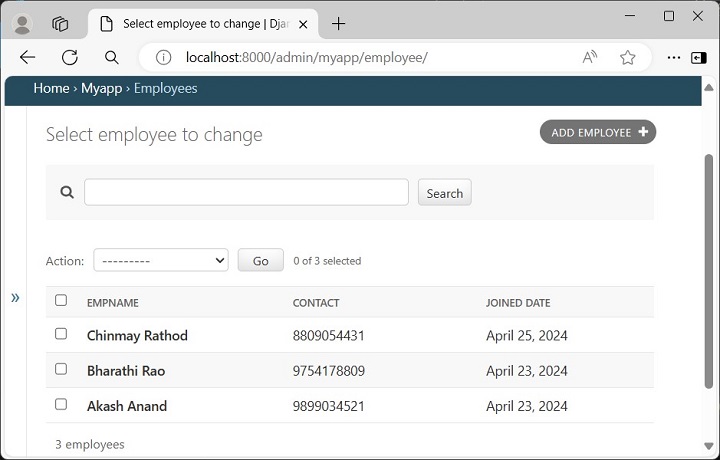
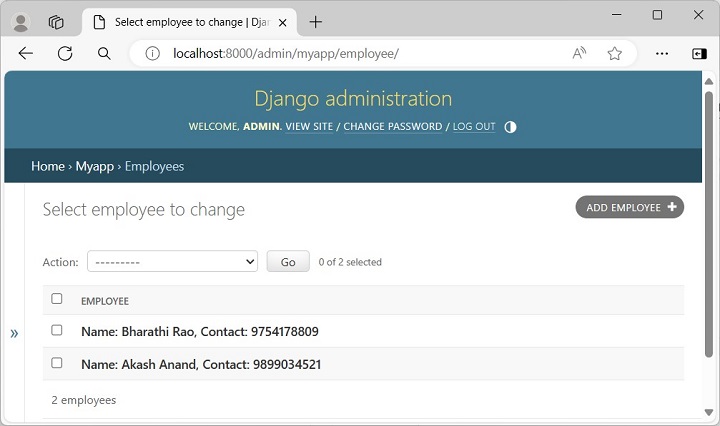
To display the list of objects, click on the name −
Add / Update / Delete an Object
To add/update/delete an object from the model, the current user must have been granted the required permission. Note that the superuser is equipped with all the permissions. Here, we assume that you have logged into the admin site with the superuser credentials.
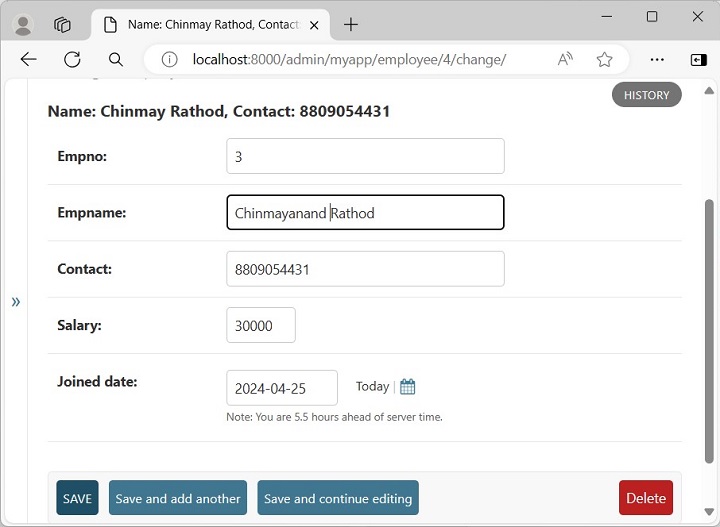
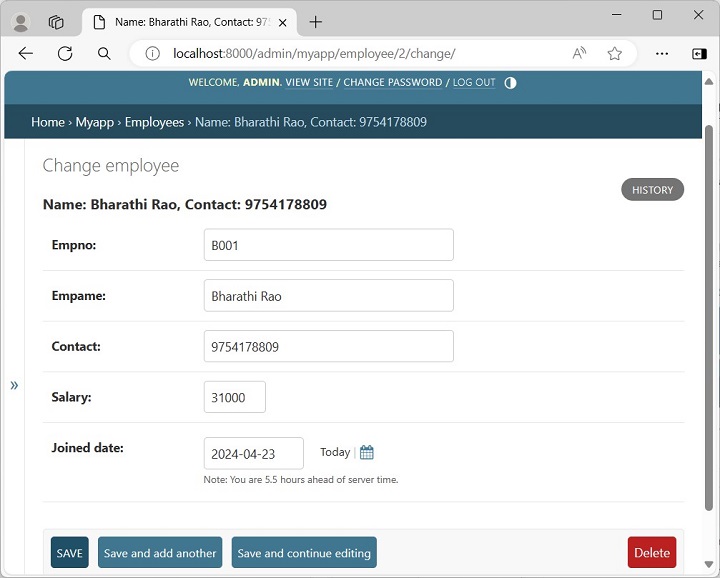
If you want to change the contents of any of the objects displayed in the above figure, just click on the corresponding row in the list.
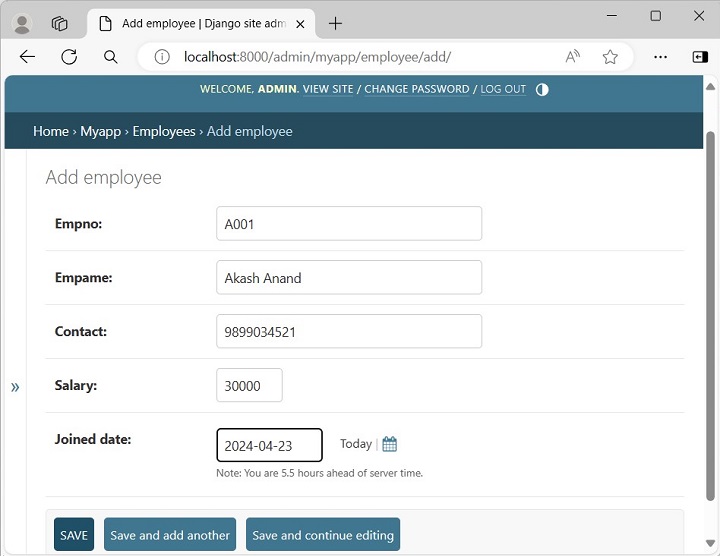
Let us open the object on the top of the list.
Let us update the values of Empname and Salary fields as shown. Click on the SAVE button, so that the corresponding row of the backend table is also updated.
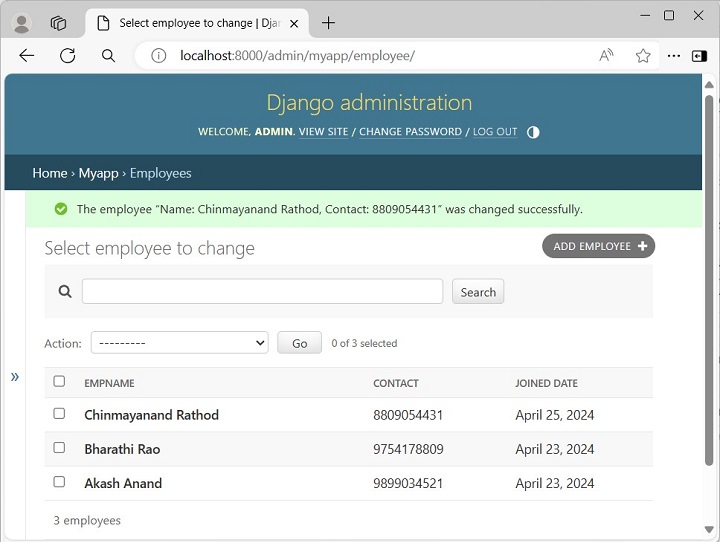
The list of objects reappears with the changes made being reflected.
Note that the admin interface lets you to add/update/delete an object from the model, but it is not possible to change the structure of the model from the admin interface.
To add/modify/delete any of the attributes of any model, you need to edit the class definition and perform migrations for the change to be propagated to the database table mapped to the object.
When a model is registered to Django’s Admin site, its list of objects is displayed when you click the name of the model.
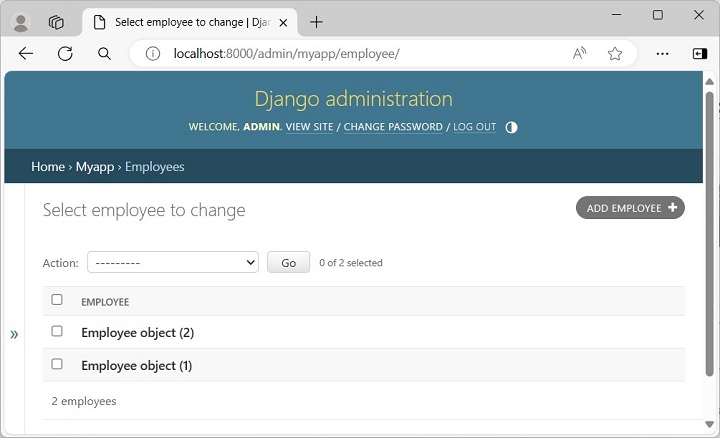
In the following figure, the list of objects in the Employees model is displayed −
However, the above page shows the objects in the form Employee object(1), which doesn’t reveal the attributes such as the name or contact, etc. To make the object description more user-friendly, we need to override the __str__() method in the employee model class.
The employee class is rewritten as below to give the alternate string representation of its object.
Make these changes to the model definition, and refresh the admin site’s homepage (Start the Django server if it isn’t already running).
Click the Employees model under MYAPP to display the employee object details −
If you click any of the object details, a form that shows the object attributes appears, and you can update the object or delete the object from here.
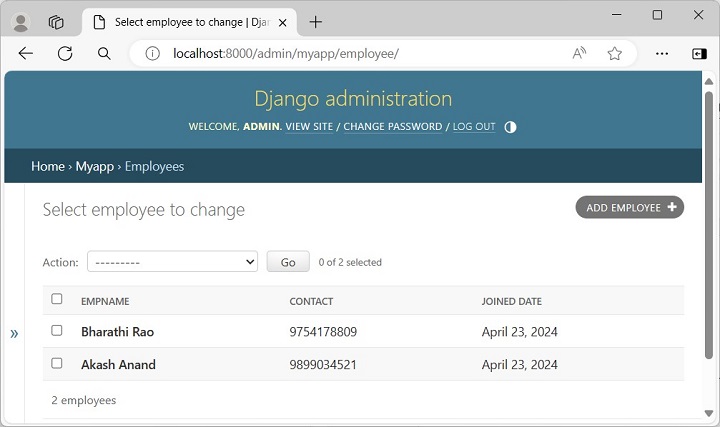
You can customize the "change list page" with the "list_display" attribute of an admin.ModelAdmin object that specifies what columns are shown in the change list.
The ModelAdmin class is the representation of a model in the admin interface. Usually, these are stored in a file called admin.py in your application.
Define the EmployeeAdmin class by inheriting from the ModelAdmin class. Set the list_display attribute as a tuple of the fields to be displayed.
from django.contrib import admin
# Register your models here.from.models import Employee
classEmployeeAdmin(admin.ModelAdmin):
list_display =("empname","contact","joined_date")
Register the EmployeeAdmin class as follows −
admin.site.register(Employee, EmployeeAdmin)
You can also register the model using the @admin.register() decorator −
from django.contrib import admin
# Register your models here.from.models import Employee
@admin.register(Employee)classEmployeeAdmin(admin.ModelAdmin):
list_display =("empname","contact","joined_date")
Save the above changes and refresh the Admin site to display the list of Employee objects −
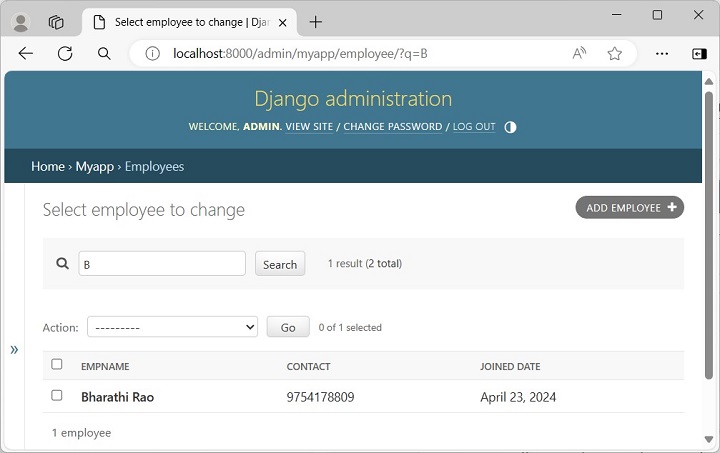
You can also provide a searching facility to the list page. Add search_fields attribute in the EmployeeAdmin class −
Now the list page shows a search field on the top. The search is based on employee’s name. The __startswith modifier restricts the search to names that begin with the search parameter.
Thus, the Django Admin interface is completely customizable. You can set the fields to be provided in the update form by providing the fields attribute in the admin class.
When a new project is initialized with the startproject command, Django automatically installs a few apps, the list of these apps can be found in the INSTALLED_APPS parameter of the project’s settings module.
To be able to log into the admin site, the models – Groups and Users are automatically registered with the Admin site.
Hence, as we log into the admin site at the URL http://localhost:8000/admin with the superuser credentials, we get to see the Groups and Users tables on the homepage.
However, the models declared in the other apps are not automatically registered. You need to do so in the “admin.py” module present in the app’s package folder.
First, we create a new Django app −
Python manage.py startapp myapp
Next, we include it in the list of INSTALLED_APPS.
This will now create the Employee model. We now have to add this model to the admin interface. For that, open the "admin.py" file, import the employee model, and call the admin.register() function.
from django.contrib import admin

# Register your models here.from.models import Employee

admin.site.register(Employee)
After taking these steps, start the Django server −
Python manage.py runserver
Open the browser and visit the admin URL http://localhost:8000/admin which will now show the newly registered model under MYAPP.
To add new employee objects, click the + Add button −
Click the Employees model to expand its collection −
The list above shows "Employee object (1)", "Employee object (2)" without any details as it is the default string representation of the object.
In order to display more meaningful representations, we can add a __str__() method in the employee model.
The Django framework readily provides a robust user management system. The users, groups, and permissions are managed both through the admin interface as well as programmatically.
When you create a new project with the startproject command, the admin and auth apps are added in the INSTALLED_APPS by default. All the user objects are stored in the “django.contrib.auth.models.User” model.
Assuming that the project has been created with the following command −
django-admin startproject myproject
The admin and auth apps are found in the list of INSTALLED_APPS in the settings module −
You need at least one user to be able to use the admin panel. The User objects are of the following types −
Superuser − A user object that can log into the admin site and possesses permissions to add/change/delete other users as well as perform CRUD operations on all the models in the project, through the admin interface itself.
Staff − The User object has a is_staff property. When this property is set to True, the user can login to the Django admin site. The superuser is a staff user by default.
Active − All users are marked as “active” by default. A normal active user (without staff privilege) is not authorized to use the Admin site.
Creating a Superuser
A superuser can be created in two ways.
With createsuperuser parameter to manage.py script from the command line
Calling create_superuser() function programmatically.
The command line use is straightforward. Execute following command from inside the project’s parent folder −
python manage.py createsuperuser
Enter the username and password when prompted −
Username: admin
Email address: [email protected]
Password:********
Password (again):********
The password is too similar to the username.
This password is too short. It must contain at least 8 characters.
This password is too common.
Bypass password validation and create user anyway? [y/N]: y
Superuser created successfully.
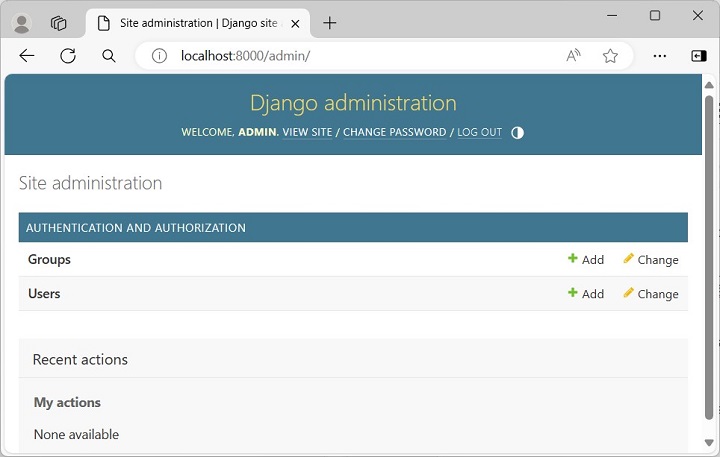
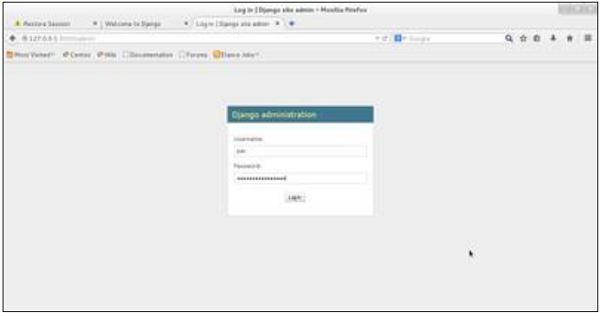
Start the Django server, and login with the superuser credentials, open the login page of admin site http://localhost:8000/admin/.
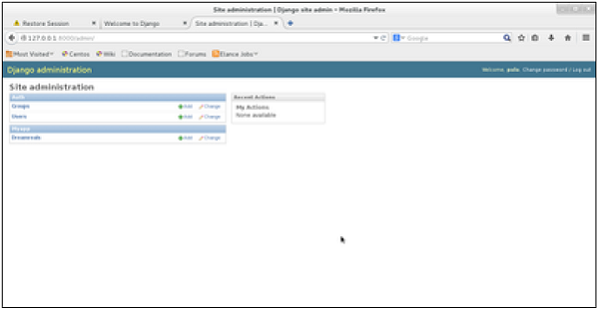
The admin homepage shows the two models Groups and Users.
Creating a New User
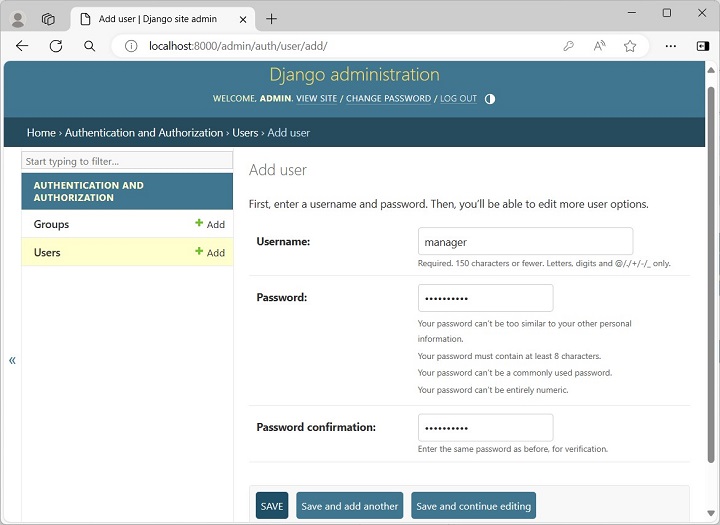
To create a new user, click the “+” Add button. Enter the Username (manager) and the password that complies with the rules as mentioned.
After the new user is successfully added, scroll down to enable the staff status if you want to grant the privilege of logging in. By default, each user is Active. You can also enter the other details such as the name and email address, etc.
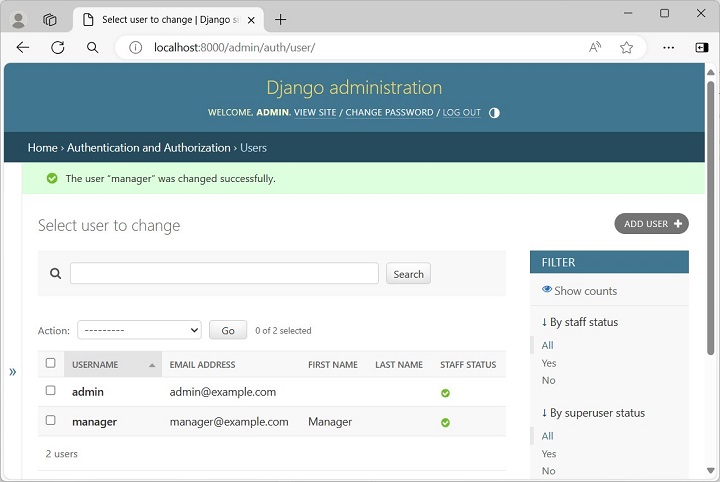
Expand the Users model to see all the users.
To create the user programmatically, use the Django shell.
Call the create_user() function as follows −
>>>from django.contrib.auth.models import User
>>> usr=User.objects.create_user('testusr','[email protected]','pass123')
To accord the staff status, set the is_staff property to True.
>>> usr.is_staff=True>>> usr.save()
Refresh the users list in the admin site. You should see the newly added user.
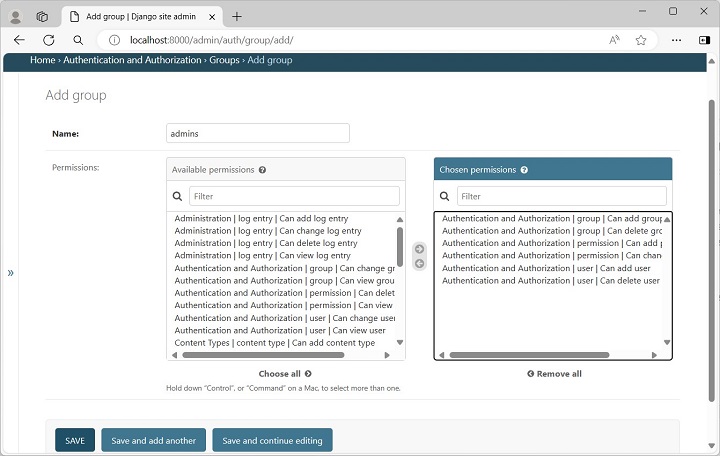
A group categorizes users so you can apply permissions, or some other label, to those users. A user can belong to any number of groups.
In Django, a group is a list of permissions to be assigned to one or more users. When you create or modify a user, simply choose the desired group, so that all the permissions listed in it will be accorded to the user. In addition, you can always add other permissions to a user in addition to those obtained from the user.
Go to the homepage of the admin site and click the Add button in Groups model row to add a new group called admins. Select the permissions to be accorded to the users in this group from the list of available permissions.
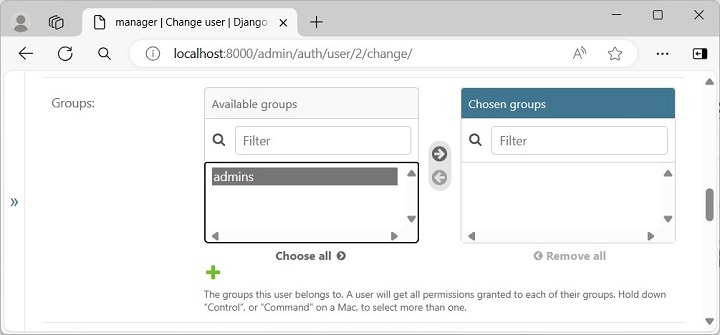
To enable all the permissions included in this group to a user, modify his properties and scroll down to see the available groups, make the selection and save.
Django’s admin site can be very effectively used to create and manage users as well as manage groups and permissions.
Django provides a ready-to-use user interface for administrative activities. We all know how an admin interface is important for a web project. Django automatically generates admin UI based on your project models.
Starting the Admin Interface
The Admin interface depends on the django.countrib module. To have it working you need to make sure some modules are imported in the INSTALLED_APPS and MIDDLEWARE_CLASSES tuples of the myproject/settings.py file.
Before launching your server, to access your Admin Interface, you need to initiate the database −
$ python manage.py migrate
syncdb will create necessary tables or collections depending on your db type, necessary for the admin interface to run. Even if you don’t have a superuser, you will be prompted to create one.
If you already have a superuser or have forgotten it, you can always create one using the following code −
$ python manage.py createsuperuser
Now to start the Admin Interface, we need to make sure we have configured a URL for our admin interface. Open the myproject/url.py and you should have something like −
from django.conf.urls import patterns, include, url

from django.contrib import admin
admin.autodiscover()

urlpatterns = patterns('',
   # Examples:
   # url(r'^$', 'myproject.views.home', name = 'home'),
   # url(r'^blog/', include('blog.urls')),

   url(r'^admin/', include(admin.site.urls)),
)
Now just run the server.
$ python manage.py runserver
And your admin interface is accessible at: http://127.0.0.1:8000/admin/
Once connected with your superuser account, you will see the following screen −
That interface will let you administrate Django groups and users, and all registered models in your app. The interface gives you the ability to do at least the “CRUD” (Create, Read, Update, Delete) operations on your models.