Author: saqibkhan

  • Installation Using Netbeans

    Apache Netbeans is a free and open source integrated development environment (IDE) to develop applications using Java. And it allows you to create applications using JavaFX.

    This chapter demonstrates how to create a JavaFX application in Netbeans. We will be installing the latest versions of both JavaFX SDK and Apache Netbeans.

    Setting NetBeans Environment of JavaFX

    NetBeans18 provides inbuilt support for JavaFX. On installing this, you can create a JavaFX application without any additional plugins or JAR files. To set up the NetBeans environment, you will need to follow the steps that are given below.

    Step 1 − Visit the NetBeans website NetBeans website and click the Download button in order to download the NetBeans software.

    NetBeans Download Page

    Step 2 − On clicking this button, a file named Apache-NetBeans-18-bin-windows-x64.exe will be downloaded onto your system. Run this file in order to install it. On running this file, a NetBeans installer will start as shown in the following screenshot.

    After completion of the configuration, you will see the Welcome Page of the installer.

    Step 3 − Click the Next button and proceed with the installation.

    NetBeans IDE Installer

    Step 4 − The next window holds the NETBEANS IDE 18 license agreement. Read it carefully and accept the agreement by checking the checkbox at “I accept the terms in the license agreement” and then click the Next button.

    NetBeans Licenec Agreement

    Step 5 − Choose the destination directory where you need the Netbeans 18 to be installed. Furthermore, you can also browse through the directory where Java Development Kit is installed in your system and click on the Next button.

    NetBeans Installation Next

    Step 6 − Check the Check for Updates box for automatic updates and click the Install button to start the installation.

    Click Install Button

    Step 7 − The wizard will then start preparing the installation data.

    Step 8 − This step starts the installation of NetBeans IDE 18 and it may take a while.

    Step 9 − Once the process is complete, click the Finish button to finish the installation.

    Installation Complete

    Step 10 − Once you launch the NetBeans IDE, you will see the start page as shown in the following screenshot.

    Start Page

    Step 11 − In the file menu, select New Project… to open the New project wizard as shown in the following screenshot.

    NetBeans File

    Step 12 − In the New Project wizard, select Java with Ant and click on Next. It starts creating a new Java Application for you.

    New Project JavaFX

    Step 13 − Select the name of the project and location of the project in the New Java Application window and then click Finish. It creates a sample application with the given name.

    Project Name

    In this instance, an application with a name SampleJavaApplication is created. Within this application, the NetBeans IDE will generate a Java program with the name SampleJavaApplication.java. As shown in the following screenshot, this program will be created inside NetBeans Source Packages → samplejavaapplication.

    samplejavaapplication java

    Step 14 − Right-click on the file and select Run Project to run this code as shown in the following screenshot.

    Run Project

    This automatically created program contains the code which generates a simple JavaFX window having a button with the label Say ‘Hello World’ in it. Every time you click on this button, the string Hello World will be displayed on the console as shown below.

    Say Hello World
  • Environment

    From Java8 onwards, the JDK (Java Development Kit) includes JavaFX library in it. Therefore, to run JavaFX applications, you simply need to install Java8 or later version in your system.

    The latest version of JDK, as of today, is 20.0.1. So, this tutorial will work with JavaFX versions supported by JDK20.

    In addition to it, IDE’s like Eclipse and NetBeans provide support for JavaFX. This chapter teaches you how to set the environment to run JavaFX Applications locally.

    Installing Java20

    First of all, you will have to verify whether there is Java Installed in your system or not by opening the command prompt and typing the command “Java” in it.

    If you haven’t installed Java in your system, the command prompt displays the message shown in the following screenshot.

    Installing Java

    You can install Java by following the steps given below.

    Step 1 − Visit the JavaSE Downloads Page, click on the JDK Download button as highlighted in the following screenshot

    Java SE Downloads

    Step 2 − On clicking the highlighted link, the Java20 Development Kit suitable for Windows 64-bit Operating System will be downloaded onto your system.

    Step 3 − Run the downloaded binary executable file to start the installation of JDK20.

    Java SE Development Kit 8 Next

    Step 4 − Change the installation directory if needed, else keep the default ones and proceed further.

    Destination Folder

    Step 5 − On selecting the destination folder and clicking Next, the JavaFX installation process starts displaying the progress bar.

    Extracting Installer

    Step 6 − Finish the installation process by clicking the Close button as shown in the following screenshot.

    Java SE Installed

    Step 7 − To verify if the installation is done properly, go to the command prompt and execute the ‘java -version’ command as shown below −

    Java Version

    Setting up the Path for Windows

    After installing Java, you need to set the path variables. Assume that you have installed Java in C:\Program Files\java\jdk-20 directory.

    Now you can follow the steps that are given below −

    • Right-click on ‘My Computer/This PC’ and select ‘Properties’.
    • Then, select ‘Advanced System Settings’.
    • Click on the ‘Environment Variables’ button under the ‘Advanced’ tab.
    • Now, alter the ‘Path’ variable so that it also contains the path to the Java executable. For Example, if the path is currently set to ‘C:\WINDOWS\SYSTEM32’, then change your path to read ‘C:\WINDOWS\SYSTEM32; C:\Program Files\java\jdk-20\bin’.
    Edit Environment Variable

    Also, create a new system variable by clicking ‘New’ under System variables as shown below.

    Create New System Variable

    Name the new variable as “JAVA_HOME” and point it to the JDK installation directory.

    JAVA_HOME System Variable

    Learn Java in-depth with real-world projects through our Java certification course. Enroll and become a certified expert to boost your career.

    Installing JavaFX SDK

    Now, you have to install the JavaFX SDK to access the command-line tools and technologies to develop application content.

    In order to use the JavaFX SDK to run a program, follow the steps given below −

    Step 1 − Download an appropriate JavaFX runtime for your operating system (here, we are downloading JavaFX 20) from the JavaFX – Gluon page.

    JavaFX SDK

    Step 2 − A .zip folder will be downloaded containing tools required to develop content for applications. Unzip this folder to any desired location (say, “C:/JavaFX”).

    Step 3 − Now, right-click on ‘My Computer/This PC’ and select ‘Properties’. Then, select ‘Advanced System Settings’. Click on the ‘Environment Variables’ button under the ‘Advanced’ tab. Create a new environment variable and name it “PATH_TO_FX” pointing to the lib directory of the JavaFX runtime.

    JavaFX PATH_TO_FX

    This will now allow you to compile and run JavaFX applications from the command line using the downloaded JavaFX runtime.

  • Overview

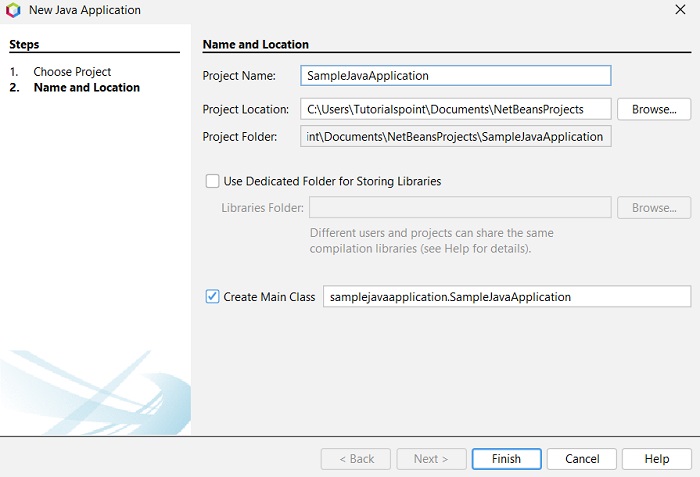
    Rich Internet Applications are those web applications which provide similar features and experience as that of desktop applications. They offer a better visual experience when compared to the normal web applications to the users. These applications are delivered as browser plug-ins or as a virtual machine and are used to transform traditional static applications into more enhanced, fluid, animated and engaging applications.

    Unlike traditional desktop applications, RIA’s don’t require to have any additional software to run. As an alternative, you should install software such as ActiveX, Java, Flash, depending on the Application.

    In an RIA, the graphical presentation is handled on the client side, as it has a plugin that provides support for rich graphics. In a nutshell, data manipulation in an RIA is carried out on the server side, while related object manipulation is carried out on the client side.

    We have three main technologies using which we can develop an RIA. These include the following −

    • Adobe Flash
    • Microsoft Silverlight
    • JavaFX

    Adobe Flash

    This software platform is developed by Adobe Systems and is used in creating Rich Internet Applications. Along with these, you can also build other Applications such as Vector, Animation, Browser Games, Desktop Applications, Mobile Applications and Games, etc.

    This is the most commonly used platform for developing and executing RIA’s with a desktop browser penetration rate of 96%.

    Microsoft Silverlight

    Just like Adobe flash, Microsoft Silverlight is also a software application framework for developing as well as executing Rich Internet Applications. Initially this framework was used for streaming media. The present versions support multimedia, graphics, and animation as well.

    This platform is rarely used with a desktop browser penetration rate of 66%.

    Learn Java in-depth with real-world projects through our Java certification course. Enroll and become a certified expert to boost your career.

    JavaFX

    JavaFX is a Java library using which you can develop Rich Internet Applications. By using Java technology, these applications have a browser penetration rate of 76%.

    What is JavaFX?

    JavaFX is a Java library used to build Rich Internet Applications. The applications written using this library can run consistently across multiple platforms. The applications developed using JavaFX can run on various devices such as Desktop Computers, Mobile Phones, TVs, Tablets, etc.

    To develop GUI Applications using Java programming language, the programmers rely on libraries such as Advanced Windowing Toolkit and Swing. After the advent of JavaFX, these Java programmers can now develop GUI applications effectively with rich content.

    Need for JavaFX

    To develop Client Side Applications with rich features, the programmers used to depend on various libraries to add features such as Media, UI controls, Web, 2D and 3D, etc. JavaFX includes all these features in a single library. In addition to these, the developers can also access the existing features of a Java library such as Swing.

    JavaFX provides a rich set of graphics and media API’s and it leverages the modern Graphical Processing Unit through hardware accelerated graphics. JavaFX also provides interfaces using which developers can combine graphics animation and UI control.

    One can use JavaFX with JVM based technologies such as Java, Groovy and JRuby. If developers opt for JavaFX, there is no need to learn additional technologies, as prior knowledge of any of the above-mentioned technologies will be good enough to develop RIA’s using JavaFX.

    Features of JavaFX

    Following are some of the important features of JavaFX −

    • Written in Java − The JavaFX library is written in Java and is available for the languages that can be executed on a JVM, which include − Java, Groovy and JRuby. These JavaFX applications are also platform independent.
    • FXML − JavaFX features a language known as FXML, which is a HTML like declarative markup language. The sole purpose of this language is to define a user Interface.
    • Scene Builder − JavaFX provides an application named Scene Builder. On integrating this application in IDE’s such as Eclipse and NetBeans, the users can access a drag and drop design interface, which is used to develop FXML applications (just like Swing Drag & Drop and DreamWeaver Applications).
    • Swing Interoperability − In a JavaFX application, you can embed Swing content using the Swing Node class. Similarly, you can update the existing Swing applications with JavaFX features like embedded web content and rich graphics media.
    • Built-in UI controls − JavaFX library caters UI controls using which we can develop a full-featured application.
    • CSS like Styling − JavaFX provides a CSS like styling. By using this, you can improve the design of your application with a simple knowledge of CSS.
    • Canvas and Printing API − JavaFX provides Canvas, an immediate mode style of rendering API. Within the package javafx.scene.canvas it holds a set of classes for canvas, using which we can draw directly within an area of the JavaFX scene. JavaFX also provides classes for Printing purposes in the package javafx.print.
    • Rich set of API’s − JavaFX library provides a rich set of API’s to develop GUI applications, 2D and 3D graphics, etc. This set of API’s also includes capabilities of Java platform. Therefore, using this API, you can access the features of Java languages such as Generics, Annotations, Multithreading, and Lambda Expressions. The traditional Java Collections library was enhanced and concepts like observable lists and maps were included in it. Using these, the users can observe the changes in the data models.
    • Integrated Graphics library − JavaFX provides classes for 2d and 3d graphics.
    • Graphics pipeline − JavaFX supports graphics based on the Hardware-accelerated graphics pipeline known as Prism. When used with a supported Graphic Card or GPU it offers smooth graphics. In case the system does not support graphic card then prism defaults to the software rendering stack.

    History of JavaFX

    JavaFX was originally developed by Chris Oliver, when he was working for a company named See Beyond Technology Corporation, which was later acquired by Sun Microsystems in the year 2005.

    The following points give us more information of this project −

    • Initially this project was named as F3 (Form Follows Functions) and it was developed with an intention to provide richer interfaces for developing GUI Applications.
    • Sun Microsystems acquired the See Beyond company in June 2005, it adapted the F3 project as JavaFX.
    • In the year 2007, JavaFX was announced officially at Java One, a world wide web conference which is held yearly.
    • In the year 2008, Net Beans integrated with JavaFX was available. In the same year, the Java Standard Development Kit for JavaFX 1.0 was released.
    • In the year 2009, Oracle Corporation acquired Sun Microsystems and in the same year the next version of JavaFX (1.2) was released as well.
    • In the year 2010, JavaFX 1.3 came out and in the year 2011 JavaFX 2.0 was released.
    • The JavaFX8 version was released as an integral part of Java on 18th of March 2014, after version bump.
    • Features of JavaFX 9 were centred around extracting useful private APIs from the JavaFX code to make these APIs public.
    • Oracle announced that they will stop shipping JavaFX with JDK 11 and later.
    • JavaFX 11 was first shipped in September 2018.
    • JavaFX 12 was first shipped in March 2019, JavaFX 13 in September 2019.
    • JavaFX 14 was released in March 2020, and version 15 was released in September 2020.
    • JavaFX 16 was released in March 2021, and version 17 was released in September 2021.
    • JavaFX 18 was released in March 2022, and version 19 was released in September 2022.
    • The latest version, JavaFX 20, is released on March 2023.
  • Errors

    Introduction

    The java.util.zip Error contains the error which can occur during zip/unzip operations.

    Interface Summary

    Sr.No.Error & Description
    1ZipErrorSignals that an unrecoverable error has occurred.
  • Exceptions

    Introduction

    The java.util.zip Exceptions contains the exceptions which can occur during zip/unzip operations.

    Interface Summary

    Sr.No.Exception & Description
    1DataFormatExceptionSignals that a data format error has occurred.
    2ZipExceptionSignals that a Zip exception of some sort has occurred.
  • ZipOutputStream 

    Introduction

    The java.util.zip.ZipOutputStream class implements an output stream filter for writing files in the ZIP file format. Includes support for both compressed and uncompressed entries.

    Class Declaration

    Following is the declaration for java.util.zip.ZipOutputStream class −

    publicclassZipOutputStreamextendsDeflaterOutputStream

    Learn Java in-depth with real-world projects through our Java certification course. Enroll and become a certified expert to boost your career.

    Fields

    Following are the fields for java.util.zip.ZipOutputStream class −

    • static int CENATT
    • static int CENATX
    • static int CENCOM
    • static int CENCRC
    • static int CENDSK
    • static int CENEXT
    • static int CENFLG
    • static int CENHDR
    • static int CENHOW
    • static int CENLEN
    • static int CENNAM
    • static int CENOFF
    • static long CENSIG
    • static int CENSIZ
    • static int CENTIM
    • static int CENVEM
    • static int CENVER
    • static int DEFLATED − Compression method for compressed (DEFLATED) entries.
    • static int ENDCOM
    • static int ENDHDR
    • static int ENDOFF
    • static long ENDSIG
    • static int ENDSIZ
    • static int ENDSUB
    • static int ENDTOT
    • static int EXTCRC
    • static int EXTHDR
    • static int EXTLEN
    • static long EXTSIG
    • static int EXTSIZ
    • static int LOCCRC
    • static int LOCEXT
    • static int LOCFLG
    • static int LOCHDR
    • static int LOCHOW
    • static int LOCLEN
    • static int LOCNAM
    • static long LOCSIG
    • static int LOCSIZ
    • static int LOCTIM
    • static int LOCVER
    • static int STORED − Compression method for uncompressed (STORED) entries.

    Constructors

    Sr.No.Constructor & Description
    1ZipOutputStream(OutputStream out)Creates a new ZIP output stream.
    2ZipOutputStream(OutputStream out, Charset charset)Creates a new ZIP output stream.

    Class Methods

    Sr.No.Method & Description
    1void close()Closes the ZIP output stream as well as the stream being filtered.
    2void closeEntry()Closes the current ZIP entry and positions the stream for writing the next entry.
    3void finish()Finishes writing the contents of the ZIP output stream without closing the underlying stream.
    4void putNextEntry(ZipEntry e)Begins writing a new ZIP file entry and positions the stream to the start of the entry data.
    5void setComment(String comment)Sets the ZIP file comment.
    6void setLevel(int level)Sets the compression level for subsequent entries which are DEFLATED.
    7void setMethod(int method)Sets the default compression method for subsequent entries.
    8void write(byte[] b, int off, int len)Writes an array of bytes to the current ZIP entry data.

    Methods Inherited

    This class inherits methods from the following classes −

    • java.util.zip.DeflaterOutputStream
    • java.io.FilterOutputStream
    • java.lang.Object
  • ZipInputStream 

    Introduction

    The java.util.zip.ZipInputStream class implements an input stream filter for reading files in the ZIP file format. Includes support for both compressed and uncompressed entries.

    Class Declaration

    Following is the declaration for java.util.zip.ZipInputStream class −

    publicclassZipInputStreamextendsInflaterInputStream

    Learn Java in-depth with real-world projects through our Java certification course. Enroll and become a certified expert to boost your career.

    Fields

    Following are the fields for java.util.zip.ZipInputStream class −

    • static int CENATT
    • static int CENATX
    • static int CENCOM
    • static int CENCRC
    • static int CENDSK
    • static int CENEXT
    • static int CENFLG
    • static int CENHDR
    • static int CENHOW
    • static int CENLEN
    • static int CENNAM
    • static int CENOFF
    • static long CENSIG
    • static int CENSIZ
    • static int CENTIM
    • static int CENVEM
    • static int CENVER
    • static int ENDCOM
    • static int ENDHDR
    • static int ENDOFF
    • static long ENDSIG
    • static int ENDSIZ
    • static int ENDSUB
    • static int ENDTOT
    • static int EXTCRC
    • static int EXTHDR
    • static int EXTLEN
    • static long EXTSIG
    • static int EXTSIZ
    • static int LOCCRC
    • static int LOCEXT
    • static int LOCFLG
    • static int LOCHDR
    • static int LOCHOW
    • static int LOCLEN
    • static int LOCNAM
    • static long LOCSIG
    • static int LOCSIZ
    • static int LOCTIM
    • static int LOCVER

    Constructors

    Sr.No.Constructor & Description
    1ZipInputStream(InputStream in)Creates a new ZIP input stream.
    2ZipInputStream(InputStream in, Charset charset)Creates a new ZIP input stream.

    Class Methods

    Sr.No.Method & Description
    1int available()Returns 0 after EOF has reached for the current entry data, otherwise always return 1.
    2void close()Closes this input stream and releases any system resources associated with the stream.
    3void closeEntry()Closes the current ZIP entry and positions the stream for reading the next entry.
    4ZipEntry getNextEntry()Reads the next ZIP file entry and positions the stream at the beginning of the entry data.
    5int read(byte[] b, int off, int len)Reads from the current ZIP entry into an array of bytes.
    6long skip(long n)Skips specified number of bytes in the current ZIP entry.

    Methods Inherited

    This class inherits methods from the following classes −

    • java.util.zip.InflaterInputStream
    • java.io.FilterInputStream
    • java.lang.Object
  • ZipFile 

    Introduction

    The java.util.zip.ZipFile class is used to read entries from a zip file.

    Class Declaration

    Following is the declaration for java.util.zip.ZipFile class −

    publicclassZipFileextendsObjectimplementsCloseable

    Learn Java in-depth with real-world projects through our Java certification course. Enroll and become a certified expert to boost your career.

    Fields

    Following are the fields for java.util.zip.ZipFile class −

    • static int CENATT
    • static int CENATX
    • static int CENCOM
    • static int CENCRC
    • static int CENDSK
    • static int CENEXT
    • static int CENFLG
    • static int CENHDR
    • static int CENHOW
    • static int CENLEN
    • static int CENNAM
    • static int CENOFF
    • static long CENSIG
    • static int CENSIZ
    • static int CENTIM
    • static int CENVEM
    • static int CENVER
    • static int ENDCOM
    • static int ENDHDR
    • static int ENDOFF
    • static long ENDSIG
    • static int ENDSIZ
    • static int ENDSUB
    • static int ENDTOT
    • static int EXTCRC
    • static int EXTHDR
    • static int EXTLEN
    • static long EXTSIG
    • static int EXTSIZ
    • static int LOCCRC
    • static int LOCEXT
    • static int LOCFLG
    • static int LOCHDR
    • static int LOCHOW
    • static int LOCLEN
    • static int LOCNAM
    • static long LOCSIG
    • static int LOCSIZ
    • static int LOCTIM
    • static int LOCVER
    • static int OPEN_DELETE − Mode flag to open a zip file and mark it for deletion.
    • static int OPEN_READ − Mode flag to open a zip file for reading.

    Constructors

    Sr.No.Constructor & Description
    1ZipFile(File file)Opens a ZIP file for reading given the specified File object.
    2ZipFile(File file, Charset charset)Opens a ZIP file for reading given the specified File object.
    3ZipFile(File file, int mode)Opens a new ZipFile to read from the specified File object in the specified mode.
    4ZipFile(File file, int mode, Charset charset)Opens a new ZipFile to read from the specified File object in the specified mode.
    5ZipFile(String name)Opens a zip file for reading.
    6ZipFile(String name, Charset charset)Opens a zip file for reading.

    Class Methods

    Sr.No.Method & Description
    1void close()Closes the ZIP file.
    2Enumeration<? extends ZipEntry> entries()Returns an enumeration of the ZIP file entries.
    3String getComment()Returns the zip file comment, or null if none.
    4ZipEntry getEntry(String name)Returns the zip file entry for the specified name, or null if not found.
    5InputStream getInputStream(ZipEntry entry)Returns an input stream for reading the contents of the specified zip file entry.
    6String getName()Returns the path name of the ZIP file.
    7int size()Returns the number of entries in the ZIP file.

    Methods Inherited

    This class inherits methods from the following classes −

    • Java.lang.Object
  • ZipEntry 

    Introduction

    The java.util.zip.ZipEntry class is used to represent a ZIP file entry.

    Class Declaration

    Following is the declaration for java.util.zip.ZipEntry class −

    publicclassZipEntryextendsObjectimplementsCloneable

    Learn Java in-depth with real-world projects through our Java certification course. Enroll and become a certified expert to boost your career.

    Fields

    Following are the fields for java.util.zip.ZipEntry class −

    • protected byte[] buf − Output buffer for writing uncompressed data.
    • protected Inflater inf − Decompressor for this stream.
    • static int CENATT
    • static int CENATX
    • static int CENCOM
    • static int CENCRC
    • static int CENDSK
    • static int CENEXT
    • static int CENFLG
    • static int CENHDR
    • static int CENHOW
    • static int CENLEN
    • static int CENNAM
    • static int CENOFF
    • static long CENSIG
    • static int CENSIZ
    • static int CENTIM
    • static int CENVEM
    • static int CENVER
    • static int DEFLATED − Compression method for compressed (deflated) entries.
    • static int ENDCOM
    • static int ENDHDR
    • static int ENDOFF
    • static long ENDSIG
    • static int ENDSIZ
    • static int ENDSUB
    • static int ENDTOT
    • static int EXTCRC
    • static int EXTHDR
    • static int EXTLEN
    • static long EXTSIG
    • static int EXTSIZ
    • static int LOCCRC
    • static int LOCEXT
    • static int LOCFLG
    • static int LOCHDR
    • static int LOCHOW
    • static int LOCLEN
    • static int LOCNAM
    • static long LOCSIG
    • static int LOCSIZ
    • static int LOCTIM
    • static int LOCVER
    • static int STORED − Compression method for uncompressed entries.

    Constructors

    Sr.No.Constructor & Description
    1ZipEntry(String name)Creates a new zip entry with the specified name.
    2ZipEntry(ZipEntry e)Creates a new zip entry with fields taken from the specified zip entry.

    Class Methods

    Sr.No.Method & Description
    1Object clone()Returns a copy of this entry.
    2String getComment()Returns the comment string for the entry, or null if none.
    3long getCompressedSize()Returns the size of the compressed entry data, or -1 if not known.
    4long getCrc()Returns the CRC-32 checksum of the uncompressed entry data, or -1 if not known.
    5byte[] getExtra()Returns the extra field data for the entry, or null if none.
    6int getMethod()Returns the compression method of the entry, or -1 if not specified.
    7String getName()Returns the name of the entry.
    8long getSize()Returns the uncompressed size of the entry data, or -1 if not known.
    9long getTime()Returns the modification time of the entry, or -1 if not specified.
    10int hashCode()Returns the hash code value for this entry.
    11boolean isDirectory()Returns true if this is a directory entry.
    12void setComment(String comment)Sets the optional comment string for the entry.
    13void setCrc(long crc)Sets the CRC-32 checksum of the uncompressed entry data.
    14void setExtra(byte[] extra)Sets the optional extra field data for the entry.
    15void setMethod(int method)Sets the compression method for the entry.
    16void setSize(long size)Sets the uncompressed size of the entry data.
    17void setTime(long time)Sets the modification time of the entry.
    18String toString()Returns a string representation of the ZIP entry.

    Methods Inherited

    This class inherits methods from the following classes −

    • java.io.FilterOutputStream
    • java.lang.Object
  • InflaterOutputStream 

    Introduction

    The java.util.zip.InflaterOutputStream class implements an output stream filter for uncompressing data stored in the “deflate” compression format.

    Class Declaration

    Following is the declaration for java.util.zip.InflaterOutputStream class −

    publicclassInflaterOutputStreamextendsFilterOutputStream

    Learn Java in-depth with real-world projects through our Java certification course. Enroll and become a certified expert to boost your career.

    Fields

    Following are the fields for java.util.zip.InflaterOutputStream class −

    • protected byte[] buf − Output buffer for writing uncompressed data.
    • protected Inflater inf − Decompressor for this stream.

    Constructors

    Sr.No.Constructor & Description
    1InflaterOutputStream(OutputStream out)Creates a new output stream with a default decompressor and buffer size.
    2InflaterOutputStream(OutputStream out, Inflater infl)Creates a new output stream with the specified decompressor and a default buffer size.
    3InflaterOutputStream(OutputStream out, Inflater infl, int bufLen)Creates a new output stream with the specified decompressor and buffer size.

    Class Methods

    Sr.No.Method & Description
    1void close()Writes remaining compressed data to the output stream and closes the underlying stream.
    2void finish()Finishes writing uncompressed data to the output stream without closing the underlying stream.
    3void flush()Flushes this output stream, forcing any pending buffered output bytes to be written.
    4void write(byte[] b, int off, int len)Writes an array of bytes to the compressed output stream.
    5void write(int b)Writes a byte to the compressed output stream.

    Methods Inherited

    This class inherits methods from the following classes −

    • java.io.FilterOutputStream
    • java.lang.Object