- Applying a style from one image onto another content image by combining CNN feature representations.
Author: saqibkhan
-
Neural Style Transfer:
-
Reinforcement Learning:
- Deep Q-Learning: Using Keras to implement reinforcement learning algorithms like Deep Q-Learning (DQN) to train an agent to play a game.
-
Transfer Learning:
- Fine-tuning a Pretrained Model: Use models like VGG16 or ResNet50 pre-trained on ImageNet and fine-tune for a specific task, such as custom image classification.
pythonCopy codefrom tensorflow.keras.applications import VGG16 from tensorflow.keras import layers, models # Load VGG16 without the top layer base_model = VGG16(weights='imagenet', include_top=False, input_shape=(150, 150, 3)) # Freeze the base model base_model.trainable = False # Add custom layers model = models.Sequential([
]) # Compile and train the model model.compile(optimizer='adam', loss='binary_crossentropy', metrics=['accuracy'])base_model, layers.Flatten(), layers.Dense(256, activation='relu'), layers.Dense(1, activation='sigmoid') -
Time Series Forecasting:
- Temperature Forecasting: Predicting future temperatures based on past values using LSTMs or GRUs.
- Stock Price Prediction: Using RNNs or LSTMs to predict stock prices based on historical data.
-
Generative Models:
- Variational Autoencoders (VAEs): Keras has examples for creating a variational autoencoder that generates new images by learning the latent space of the input data.
- Generative Adversarial Networks (GANs): A more advanced model that pits two networks against each other: a generator and a discriminator.
pythonCopy codefrom tensorflow.keras import layers, models, backend as K from tensorflow.keras.losses import binary_crossentropy # Sampling function for VAE def sampling(args):
# Build encoder inputs = layers.Input(shape=(28, 28, 1)) x = layers.Conv2D(32, 3, activation="relu", padding="same")(inputs) z_mean = layers.Dense(2, name="z_mean")(x) z_log_var = layers.Dense(2, name="z_log_var")(x) z = layers.Lambda(sampling, output_shape=(2,), name="z")([z_mean, z_log_var]) # Build decoder decoder = models.Sequential([z_mean, z_log_var = args epsilon = K.random_normal(shape=(K.shape(z_mean)[0], K.int_shape(z_mean)[1])) return z_mean + K.exp(0.5 * z_log_var) * epsilon
]) # Define the VAE vae = models.Model(inputs, decoder(z)) vae.compile(optimizer='adam', loss='mse')layers.InputLayer(input_shape=(2,)), layers.Dense(128, activation='relu'), layers.Reshape((4, 4, 8)), layers.Conv2DTranspose(32, 3, activation='relu'), layers.Conv2D(1, 3, activation='sigmoid') -
Node.js MySQL Create Table
CREATE TABLE command is used to create a table in MySQL. You must make it sure that you define the name of the database when you create the connection.
Example
For creating a table named “employees”.
Create a js file named employees.js having the following data in DBexample folder.
var mysql = require('mysql');

var con = mysql.createConnection({

host: "localhost",

user: "root",

password: "12345",

database: "javatpoint"

});

con.connect(function(err) {

if (err) throw err;

console.log("Connected!");

var sql = "CREATE TABLE employees (id INT, name VARCHAR(255), age INT(3), city VARCHAR(255))";

con.query(sql, function (err, result) {

if (err) throw err;

console.log("Table created");

});

});
Now open command terminal and run the following command:
Node employees.js
Verification
To verify if the table is created or not, use the SHOW TABLES command.

You can also check the structure of the table using DESC command:

Create Table Having a Primary Key
Create Primary Key in New Table:
Let’s create a new table named “employee2” having id as primary key.
Create a js file named employee2.js having the following data in DBexample folder.
var mysql = require('mysql');

var con = mysql.createConnection({

host: "localhost",

user: "root",

password: "12345",

database: "javatpoint"

});

con.connect(function(err) {

if (err) throw err;

console.log("Connected!");

var sql = "CREATE TABLE employee2 (id INT PRIMARY KEY, name VARCHAR(255), age INT(3), city VARCHAR(255))";

con.query(sql, function (err, result) {

if (err) throw err;

console.log("Table created");

});

});
Now open command terminal and run the following command:
Node employee2.js
Verification
To verify if the table is created or not, use the SHOW TABLES command.

You can also check the structure of the table using DESC command to see that id is a primary key :

Add columns in existing Table:
ALTER TABLE statement is used to add a column in an existing table. Take the already created table “employee2” and use a new column salary.
Replace the data of the “employee2” table with the following data:
var mysql = require('mysql');

var con = mysql.createConnection({

host: "localhost",

user: "root",

password: "12345",

database: "javatpoint"

});

con.connect(function(err) {

if (err) throw err;

console.log("Connected!");

var sql = "ALTER TABLE employee2 ADD COLUMN salary INT(10)";

con.query(sql, function (err, result) {

if (err) throw err;

console.log("Table altered");

});

});
Now open command terminal and run the following command:
Node employee2.js
Verification

-
Text Classification:
- IMDB Sentiment Analysis: Using Keras for binary sentiment classification (positive/negative) on the IMDB movie review dataset with recurrent neural networks (RNNs) or LSTMs.
pythonCopy codefrom tensorflow.keras.datasets import imdb from tensorflow.keras.preprocessing import sequence from tensorflow.keras import layers, models # Load IMDB dataset max_features = 10000 (x_train, y_train), (x_test, y_test) = imdb.load_data(num_words=max_features) # Pad sequences to ensure uniform input size maxlen = 500 x_train = sequence.pad_sequences(x_train, maxlen=maxlen) x_test = sequence.pad_sequences(x_test, maxlen=maxlen) # Build LSTM model model = models.Sequential([
]) # Compile and train the model model.compile(optimizer='adam', loss='binary_crossentropy', metrics=['accuracy']) model.fit(x_train, y_train, epochs=3, batch_size=64, validation_data=(x_test, y_test))layers.Embedding(max_features, 128, input_length=maxlen), layers.LSTM(128, dropout=0.2, recurrent_dropout=0.2), layers.Dense(1, activation='sigmoid') -
Image Classification:
- MNIST Handwritten Digits: Classifying the famous MNIST dataset, which contains images of handwritten digits (0–9). This is a beginner-friendly example that introduces how to use convolutional neural networks (CNNs) for image classification.
- CIFAR-10 Image Classification: Building a CNN to classify the CIFAR-10 dataset, a set of 60,000 32×32 color images in 10 classes.
pythonCopy codefrom tensorflow.keras import layers, models from tensorflow.keras.datasets import mnist # Load MNIST dataset (train_images, train_labels), (test_images, test_labels) = mnist.load_data() # Normalize pixel values train_images, test_images = train_images / 255.0, test_images / 255.0 # Build CNN model model = models.Sequential([
]) # Compile and train the model model.compile(optimizer='adam', loss='sparse_categorical_crossentropy', metrics=['accuracy']) model.fit(train_images, train_labels, epochs=5, validation_data=(test_images, test_labels))layers.Conv2D(32, (3, 3), activation='relu', input_shape=(28, 28, 1)), layers.MaxPooling2D((2, 2)), layers.Conv2D(64, (3, 3), activation='relu'), layers.MaxPooling2D((2, 2)), layers.Conv2D(64, (3, 3), activation='relu'), layers.Flatten(), layers.Dense(64, activation='relu'), layers.Dense(10, activation='softmax') -
Node.js MySQL Create Database
CREATE DATABASE statement is used to create a database in MySQL.
Example
For creating a database named “javatpoint”.
Create a js file named javatpoint.js having the following data in DBexample folder.
var mysql = require('mysql');

var con = mysql.createConnection({

host: "localhost",

user: "root",

password: "12345"

});

con.connect(function(err) {

if (err) throw err;

console.log("Connected!");

con.query("CREATE DATABASE javatpoint", function (err, result) {

if (err) throw err;

console.log("Database created");

});

});
Now open command terminal and run the following command:
Node javatpoint.js
You can see the database is created.
Verification
To verify if the database is created or not, use the SHOW DATABASES command. Before this, go to initial path by using mysql-p command.

-
Node.Js Create Connection with MySQL
We can use Node.js in database applications. Here we use MySQL as a database with Node.js.
Install MySQL on your computer.
You can download it from here https://www.mysql.com/downloads/.
Once the MySQL is installed and running, you can access it by using Node.js.
Install MySQL Driver
You have to install MySQL driver to access a MySQL database with Node.js. Download MySQl module from npm.
To download and install the “mysql” module, open the Command Terminal and execute the following:
npm install mysqlCreate Connection
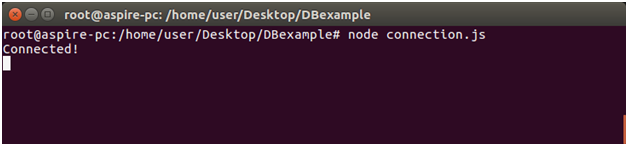
Create a folder named “DBexample”. In that folder create a js file named “connection.js” having the following code:
var mysql = require('mysql');

var con = mysql.createConnection({

  host: "localhost",

  user: "root",

  password: "12345"

});

con.connect(function(err) {

  if (err) throw err;

  console.log("Connected!");

});
Now open the command terminal and use the following command:
Node connection.js