The Angular 8 directives are used to manipulate the DOM. By using Angular directives, you can change the appearance, behavior or a layout of a DOM element. It also helps you to extend HTML.
Angular 8 directives can be classified in 3 categories based on how they behave:
Component Directives
Structural Directives
Attribute Directives
Component Directives: Component directives are used in main class. They contain the detail of how the component should be processed, instantiated and used at runtime.
Structural Directives: Structural directives start with a * sign. These directives are used to manipulate and change the structure of the DOM elements. For example, *ngIf directive, *ngSwitch directive, and *ngFor directive.
*ngIf Directive: The ngIf allows us to Add/Remove DOM Element.
*ngSwitch Directive: The *ngSwitch allows us to Add/Remove DOM Element. It is similar to switch statement of C#.
*ngFor Directive: The *ngFor directive is used to repeat a portion of HTML template once per each item from an iterable list (Collection).
Attribute Directives: Attribute directives are used to change the look and behavior of the DOM elements. For example: ngClass directive, and ngStyle directive etc.
ngClass Directive: The ngClass directive is used to add or remove CSS classes to an HTML element.
ngStyle Directive: The ngStyle directive facilitates you to modify the style of an HTML element using the expression. You can also use ngStyle directive to dynamically change the style of your HTML element.
Angular 8 is a platform and a framework which is used to build client applications in HTML and TypeScript.
Angular 8 is written in TypeScript. It implements core and optional functionality as a set of TypeScript libraries that you can import into your apps.
The basic building blocks of an Angular application are NgModules, which provide a compilation context for components. NgModules collect related code into functional sets; an Angular app is defined by a set of NgModules. An app always has at least a root module that enables bootstrapping, and typically has many more feature modules.
Components define views, which are sets of screen elements that Angular can choose among and modify according to your program logic and data.
Components use services, which provide specific functionality not directly related to views. Service providers can be injected into components as dependencies, making your code modular, reusable, and efficient.
Key parts of Angular 8 Architecture:
Angular 8 Components
In Angular 8, Components and services both are simply classes with decorators that mark their types and provide metadata which guide Angular to do things.
Every Angular application always has at least one component known as root component that connects a page hierarchy with page DOM. Each component defines a class that contains application data and logic, and is associated with an HTML template that defines a view to be displayed in a target environment.
Metadata of Component class
The metadata for a component class associates it with a template that defines a view. A template combines ordinary HTML with Angular directives and binding markup that allow Angular to modify the HTML before rendering it for display.
The metadata for a service class provides the information Angular needs to make it available to components through dependency injection (DI).
Modules
Angular 8 NgModules are different from other JavaScript modules. Every Angular 8 app has a root module known as AppModule. It provides the bootstrap mechanism that launches the application.
Generally, every Angular 8 app contains many functional modules.
Some important features of Anngular 8 Modules:
Angular 8 NgModules import the functionalities form other NgModules just like other JavaScript modules.
NgModules allow their own functionality to be exported and used by other NgModules. For example, if you want to use the router service in your app, you can import the Router NgModule.
Template, Directives and Data Binding
In Angular 8, a template is used to combine HTML with Angular Markup and modify HTML elements before displaying them. Template directives provide program logic, and binding markup connects your application data and the DOM.
There are two types of data binding:
1. Event Binding: Event binding is used to bind events to your app and respond to user input in the target environment by updating your application data.
2. Property Binding: Property binding is used to pass data from component class and facilitates you to interpolate values that are computed from your application data into the HTML.
Services and Dependency Injection
In Angular 8, developers create a service class for data or logic that isn’t associated with a specific view, and they want to share across components.
Dependency Injection (DI) is used to make your component classes lean and efficient. DI doesn’t fetch data from the server, validate user input, or log directly to the console; it simply renders such tasks to services.
Routing3
In Angular 8, Router is an NgModule which provides a service that facilitates developers to define a navigation path among the different application states and view hierarchies in their app.
It works in the same way as a browser’s navigation works. i.e.:
Enter a URL in the address bar and the browser will navigate to that corresponding page.
Click the link on a page and the browser will navigate to a new page.
Click the browser’s back or forward buttons and the browser will navigate backward or forward according to your seen history pages.
When you create an Angular app and run it by usingng serve command, it looks like the following image.
It is a simple Angular app created by usingng new app_name command and nothing is edited in the app. The name of the app isangular8firstapp.
Now, we will learn how the Angular’s app is loaded and started.
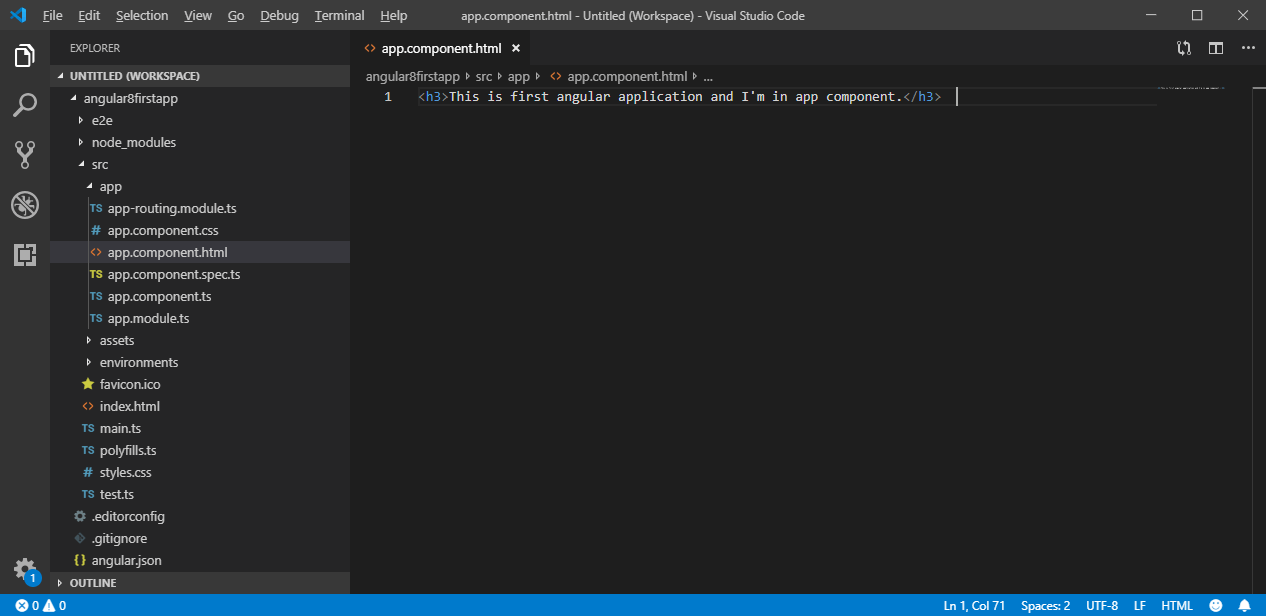
Let’s remove all the code from theapp.compoment.htmlfile and write some basic HTML code.For example:
<h3>This is first angular application and I'm in app component.</h3>
This is the original code in theapp.compoment.html file
Now, it is replaced and looked like this:
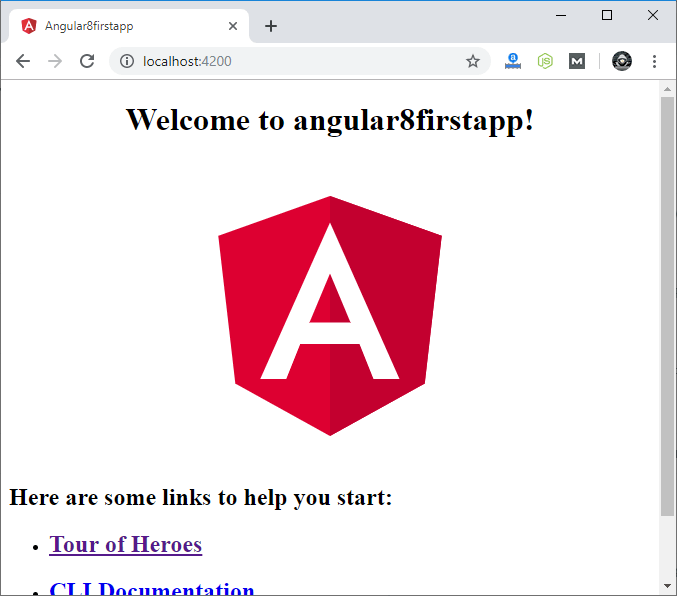
You can also see it in browser:
Here, the above file is not served by the server. The server served an index.html file.
Angular is a framework which allows us to create “Single Page Applications”, and here the index.html is the single page which was provided by the server.
The above code looks like a normal HTML code and here the <title> tag shows the same title in the browser as the app’s title. But the <body> code is different from normal HTML code. Here, you see “<app-root>” tag which is provided by the CLI. We can say that, whenever we create a project from CLI, by default, one component is created, i.e., “app component”.
Now, see the “app.component.ts” file. It is a TypeScript file. Here, you see the “selector” property.
import { Component } from '@angular/core';

@Component({

  selector: 'app-root',

  templateUrl: './app.component.html',

  styleUrls: ['./app.component.css']

})

export class AppComponent {

  title = 'angular8firstapp';

}
You can see that the selector property contains the string as index.html file. This information is required the Angular to place this part into an index.html file with the template of the component.
The template of the component is “./app.component.html”, so, Angular includes this part into the body of the index.html file.
Now, you see how an “app-root” is included in index.html file. Now, let’s see “How does Angular trigger?”
Whenever ng-serve builds the application, it creates “bundles” and automatically adds these to index.html file at runtime. So, from these bundles, the first code has to be executed from “main.ts” file, i.e., “main.ts” file is the main file from where the execution of an Angular application starts.
Main.ts file:
import { enableProdMode } from '@angular/core';

import { platformBrowserDynamic } from '@angular/platform-browser-dynamic';

import { AppModule } from './app/app.module';

import { environment } from './environments/environment';

if (environment.production) {

  enableProdMode();

}

platformBrowserDynamic().bootstrapModule(AppModule)

  .catch(err => console.error(err));
Here, the bootstrap method starts the Angular application. It refers to AppModule, which looks into the app folders. You can see in the “app.module” file that a bootstrap array which is basically a list of all the components analyzes the index.html file.
See app.module.ts file:
import { BrowserModule } from '@angular/platform-browser';

import { NgModule } from '@angular/core';

import { AppRoutingModule } from './app-routing.module';

import { AppComponent } from './app.component';

@NgModule({

  declarations: [

    AppComponent

  ],

  imports: [

    BrowserModule,

    AppRoutingModule

  ],

  providers: [],

  bootstrap: [AppComponent]

})

export class AppModule { }
Now, you can see that the Angular application gets loaded as:
For example: Here, we are going to create an app named “angular8firstapp”
ng new angular8firstapp
You can see that a folder is created. This is your first created app of Angular 8.
Open this folder and you will see the some subfolders.
Here, src is the main folder of your project. Open the src folder and you will see some other subfolders.
This app folder is the root of your Angular 8 app. Open this folder and you will see some .ts, html and css files.
Files used in Angular 7 App folder
Angular 7 App files which are mainly used in your project are given below:
src folder: This is the folder which contains the main code files related to your angular application.
app folder: The app folder contains the files, you have created for app components.
app.component.css: This file contains the cascading style sheets code for your app component.
app.component.html: This file contains the html file related to app component. This is the template file which is used by angular to do the data binding.
app.component.spec.ts: This file is a unit testing file related to app component. This file is used along with other unit tests. It is run from Angular CLI by the command ng test.
app.component.ts: This is the most important typescript file which includes the view logic behind the component.
app.module.ts: This is also a typescript file which includes all the dependencies for the website. This file is used to define the needed modules to be imported, the components to be declared and the main component to be bootstrapped.
Install Visual Studio Code IDE or JetBrains WebStorm
You must have an IDE like Visual Studio Code IDE or JetBrains WebStorm to run your Angular 7 app.
VS Code is light and easy to setup, it has a great range of built-in code editing, formatting, and refactoring features. It is free to use. It also provides a huge number of extensions that will significantly increase your productivity.
You can download VS Code from here: https://code.visualstudio.com
JetBrains WebStorm is also a great IDE to develop Angular 7 apps. It is fast, attractive, and very easy to use software but, it is not free to use. You have to purchase it later, it only provides a trial period of 30 days for free.
You can download Jetbrains Webstorm from here: https://www.jetbrains.com/webstorm/download/#section=windows
Here, we are using VS Code IDE:
You can see that your project is open in the VS Code IDE. You can also make changes in .ts and html files to change your output accordingly.
Run your app
Open your node.js command prompt and go to your project by using cd command and then run the ng serve command to compile and run your app.
ng serve
Open your browser and go to local host at: http://localhost:4200/
(How to install Angular 8 or Angular 8 Environment setup)
Before to setup environment for Angular development using the Angular CLI tool, you must have installed Node.js on your system and set a development environment and npm package manager.
Install Node.js
Angular requires Node.js version 10.9.0 or later. You can download it from https://nodejs.org/en/
After downloading, you have to install it on your system.
See how to install Node.js on Windows:
See how to install Node.js on Linux/ Ubuntu/ CentOS:
Once you have installed Node.js on your system, open node.js command prompt.
To check your version, run node -v in a terminal/console window.
Use npm to Install Angular CLI
Use the following command to install Angular CLI
npm install -g @angular/cli
Or
npm install -g @angular/cli@latest
Or
Just go to Angular CLI official website https://cli.angular.io/
You will see the whole cli command to create an Angular app. You need to run the first command to install Angular CLI. These steps are same for Windows and Mac.
Check your Installed versions
To check Node and Angular CLI version, use ng –version command.
The Angular community has released its latest version Angular 8 with an impressive list of changes and improvements including the much awaited Ivy compiler as an opt-in feature.
Most prominent features of Angular 8:
Support TypeScript 3.4
Supports Web Workers
Preview of Ivy available
Lazy loading
Improvement of ngUpgrade
TypeScript 3.4
Angular 8 supports TypeScript 3.4 and it is required to run your Angular 8 project. So, you have to upgrade your TypeScript version to 3.4. TypeScript 3.4 introduces a new flag called –incremental. The incremental tells TypeScript to save information about the project graph from the last compilation. Every time the TypeScript is invoked with –incremental, it will use that information to detect the least costly way to type-check and emit changes to your project.
Web workers class
JavaScript is single threaded, so it is common for more critical tasks like data calls to take place asynchronously. Web Workers facilitates you to run the CPU intensive computations in the background thread, freeing the main thread to update the user interface.
Web workers can also be helpful, if your application is unresponsive while processing data.
If you want to outsource such a calculation to a background, we must first create the web worker using the Angular CLI.
Preview of Ivy and Bazel available
After the release of Angular 8, a preview version of Ivy is now available for testing. Ivy is the new rendering engine that produces small bundle size and Bazel is the new build system. Both are ready for proper use with Angular 8. The preview of these two should be available shortly. Ivy is a new compiler/runtime of Angular and Angular 8 is a first release to offer a switch to opt-in into Ivy officially.
To use Ivy in your project, you can instruct the Angular CLI to enable Ivy in your project using the –enable-ivy switch:
$ ng new angular-project --enable-ivy
Ivy is supposed to be a by default rendering engine in Angular version 9.
Bazel provides one of the newest features of Angular 8 as a possibility to build your CLI application more quickly.
The main advantages of Bazel are:
The incremental build and tests.
It provides a chance to make your backends and frontends with a same tool.
It has a possibility to have remote builds and cache on the build farm.
Dynamic imports for lazy-loaded modules
Lazy Loading
Angular 8 facilitates you to use standard dynamic import syntax instead of a custom string for lazy-loaded modules.
It means lazy-loaded import that looked like this:
The Angular CLI is continuously improving. Now, the ng build, ng test and ng run are equipped by 3rd-party libraries and tool. For example, AngularFire already makes use of these new capabilities with a deploy command.
Angular is the most popular JavaScript framework and platform for developing client-side (front-end) mobile and desktop web apps or single page applications (SPAs).
Angular community has released its latest version known as Angular 8. If you are familiar with previous version of Angular, it will not be difficult for you. You can easily upgrade your older version of Angular to latest version Angular 8.
What is Angular 8?
Angular 8 is an open-source, client-side TypeScript based JavaScript framework. It is written in TypeScript and complied into JavaScript. Angular 8 is used to create dynamic web applications. It is very similar to its previous versions except having some extensive features.
What is a dynamic web application?
A dynamic web application is simply a dynamic website. i.e. www.gmail.com, www.facebook.com, www.yahoo.com etc. which has a tendency to change data/information with respect to 3 parameters:
Time-to-time (eg. news update webs applications)
Location-to-location (eg. Weather-report web applications)
User-to-user (eg. Gmail, Facebook type applications)
Angular Previous Versions
AngularJS (also known as Angular 1.0): AngularJS is a JavaScript based open-source frontend web framework developed and maintained by Google. AngularJS can be added to an HTML page with a <script> tag. Because AngularJS was the first version of the Angular, so it is also known as Angular 1. AngularJS was first released on October 20, 2010 by a team of Google.
Angular 2: Angular 2 was a complete rewrite of AngularJS. It was first released in May 2016 and the final version was released on September 14, 2016.
Angular 4: Angular 4 was the updated version of Angular 2. The Google team skipped the Angular 3 to avoid the confusion due to the misalignment of the router package’s version which was already distributed as v3.3.0.
Angular 5: Angular 5 was the improved version of the previous one. It was released on November 1, 2017 and improved the support for progressive web apps.
Angular 6: Angular 6 Angular 6 was released on May 4, 2018. It was a major released focused on ng update, ng add, Angular Elements, Angular Material + CDK Components, Angular Material Starter Components, CLI Workspaces, Library Support, Tree Shakable Providers, Animations Performance Improvements, and RxJS v6.
Angular 7: Angular 7 was released on October 18, 2018. It was focused on Application Performance, Angular Material & CDK, Virtual Scrolling, Improved Accessibility etc.
Angular 8: Angular 8 is the latest version running nowadays. Angular 8 is released on May 28, 2019. It is mainly focused on Differential loading, Dynamic imports for lazy routes, web workers and Angular Ivy as an opt-in support. It also supports TypeScript 3.4.
Angular 8 is the latest version of Angular. Here, we are specifying how to upgrade your older version of Angular in the latest one. It doesn’t matter which Angular’s version you are using, you can easily update it to Angular 8 by using the following steps:
Step 1: First, check your current version of Angular CLI by using the following command.
ng -version
You can see in the above output that we are using Angular 7. Now, we have to update it to Angular 8.
Step 2: Run the following command to uninstall your older version of Angular.
npm uninstall -g angular-cli // For Windows Open Powershell on Administrator Mode

sudo npm uninstall -g angular-cli // For Mac
Step 3: Now you have to verify and clear the cache by using the following commands.
npm cache verify
npm cache clean
Step 4:Now, install the latest Angular CLI (Angular 8) by using the following command.
npm install -g @angular/cli@latest
Step 5: Angular 8 CLI is now installed in your system. You can check it by using the following command.
ng --version
Now, you can see that Angular 8 is installed in your system.
Note: After updating both global and local package, you should clear the cache to avoid errors.
Update Angular Packages
If you have already created your project in older Angular version then go inside that folder and use the following command to update that package.
Template-driven forms can be used for many applications i.e. log in, submit a request, place an order, data entry etc.
Now, let’s create the form. Follow these steps:
Create a project
First, create a new project named angular-forms by using the following command:
ng new angular-forms
Now, go to the project folder by using the following command.
cd angular-forms
Now, use the Angular CLI command ng generate class Hero to generate a new class named Hero:
ng generate class Hero
Go to your project folder angular-forms and open the hero.ts file under the app module. Write the following code:
export class Hero {

  constructor(

    public id: number,

    public name: string,

    public power: string,

    public alterEgo?: string

  ) {  }

}
The TypeScript compiler generates a public field for each public constructor parameter and when you create new heroes, it automatically assign the parameter’s value to that field.
Here, alterEgo is optional and the constructor can omit it.
Create a Form component
An Angular form consists of two parts:
HTML based template
A component class to handle data and users
Now, generate a new component named HeroForm by using the following command:
ng generate component HeroForm
Write down the following code in hero-form.component.ts
import { Component } from '@angular/core';

import { Hero }    from '../hero';

@Component({

  selector: 'app-hero-form',

  templateUrl: './hero-form.component.html',

  styleUrls: ['./hero-form.component.css']

})

export class HeroFormComponent {

  powers = ['Really Smart', 'Super Flexible',

            'Super Hot', 'Weather Changer'];

  model = new Hero(18, 'Dr IQ', this.powers[0], 'Chuck Overstreet');

  submitted = false;

  onSubmit() { this.submitted = true; }

  // TODO: Remove this when we're done

  get diagnostic() { return JSON.stringify(this.model); }

}
Revise app.module.ts file
The app.module.ts file is used to define the application’s root module. The template-driven forms reside in their own module. You need to add the FormsModule to the array of imports for the application module before using forms.
Use the following code inside app.module.ts file:
import { NgModule }      from '@angular/core';

import { BrowserModule } from '@angular/platform-browser';

import { FormsModule }   from '@angular/forms';

import { AppComponent }  from './app.component';

import { HeroFormComponent } from './hero-form/hero-form.component';

@NgModule({

  imports: [

    BrowserModule,

    FormsModule

  ],

  declarations: [

    AppComponent,

    HeroFormComponent

  ],

  providers: [],

  bootstrap: [ AppComponent ]

})

export class AppModule { }
Here, we have imported FormsModule and added the FormsModule to the list of imports defined in the @NgModule decorator. This is used to access the application to all of the template-driven forms features, including ngModel.
Revise app.component.html file
The app.component.html is used to host the new HeroFormComponent. It is the application’s root component. Write the following code in app.component.html
<app-hero-form></app-hero-form>
Create an initial HTML form template
Use the following code in hero-form.component.html
The hero form can choose power lists from a fixed list of agency-approved powers. Use the following HTML code immediately below the Alter Ego group in hero-form.component.html
Angular reactive forms follow a model-driven approach to handle form input whose values can be changed over time. These are also known as model-driven forms. In reactive forms, you can create and update a simple form control, use multiple controls in a group, validate form values, and implement more advanced forms.
Reactive forms use an explicit and immutable approach to manage the state of the form at a given point of time. When we change the form state, it returns a new state which manages the integrity of the models between changes. In reactive forms, you build your own representation of a form in the component class.
Reactive forms are easy to test because they assure consistent and predictable data when requested.
How to add a single form control
In this section, we will describe how to add a single form control. Here, the users have to enter their name into an input field, form captures that input value, and displays the current value of the form control element.
Follow these steps:
1. Register the reactive forms module
You have to import ReactiveFormsModule from the @angular/forms package and add it to your NgModule’s imports array to use reactive forms.
import { ReactiveFormsModule } from '@angular/forms';

@NgModule({

imports: [

    // other imports ...

ReactiveFormsModule

  ],

})

export class AppModule { }
2. Generate and Import a new form control
First, generate a component for the control by using the following syntax:
ng generate component NameEditor
To register a single form control, you have to import the FormControl class into your component and create a new instance of the form control to save as a class property. The FormControl class is the basic building block used in reactive forms.
Write the following code in name-editor.component.ts file:
import { Component } from '@angular/core';

import { FormControl } from '@angular/forms';

@Component({

  selector: 'app-name-editor',

  templateUrl: './name-editor.component.html',

  styleUrls: ['./name-editor.component.css']

})

export class NameEditorComponent {

  name = new FormControl('');

}
3. Now, register the control in the template
After creating the control in the component class, you have to add it to the form control element in the template. Use the formControl binding provided by FormControlDirective to update the template with the form control.
We have registered the form control to the name input element in the template. Now, the form control and DOM element communicate with each other and the view reflects changes in the model, and the model reflects changes in the view.
4. Display the component
Add the form control component to the template to display the form. Add the following code to app.component.html.