Namespaces can be defined as a class of elements in which each element has a unique name to that associated class. It may be shared with elements in other classes.
Declaration of namespace
The use keyword allows the developers to shorten the namespace.
use <namespace-name>;
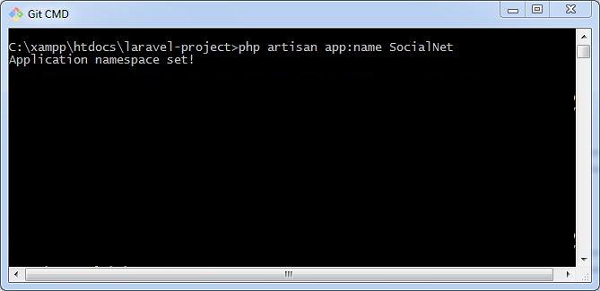
The default namespace used in Laravel is App, however a user can change the namespace to match with web application. Creating user defined namespace with artisan command is mentioned as follows −
php artisan app:name SocialNet
The namespace once created can include various functionalities which can be used in controllers and various classes.
Laravel includes a built-in queue system, which allows you to defer time-consuming tasks, like sending emails or processing uploads, to a background process. This improves application performance and responsiveness.
Middleware acts as a bridge between a request and a response. It is a type of filtering mechanism. This chapter explains you the middleware mechanism in Laravel.
Laravel includes a middleware that verifies whether the user of the application is authenticated or not. If the user is authenticated, it redirects to the home page otherwise, if not, it redirects to the login page.
Middleware can be created by executing the following command −
php artisan make:middleware <middleware-name>
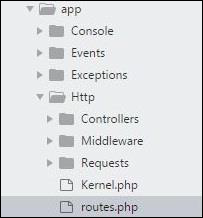
Replace the <middleware-name> with the name of your middleware. The middleware that you create can be seen at app/Http/Middleware directory.
Example
Observe the following example to understand the middleware mechanism −
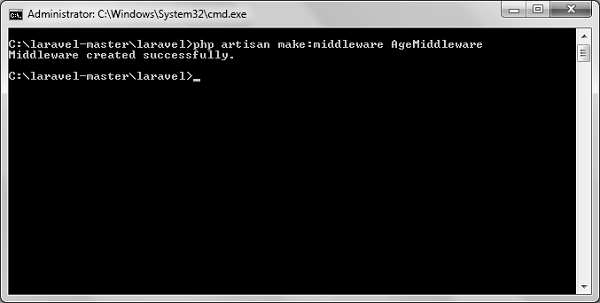
Step 1 − Let us now create AgeMiddleware. To create that, we need to execute the following command −
php artisan make:middleware AgeMiddleware
Step 2 − After successful execution of the command, you will receive the following output −
Step 3 − AgeMiddleware will be created at app/Http/Middleware. The newly created file will have the following code already created for you.
<?php

namespace App\Http\Middleware;
use Closure;

class AgeMiddleware {
   public function handle($request, Closure $next) {
  return $next($request);   }
}
Registering Middleware
We need to register each and every middleware before using it. There are two types of Middleware in Laravel.
Global Middleware
Route Middleware
The Global Middleware will run on every HTTP request of the application, whereas the Route Middleware will be assigned to a specific route. The middleware can be registered at app/Http/Kernel.php. This file contains two properties $middleware and $routeMiddleware. $middleware property is used to register Global Middleware and $routeMiddleware property is used to register route specific middleware.
To register the global middleware, list the class at the end of $middleware property.
We have created AgeMiddleware in the previous example. We can now register it in route specific middleware property. The code for that registration is shown below.
The following is the code for app/Http/Kernel.php −
<?php
namespace App\Http;
use Illuminate\Foundation\Http\Kernel as HttpKernel;
class Kernel extends HttpKernel {
protected $middleware = [
We can also pass parameters with the Middleware. For example, if your application has different roles like user, admin, super admin etc. and you want to authenticate the action based on role, this can be achieved by passing parameters with middleware. The middleware that we create contains the following function and we can pass our custom argument after the $next argument.
public function handle($request, Closure $next) {
   return $next($request);
}
Example
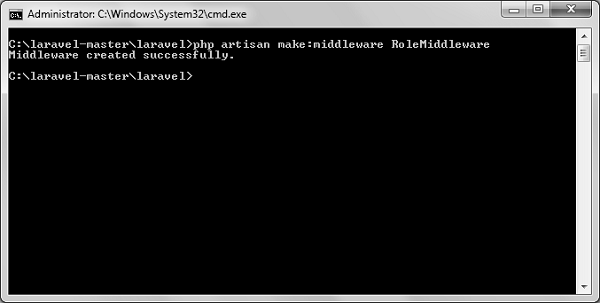
Step 1 − Create RoleMiddleware by executing the following command −
php artisan make:middleware RoleMiddleware
Step 2 − After successful execution, you will receive the following output −
Step 3 − Add the following code in the handle method of the newly created RoleMiddlewareat app/Http/Middleware/RoleMiddleware.php.
<?php

namespace App\Http\Middleware;
use Closure;

class RoleMiddleware {
   public function handle($request, Closure $next, $role) {
  echo "Role: ".$role;
  return $next($request);   }
}
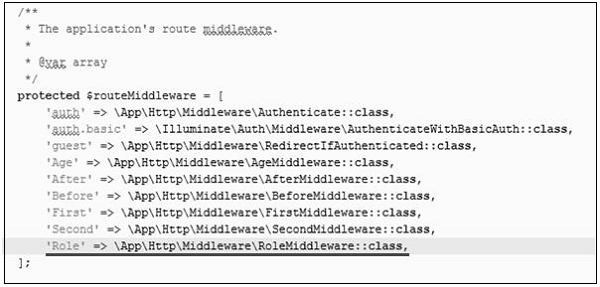
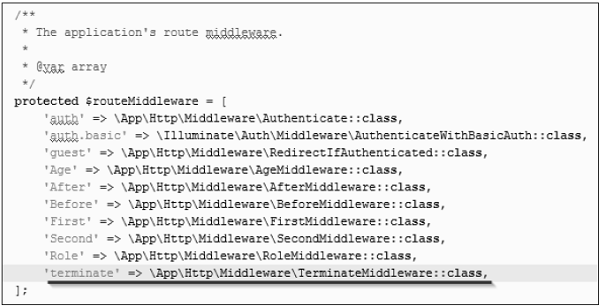
Step 4 − Register the RoleMiddleware in app\Http\Kernel.php file. Add the line highlighted in gray color in that file to register RoleMiddleware.
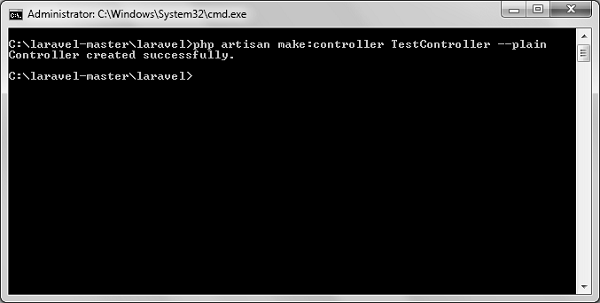
Step 5 − Execute the following command to create TestController −
Step 6 − After successful execution of the above step, you will receive the following output −
Step 7 − Copy the following lines of code to app/Http/TestController.php file.
app/Http/TestController.php
<?php
namespace App\Http\Controllers;
use Illuminate\Http\Request;
use App\Http\Requests;
use App\Http\Controllers\Controller;
class TestController extends Controller {
public function index() {
echo "<br>Test Controller.";
}
}
Step 8 − Add the following line of code in app/Http/routes.php file.
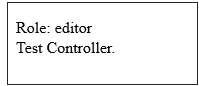
Step 9 − Visit the following URL to test the Middleware with parameters
http://localhost:8000/role
Step 10 − The output will appear as shown in the following image.
Explore our latest online courses and learn new skills at your own pace. Enroll and become a certified expert to boost your career.
Terminable Middleware
Terminable middleware performs some task after the response has been sent to the browser. This can be accomplished by creating a middleware with terminate method in the middleware. Terminable middleware should be registered with global middleware. The terminate method will receive two arguments $request and $response. Terminate method can be created as shown in the following code.
Example
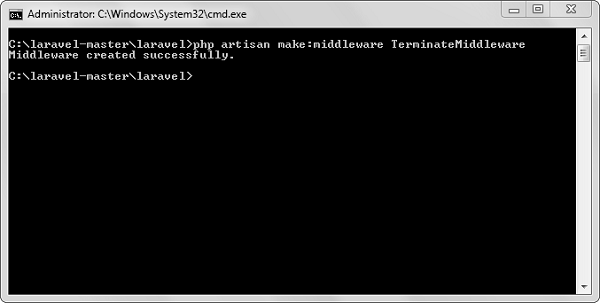
Step 1 − Create TerminateMiddleware by executing the below command.
php artisan make:middleware TerminateMiddleware
Step 2 − The above step will produce the following output −
Step 3 − Copy the following code in the newly created TerminateMiddleware at app/Http/Middleware/TerminateMiddleware.php.
<?php
namespace App\Http\Middleware;
use Closure;
class TerminateMiddleware {
public function handle($request, Closure $next) {
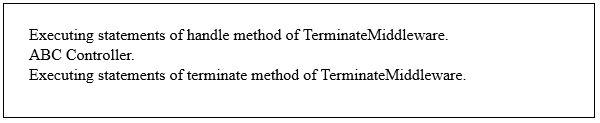
echo "Executing statements of handle method of TerminateMiddleware.";
return $next($request);
}
public function terminate($request, $response) {
echo "<br>Executing statements of terminate method of TerminateMiddleware.";
}
}
Step 4 − Register the TerminateMiddleware in app\Http\Kernel.php file. Add the line highlighted in gray color in that file to register TerminateMiddleware.
Step 5 − Execute the following command to create ABCController.
php artisan make:controller ABCController --plain
Step 6 − After the successful execution of the URL, you will receive the following output −
Step 7 − Copy the following code to app/Http/ABCController.php file.
app/Http/ABCController.php
<?php
namespace App\Http\Controllers;
use Illuminate\Http\Request;
use App\Http\Requests;
use App\Http\Controllers\Controller;
class ABCController extends Controller {
public function index() {
echo "<br>ABC Controller.";
}
}
Step 8 − Add the following line of code in app/Http/routes.php file.
Laravel’s migration system allows you to manage database schema changes easily. You can define changes in PHP files, which makes version control simple and ensures that team members can keep their databases in sync.
Laravel provides a robust authentication system out of the box, complete with features like user registration, login, password resets, and more. Additionally, it offers authorization mechanisms to control user access to specific resources and actions.
Laravel simplifies the creation of RESTful APIs by providing resource controllers. These controllers can handle multiple actions for CRUD (Create, Read, Update, Delete) operations with minimal boilerplate code, making API development efficient.
With Laravel, you can easily implement real-time event broadcasting. This allows your application to listen for events and push updates to clients using WebSockets, enhancing user experience with real-time features.
In Laravel, all requests are mapped with the help of routes. Basic routing routes the request to the associated controllers. This chapter discusses routing in Laravel.
Routing in Laravel includes the following categories −
Basic Routing
Route parameters
Named Routes
Basic Routing
All the application routes are registered within the app/routes.php file. This file tells Laravel for the URIs it should respond to and the associated controller will give it a particular call. The sample route for the welcome page can be seen as shown in the screenshot given below −
Route::get ('/', function () {
   return view('welcome');});
Example
Observe the following example to understand more about Routing −
app/Http/routes.php
<?php
Route::get('/', function () {
   return view('welcome');
});
<div class = "container">
<div class = "content">
<div class = "title">Laravel 5.1</div>
</div>
</div>
</body>
</html>
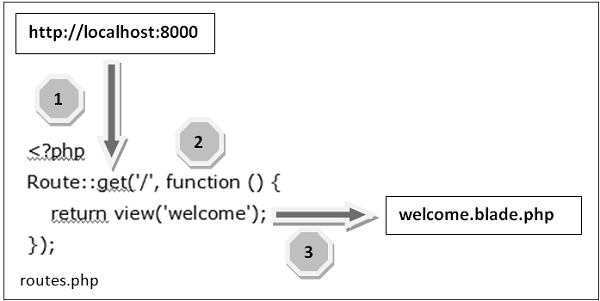
The routing mechanism is shown in the image given below −
Let us now understand the steps involved in routing mechanism in detail −
Step 1 − Initially, we should execute the root URL of the application.
Step 2 − Now, the executed URL should match with the appropriate method in the route.php file. In the present case, it should match the method and the root (‘/’) URL. This will execute the related function.
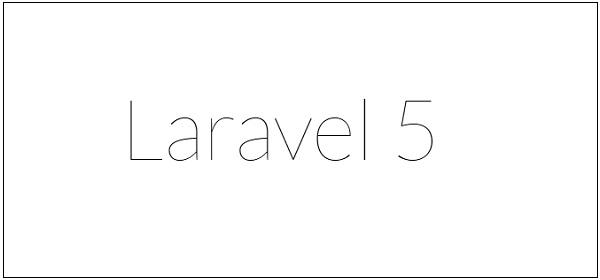
Step 3 − The function calls the template file resources/views/welcome.blade.php. Next, the function calls the view() function with argument ‘welcome’ without using the blade.php.
This will produce the HTML output as shown in the image below −
Route Parameters
Sometimes in the web application, you may need to capture the parameters passed with the URL. For this, you should modify the code in routes.php file.
You can capture the parameters in routes.php file in two ways as discussed here −
Required Parameters
These parameters are those which should be mandatorily captured for routing the web application. For example, it is important to capture the user’s identification number from the URL. This can be possible by defining route parameters as shown below −
Sometimes developers can produce parameters as optional and it is possible with the inclusion of ? after the parameter name in URL. It is important to keep the default value mentioned as a parameter name. Look at the following example that shows how to define an optional parameter −
Route::get('user/{name?}', function ($name = 'TutorialsPoint') { return $name;});
The example above checks if the value matches to TutorialsPoint and accordingly routes to the defined URL.
Explore our latest online courses and learn new skills at your own pace. Enroll and become a certified expert to boost your career.
Named Routes
Named routes allow a convenient way of creating routes. The chaining of routes can be specified using name method onto the route definition. The following code shows an example for creating named routes with controller −
In the previous chapter, we have seen that the basic configuration files of Laravel are included in the config directory. In this chapter, let us discuss the categories included in the configuration.
Environment Configuration
Environment variables are those which provide a list of web services to your web application. All the environment variables are declared in the .env file which includes the parameters required for initializing the configuration.
By default, the .env file includes following parameters −
While working with basic configuration files of Laravel, the following points are to be noted −
The .env file should not be committed to the application source control, since each developer or user has some predefined environment configuration for the web application.
For backup options, the development team should include the .env.example file, which should contain the default configuration.
Retrieval of Environment Variables
All the environment variables declared in the .env file can be accessed by env-helper functions which will call the respective parameter. These variables are also listed into $_ENV global variable whenever application receives a request from the user end. You can access the environment variable as shown below −
'env' => env('APP_ENV', 'production'),
env-helper functions are called in the app.php file included in the config folder. The above given example is calling for the basic local parameter.
Accessing Configuration Values
You can easily access the configuration values anywhere in the application using the global config helper function. In case if the configuration values are not initialized, default values are returned.
For example, to set the default time zone, the following code is used −
config(['app.timezone' => 'Asia/Kolkata']);
Explore our latest online courses and learn new skills at your own pace. Enroll and become a certified expert to boost your career.
Caching of Configuration
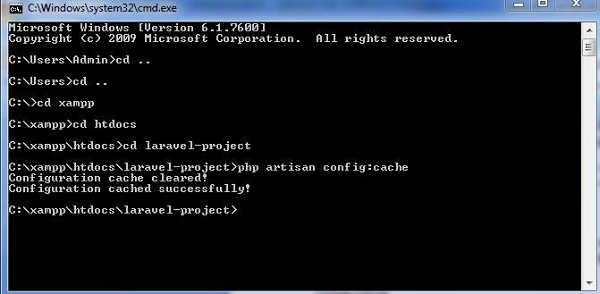
To increase the performance and to boost the web application, it is important to cache all the configuration values. The command for caching the configuration values is −
config:cache
The following screenshot shows caching in a systematic approach −
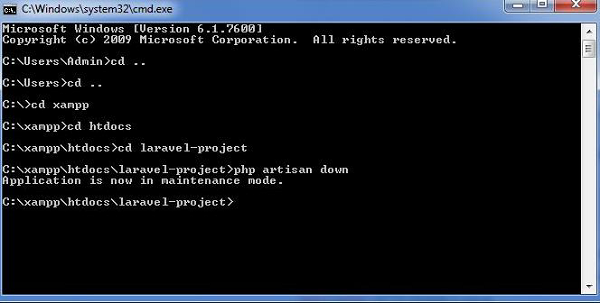
Maintenance Mode
Sometimes you may need to update some configuration values or perform maintenance on your website. In such cases, keeping it in maintenance mode, makes it easier for you. Such web applications which are kept in maintenance mode, throw an exception namely MaintenanceModeException with a status code of 503.
You can enable the maintenance mode on your Laravel web application using the following command −
php artisan down
The following screenshot shows how the web application looks when it is down −
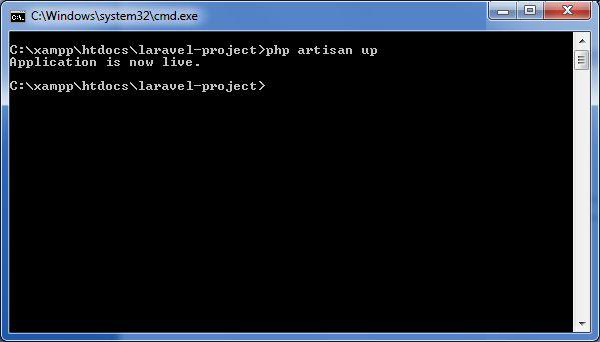
Once you finish working on updates and other maintenance, you can disable the maintenance mode on your web application using following command −
php artisan up
Now, you can find that the website shows the output with proper functioning and depicting that the maintenance mode is now removed as shown below −
Laravel Mix is a powerful tool for managing and compiling frontend assets. It provides a clean API for defining Webpack build steps, allowing developers to handle CSS and JavaScript assets easily without deep knowledge of Webpack.