HTTP middleware is a technique for filtering HTTP requests. Laravel includes a middleware that checks whether application user is authenticated or not.
Author: saqibkhan
-
Define composer.
It is an application-level package manager for PHP. It provides a standard format for managing PHP software dependencies and libraries.
-
What is Laravel?
Laravel is an open-source widely used PHP framework. The platform was intended for the development of web application by using MVC architectural pattern. Laravel is released under the MIT license.
Therefore, its source code is hosted on GitHub. It is a reliable PHP framework as it follows expressive and accurate language rules.
-
File Uploading
Uploading Files in Laravel is very easy. All we need to do is to create a view file where a user can select a file to be uploaded and a controller where uploaded files will be processed.
In a view file, we need to generate a file input by adding the following line of code.
Form::file('file_name');In Form::open(), we need to add ‘files’=>’true’ as shown below. This facilitates the form to be uploaded in multiple parts.
Form::open(array('url' => '/uploadfile','files'=>'true'));Example
Step 1 − Create a view file called resources/views/uploadfile.php and copy the following code in that file.
resources/views/uploadfile.php
<html> <body>
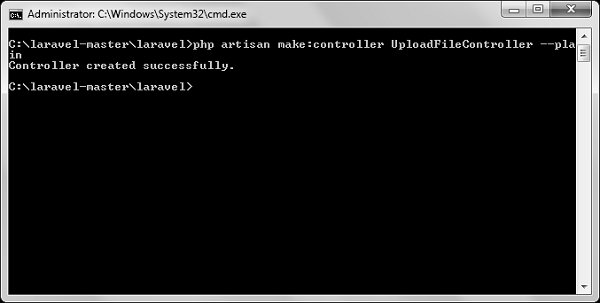
</body> </html><?php echo Form::open(array('url' => '/uploadfile','files'=>'true')); echo 'Select the file to upload.'; echo Form::file('image'); echo Form::submit('Upload File'); echo Form::close(); ?>Step 2 − Create a controller called UploadFileController by executing the following command.
php artisan make:controller UploadFileController --plainStep 3 − After successful execution, you will receive the following output −
Step 4 − Copy the following code in
app/Http/Controllers/UploadFileController.php file.
app/Http/Controllers/UploadFileController.php
<?php namespace App\Http\Controllers; use Illuminate\Http\Request; use App\Http\Requests; use App\Http\Controllers\Controller; class UploadFileController extends Controller { public function index() {
} public function showUploadFile(Request $request) {return view('uploadfile');$file = $request->file('image');//Display File Name echo 'File Name: '.$file->getClientOriginalName(); echo '<br>';//Display File Extension echo 'File Extension: '.$file->getClientOriginalExtension(); echo '<br>';//Display File Real Path echo 'File Real Path: '.$file->getRealPath(); echo '<br>';//Display File Size echo 'File Size: '.$file->getSize(); echo '<br>';//Display File Mime Type echo 'File Mime Type: '.$file->getMimeType();
} }//Move Uploaded File $destinationPath = 'uploads'; $file->move($destinationPath,$file->getClientOriginalName());Step 5 − Add the following lines in app/Http/routes.php.
app/Http/routes.php
Route::get('/uploadfile','UploadFileController@index');
Route::post('/uploadfile','UploadFileController@showUploadFile');
Step 6 − Visit the following URL to test the upload file functionality.
http://localhost:8000/uploadfileStep 7 − You will receive a prompt as shown in the following image.

-
Cross-Platform Integration
Laravel is designed to work seamlessly with various technologies and services, such as cloud storage (e.g., AWS S3), caching systems (like Redis), and payment gateways (like Stripe). This flexibility makes it suitable for a wide range of applications.
-
Laravel Telescope
Telescope is a debugging and monitoring tool for Laravel applications that provides insights into requests, exceptions, logs, and database queries. It helps developers troubleshoot issues and optimize application performance during development.
-
Validation
Validation is the most important aspect while designing an application. It validates the incoming data. By default, base controller class uses a ValidatesRequests trait which provides a convenient method to validate incoming HTTP requests with a variety of powerful validation rules.
Available Validation Rules in Laravel
Laravel will always check for errors in the session data, and automatically bind them to the view if they are available. So, it is important to note that a $errors variable will always be available in all of your views on every request, allowing you to conveniently assume the $errors variable is always defined and can be safely used. The following table shows all available validation rules in Laravel.
Available Validation Rules in Laravel Accepted Active URL After (Date) Alpha Alpha Dash Alpha Numeric Array Before (Date) Between Boolean Confirmed Date Date Format Different Digits Digits Between E-Mail Exists (Database) Image (File) In Integer IP Address JSON Max MIME Types(File) Min Not In Numeric Regular Expression Required Required If Required Unless Required With Required With All Required Without Required Without All Same Size String Timezone Unique (Database) URL The $errors variable will be an instance of Illuminate\Support\MessageBag. Error message can be displayed in view file by adding the code as shown below.
@if (count($errors) > 0) <div class = "alert alert-danger">
</div> @endif<ul> @foreach ($errors->all() as $error) <li>{{ $error }}</li> @endforeach </ul>Example
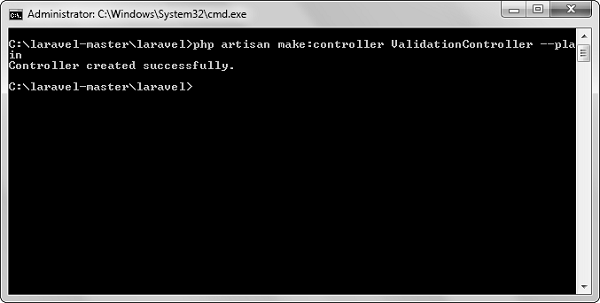
Step 1 − Create a controller called ValidationController by executing the following command.
php artisan make:controller ValidationController --plainStep 2 − After successful execution, you will receive the following output −
Step 3 − Copy the following code in
app/Http/Controllers/ValidationController.php file.
app/Http/Controllers/ValidationController.php
<?php namespace App\Http\Controllers; use Illuminate\Http\Request; use App\Http\Requests; use App\Http\Controllers\Controller; class ValidationController extends Controller { public function showform() {
} public function validateform(Request $request) {return view('login');
} }print_r($request->all()); $this->validate($request,[ 'username'=>'required|max:8', 'password'=>'required' ]);Step 4 − Create a view file called resources/views/login.blade.php and copy the following code in that file.
resources/views/login.blade.php
<html> <head>
</head> <body><title>Login Form</title>
</body> </html>@if (count($errors) > 0) <div class = "alert alert-danger"> <ul> @foreach ($errors->all() as $error) <li>{{ $error }}</li> @endforeach </ul> </div> @endif <?php echo Form::open(array('url'=>'/validation')); ?> <table border = '1'> <tr> <td align = 'center' colspan = '2'>Login</td> </tr> <tr> <td>Username</td> <td><?php echo Form::text('username'); ?></td> </tr> <tr> <td>Password</td> <td><?php echo Form::password('password'); ?></td> </tr> <tr> <td align = 'center' colspan = '2' ><?php echo Form::submit('Login'); ? ></td> </tr> </table> <?php echo Form::close(); ?>Step 5 − Add the following lines in app/Http/routes.php.
app/Http/routes.php
Route::get('/validation','ValidationController@showform');
Route::post('/validation','ValidationController@validateform');
Step 6 − Visit the following URL to test the validation.
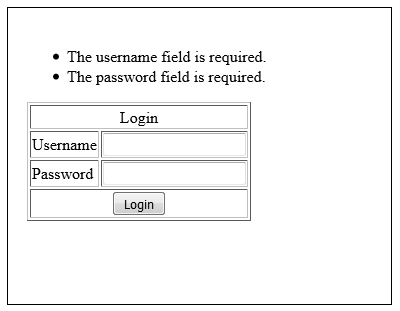
http://localhost:8000/validationStep 7 − Click the “Login” button without entering anything in the text field. The output will be as shown in the following image.
-
First-Class Support for Queues
Laravel’s queue system allows developers to defer processing time-consuming tasks (like sending emails or processing uploads) to a background job. This improves application performance and responsiveness, enabling smoother user experiences.
-
Event Broadcasting
Laravel supports event broadcasting, allowing real-time event handling in applications. This feature is useful for building applications that require real-time updates, such as chat applications or live notifications, and can be implemented using WebSockets.
-
Localization Support
Laravel includes robust localization support, allowing developers to create applications that can be easily translated into multiple languages. This is facilitated through language files, enabling developers to manage translations efficiently.