Laravel exceptions are handled by App\Exceptions\Handler class
Author: saqibkhan
-
Explain PHP artisan
An artisan is a command-line tool of Laravel. It provides commands that help you to build Laravel application without any hassle.
-
How can you generate URLs?
Laravel has helpers to generate URLs. This is helpful when you build link in your templates and API response.
-
Encryption
Encryption is a process of converting a plain text to a message using some algorithms such that any third user cannot read the information. This is helpful for transmitting sensitive information because there are fewer chances for an intruder to target the information transferred.
Encryption is performed using a process called Cryptography. The text which is to be encrypted is termed as Plain Text and the text or the message obtained after the encryption is called Cipher Text. The process of converting cipher text to plain text is called Decryption.
Laravel uses AES-256 and AES-128 encrypter, which uses Open SSL for encryption. All the values included in Laravel are signed using the protocol Message Authentication Code so that the underlying value cannot be tampered with once it is encrypted.
Configuration
The command used to generate the key in Laravel is shown below −
php artisan key:generatePlease note that this command uses the PHP secure random bytes’ generator and you can see the output as shown in the screenshot given below −

The command given above helps in generating the key which can be used in web application. Observe the screenshot shown below −
Note
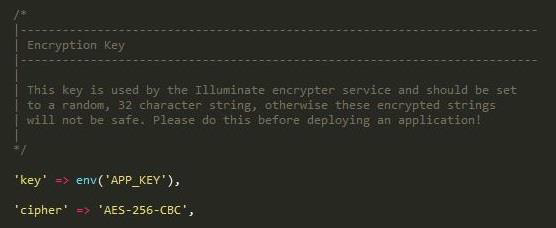
The values for encryption are properly aligned in the config/app.php file, which includes two parameters for encryption namely key and cipher. If the value using this key is not properly aligned, all the values encrypted in Laravel will be insecure.
Encryption Process
Encryption of a value can be done by using the encrypt helper in the controllers of Laravel class. These values are encrypted using OpenSSL and AES-256 cipher. All the encrypted values are signed with Message Authentication code (MAC) to check for any modifications of the encrypted string.
The code shown below is mentioned in a controller and is used to store a secret or a sensitive message.
<?php namespace App\Http\Controllers; use Illuminate\Http\Request; use App\Http\Controllers\Controller; class DemoController extends Controller{ **
*/ public function storeSecret(Request $request, $id) {* Store a secret message for the user. * * @param Request $request * @param int $id * @return Response
} }$user = User::findOrFail($id); $user->fill([ 'secret' => encrypt($request->secret) ])->save();Explore our latest online courses and learn new skills at your own pace. Enroll and become a certified expert to boost your career.
Decryption Process
Decryption of the values is done with the decrypt helper. Observe the following lines of code −
use Illuminate\Contracts\Encryption\DecryptException;

// Exception for decryption thrown in facade
try {
   $decrypted = decrypt($encryptedValue);
} catch (DecryptException $e) {
   //
}
Please note that if the process of decryption is not successful because of invalid MAC being used, then an appropriate exception is thrown.
-
Define Lumen
Lumen is a micro-framework. It is a smaller, and faster, version of a building Laravel based services, and REST API’s.
-
Artisan Console
Laravel framework provides three primary tools for interaction through command-line namely: Artisan, Ticker and REPL. This chapter explains about Artisan in detail.
Introduction to Artisan
Artisan is the command line interface frequently used in Laravel and it includes a set of helpful commands for developing a web application.
Example
Here is a list of few commands in Artisan along with their respective functionalities −
To start Laravel project
php artisan serveTo enable caching mechanism
php artisan route:cacheTo view the list of available commands supported by Artisan
php artisan list
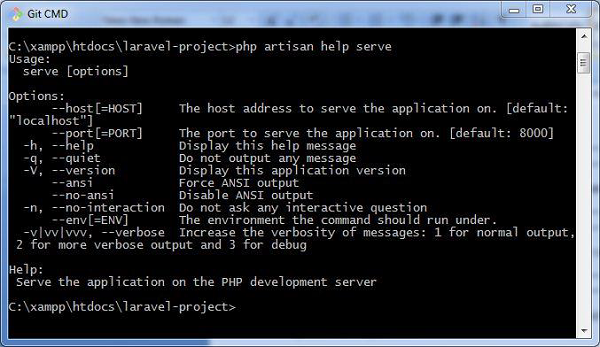
To view help about any command and view the available options and arguments
php artisan help serveThe following screenshot shows the output of the commands given above −
Explore our latest online courses and learn new skills at your own pace. Enroll and become a certified expert to boost your career.
Writing Commands
In addition to the commands listed in Artisan, a user can also create a custom command which can be used in the web application. Please note that commands are stored in app/console/commands directory.
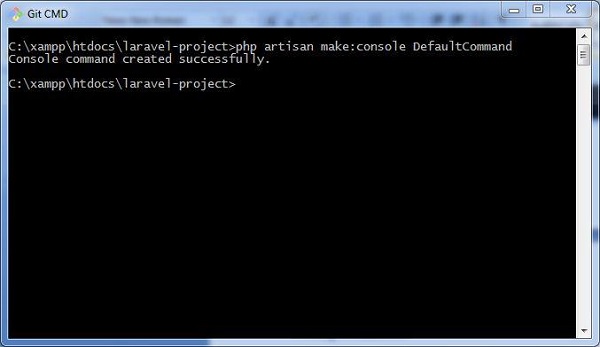
The default command for creating user defined command is shown below −
php artisan make:console <name-of-command>Once you type the above given command, you can see the output as shown in the screenshot given below −
The file created for DefaultCommand is named as DefaultCommand.php and is shown below −
<?php namespace App\Console\Commands; use Illuminate\Console\Command; class DefaultCommand extends Command{ /**
*/ protected $signature = 'command:name'; /*** The name and signature of the console command. * * @var string
*/ protected $description = 'Command description'; /*** The console command description. * * @var string
*/ public function __construct() {* Create a new command instance. * * @return void
} /**parent::__construct();
*/ public function handle() {* Execute the console command. * * @return mixed
} }//This file includes the signature and description for the command that user defined. The public function named handle executes the functionalities when the command is executed. These commands are registered in the file Kernel.php in the same directory.
You can also create the schedule of tasks for the user defined command as shown in the following code −
<?php namespace App\Console; use Illuminate\Console\Scheduling\Schedule; use Illuminate\Foundation\Console\Kernel as ConsoleKernel; class Kernel extends ConsoleKernel { /**
*/ protected $commands = [* The Artisan commands provided by your application. * * @var array
]; /**// Commands\Inspire::class, Commands\DefaultCommand::class
*/ protected function schedule(Schedule $schedule) {* Define the application's command schedule. * * @param \Illuminate\Console\Scheduling\Schedule $schedule * @return void
} }// $schedule->command('inspire') // ->hourly();Note that the schedule of tasks for the given command is defined in the function named schedule, which includes a parameter for scheduling the tasks which takes hourly parameter.
The commands are registered in the array of commands, which includes the path and name of the commands.
Once the command is registered, it is listed in Artisan commands. The values included in the signature and description section will be displayed when you call for the help attribute of the specified command.
Let us see how to view the attributes of our command DefaultCommand. You should use the command as shown below −
php artisan help DefaultCommand -
Why are migrations important?
Migrations are important because it allows you to share application by maintaining database consistency. Without migration, it is difficult to share any Laravel application. It also allows you to sync database.
RELATED ARTICLES
-
Name databases supported by Laravel.
Laravel supports the following databases:
- PostgreSQL
- SQL Server
- SQLite
- MySQL
-
Name the Template Engine utilized by Laravel.
Blade is a powerful template engine utilized by Laravel.
-
Authorization
In the previous chapter, we have studied about authentication process in Laravel. This chapter explains you the authorization process in Laravel.
Difference between Authentication and Authorization
Before proceeding further into learning about the authorization process in Laravel, let us understand the difference between authentication and authorization.
In authentication, the system or the web application identifies its users through the credentials they provide. If it finds that the credentials are valid, they are authenticated, or else they are not.
In authorization, the system or the web application checks if the authenticated users can access the resources that they are trying to access or make a request for. In other words, it checks their rights and permissions over the requested resources. If it finds that they can access the resources, it means that they are authorized.
Thus, authentication involves checking the validity of the user credentials, and authorization involves checking the rights and permissions over the resources that an authenticated user has.
Authorization Mechanism in Laravel
Laravel provides a simple mechanism for authorization that contains two primary ways, namely Gates and Policies.
Writing Gates and Policies
Gates are used to determine if a user is authorized to perform a specified action. They are typically defined in App/Providers/AuthServiceProvider.php using Gate facade. Gates are also functions which are declared for performing authorization mechanism.
Policies are declared within an array and are used within classes and methods which use authorization mechanism.
The following lines of code explain you how to use Gates and Policies for authorizing a user in a Laravel web application. Note that in this example, the boot function is used for authorizing the users.
<?php namespace App\Providers; use Illuminate\Contracts\Auth\Access\Gate as GateContract; use Illuminate\Foundation\Support\Providers\AuthServiceProvider as ServiceProvider; class AuthServiceProvider extends ServiceProvider{ /**
*/ protected $policies = [* The policy mappings for the application. * * @var array
]; /**'App\Model' => 'App\Policies\ModelPolicy',
*/ public function boot(GateContract $gate) {* Register any application authentication / authorization services. * * @param \Illuminate\Contracts\Auth\Access\Gate $gate * @return void
} }$this->registerPolicies($gate); //