Django REST Framework (DRF) makes it easy to build web APIs, allowing for seamless integration with front-end technologies and mobile applications.
Author: saqibkhan
-
Include Models
When a new project is initialized with the startproject command, Django automatically installs a few apps, the list of these apps can be found in the INSTALLED_APPS parameter of the project’s settings module.
# Application definition

INSTALLED_APPS =['django.contrib.admin','django.contrib.auth','django.contrib.contenttypes','django.contrib.sessions','django.contrib.messages','django.contrib.staticfiles',]
To be able to log into the admin site, the models – Groups and Users are automatically registered with the Admin site.
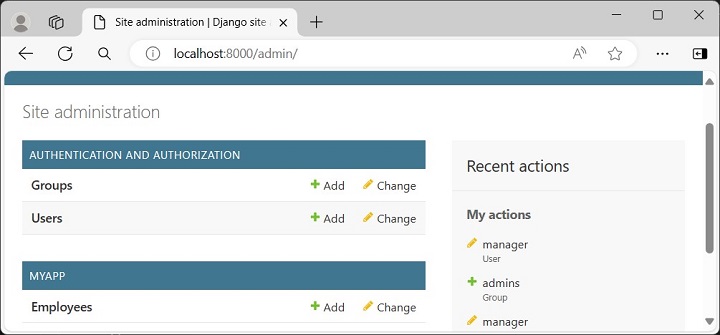
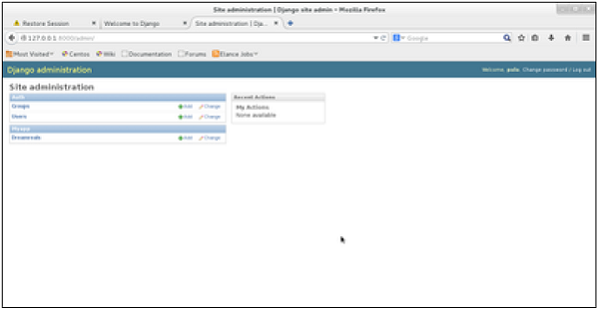
Hence, as we log into the admin site at the URL http://localhost:8000/admin with the superuser credentials, we get to see the Groups and Users tables on the homepage.
However, the models declared in the other apps are not automatically registered. You need to do so in the “admin.py” module present in the app’s package folder.
First, we create a new Django app −
Python manage.py startapp myappNext, we include it in the list of INSTALLED_APPS.
# Application definition

INSTALLED_APPS =['django.contrib.admin','django.contrib.auth','django.contrib.contenttypes','django.contrib.sessions','django.contrib.messages','django.contrib.staticfiles','myapp',]
All the models to be used are defined in the “models.py” file. Let us define the employee model as follows −
from django.db import models # Create your models here.classEmployee(models.Model): empno = models.CharField(max_length=20) empname = models.CharField(max_length=100) contact = models.CharField(max_length=15) salary = models.IntegerField() joined_date = models.DateField(null=True)classMeta:db_table ="employee"</code></pre>We must create the migration script and run the migrations.
python manage.py makemigrations myapp
python manage.py migrate
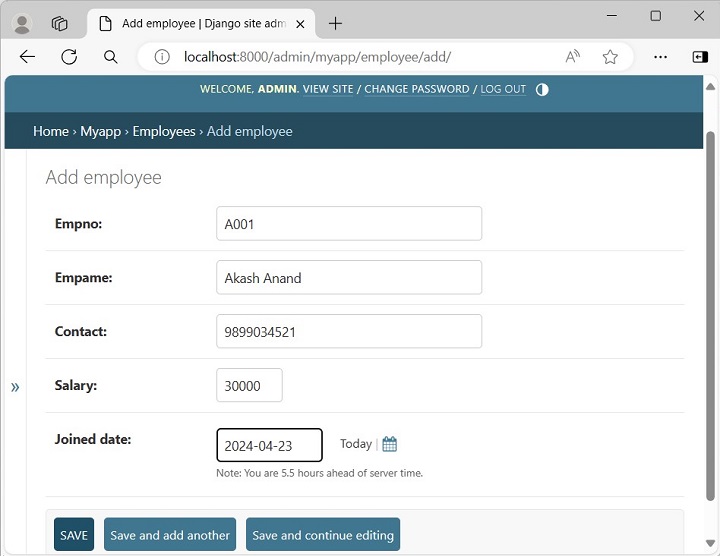
This will now create the Employee model. We now have to add this model to the admin interface. For that, open the "admin.py" file, import the employee model, and call the admin.register() function.
from django.contrib import admin

# Register your models here.from.models import Employee

admin.site.register(Employee)
After taking these steps, start the Django server −
Python manage.py runserverOpen the browser and visit the admin URL http://localhost:8000/admin which will now show the newly registered model under MYAPP.
To add new employee objects, click the + Add button −
Click the Employees model to expand its collection −
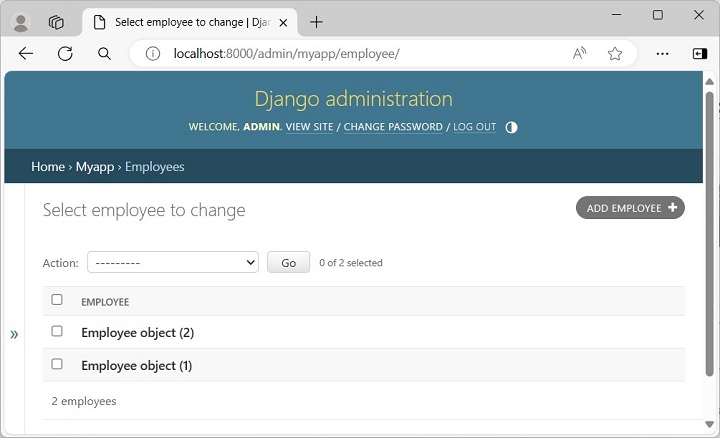
The list above shows "Employee object (1)", "Employee object (2)" without any details as it is the default string representation of the object.
In order to display more meaningful representations, we can add a __str__() method in the employee model.
-
Template Engine
The built-in template engine allows for dynamic HTML generation, supporting the separation of business logic from presentation.
-
Create User
The Django framework readily provides a robust user management system. The users, groups, and permissions are managed both through the admin interface as well as programmatically.
When you create a new project with the startproject command, the admin and auth apps are added in the INSTALLED_APPS by default. All the user objects are stored in the “django.contrib.auth.models.User” model.
Assuming that the project has been created with the following command −
django-admin startproject myprojectThe admin and auth apps are found in the list of INSTALLED_APPS in the settings module −
INSTALLED_APPS =['django.contrib.admin','django.contrib.auth',...,]You need at least one user to be able to use the admin panel. The User objects are of the following types −
- Superuser − A user object that can log into the admin site and possesses permissions to add/change/delete other users as well as perform CRUD operations on all the models in the project, through the admin interface itself.
- Staff − The User object has a is_staff property. When this property is set to True, the user can login to the Django admin site. The superuser is a staff user by default.
- Active − All users are marked as “active” by default. A normal active user (without staff privilege) is not authorized to use the Admin site.
Creating a Superuser
A superuser can be created in two ways.
- With createsuperuser parameter to manage.py script from the command line
- Calling create_superuser() function programmatically.
The command line use is straightforward. Execute following command from inside the project’s parent folder −
python manage.py createsuperuserEnter the username and password when prompted −
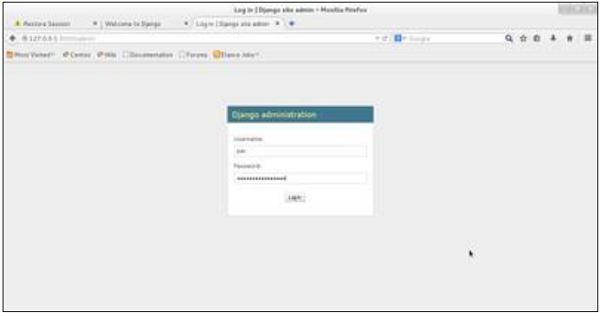
Username: admin
Email address: [email protected]
Password:********
Password (again):********
The password is too similar to the username.
This password is too short. It must contain at least 8 characters.
This password is too common.
Bypass password validation and create user anyway? [y/N]: y
Superuser created successfully.
Start the Django server, and login with the superuser credentials, open the login page of admin site http://localhost:8000/admin/.
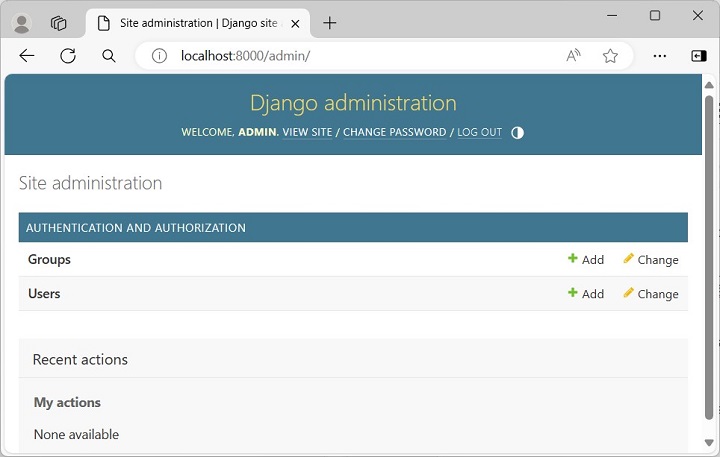
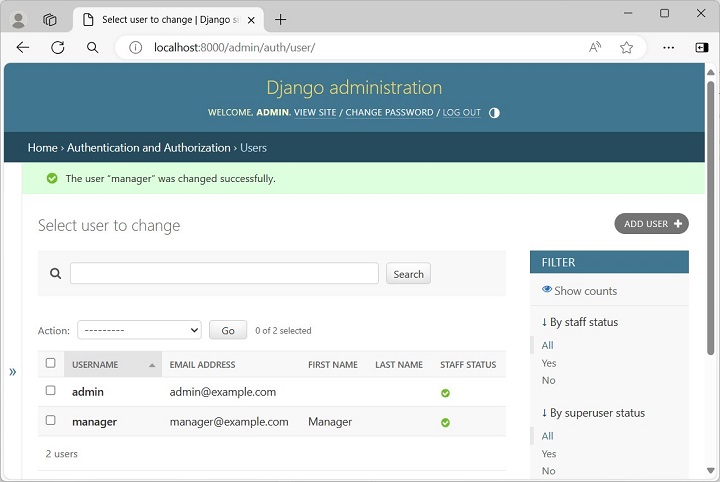
The admin homepage shows the two models Groups and Users.
Creating a New User
To create a new user, click the “+” Add button. Enter the Username (manager) and the password that complies with the rules as mentioned.
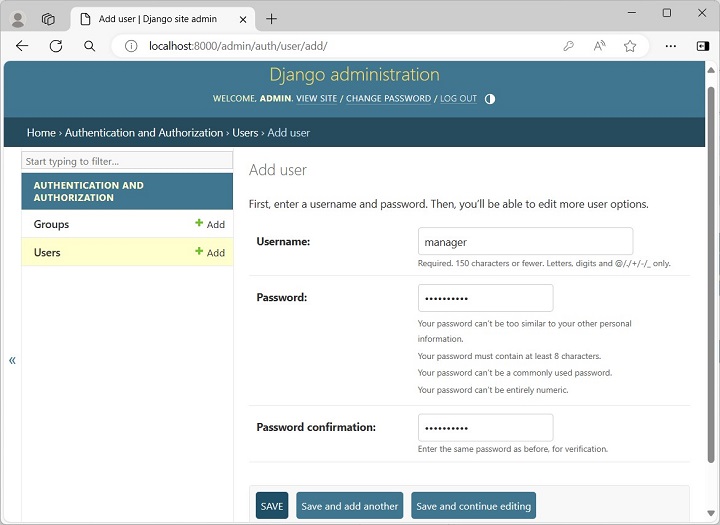
After the new user is successfully added, scroll down to enable the staff status if you want to grant the privilege of logging in. By default, each user is Active. You can also enter the other details such as the name and email address, etc.
Expand the Users model to see all the users.
To create the user programmatically, use the Django shell.
Call the create_user() function as follows −
>>>from django.contrib.auth.models import User
>>> usr=User.objects.create_user('testusr','[email protected]','pass123')
To accord the staff status, set the is_staff property to True.
>>> usr.is_staff=True>>> usr.save()Refresh the users list in the admin site. You should see the newly added user.
A group categorizes users so you can apply permissions, or some other label, to those users. A user can belong to any number of groups.
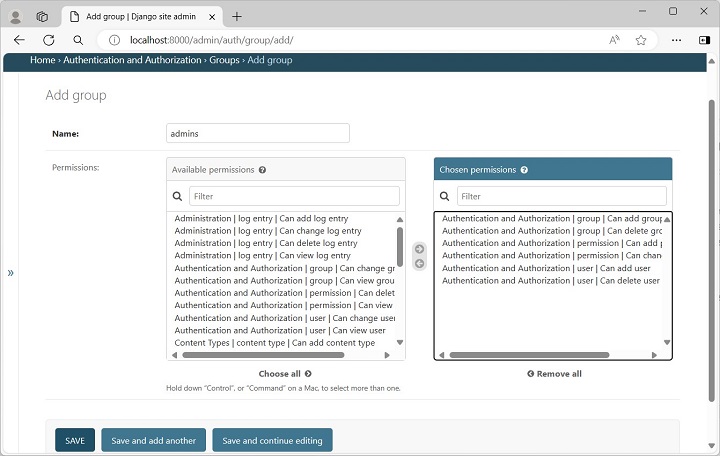
In Django, a group is a list of permissions to be assigned to one or more users. When you create or modify a user, simply choose the desired group, so that all the permissions listed in it will be accorded to the user. In addition, you can always add other permissions to a user in addition to those obtained from the user.
Go to the homepage of the admin site and click the Add button in Groups model row to add a new group called admins. Select the permissions to be accorded to the users in this group from the list of available permissions.
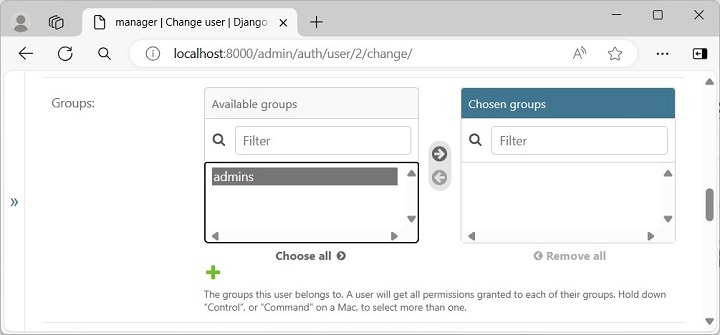
To enable all the permissions included in this group to a user, modify his properties and scroll down to see the available groups, make the selection and save.
Django’s admin site can be very effectively used to create and manage users as well as manage groups and permissions.
-
Built-in Authentication
Django comes with a robust authentication system, including user registration, login/logout, and permission management.
-
Admin Interface
Django provides a ready-to-use user interface for administrative activities. We all know how an admin interface is important for a web project. Django automatically generates admin UI based on your project models.
Starting the Admin Interface
The Admin interface depends on the django.countrib module. To have it working you need to make sure some modules are imported in the INSTALLED_APPS and MIDDLEWARE_CLASSES tuples of the myproject/settings.py file.
For INSTALLED_APPS make sure you have −
INSTALLED_APPS = (
   'django.contrib.admin',
   'django.contrib.auth',
   'django.contrib.contenttypes',
   'django.contrib.sessions',
   'django.contrib.messages',
   'django.contrib.staticfiles',
   'myapp',
)
For MIDDLEWARE_CLASSES −
MIDDLEWARE_CLASSES = (
   'django.contrib.sessions.middleware.SessionMiddleware',
   'django.middleware.common.CommonMiddleware',
   'django.middleware.csrf.CsrfViewMiddleware',
   'django.contrib.auth.middleware.AuthenticationMiddleware',
   'django.contrib.messages.middleware.MessageMiddleware',
   'django.middleware.clickjacking.XFrameOptionsMiddleware',
)
Before launching your server, to access your Admin Interface, you need to initiate the database −
$ python manage.py migratesyncdb will create necessary tables or collections depending on your db type, necessary for the admin interface to run. Even if you don’t have a superuser, you will be prompted to create one.
If you already have a superuser or have forgotten it, you can always create one using the following code −
$ python manage.py createsuperuserNow to start the Admin Interface, we need to make sure we have configured a URL for our admin interface. Open the myproject/url.py and you should have something like −
from django.conf.urls import patterns, include, url

from django.contrib import admin
admin.autodiscover()

urlpatterns = patterns('',
   # Examples:
   # url(r'^$', 'myproject.views.home', name = 'home'),
   # url(r'^blog/', include('blog.urls')),

   url(r'^admin/', include(admin.site.urls)),
)
Now just run the server.
$ python manage.py runserver
And your admin interface is accessible at: http://127.0.0.1:8000/admin/
Once connected with your superuser account, you will see the following screen −
That interface will let you administrate Django groups and users, and all registered models in your app. The interface gives you the ability to do at least the “CRUD” (Create, Read, Update, Delete) operations on your models.
-
URL Routing
Django’s URL dispatcher makes it easy to create clean, human-readable URLs and organize your application’s structure.
-
Add Master Template
Django supports template inheritance. The concept of inheritance in Django is very similar to inheritance in object-oriented programming. The idea is that the output rendered by each view in a web application must follow a uniform pattern or look, even though each view may render a different template.
Suppose a Django app has three URL routes registered with three views. We want to design the template in such a way that each view should have a page header, a footer and a sidebar with links and the variable content displayed to its right.
The Master Template
A base class in any object-oriented language (such as Python) defines attributes and methods and makes them available to the inherited class. In the same way, we need to design a master template that provides an overall skeleton for other templates.
The master template (sometimes called “base template”), along with the common structure, also marks the dummy blocks. The child template inherits the common structure and overrides the blocks to provide respective contents. Such blocks are marked with “block – endblock” construct.
{% block block_name %}......{% endblock %}The master template may have more than one such blocks in different places. Each one should be provided a unique identifier.
The HTML code for our master template (base.html) is as follows −
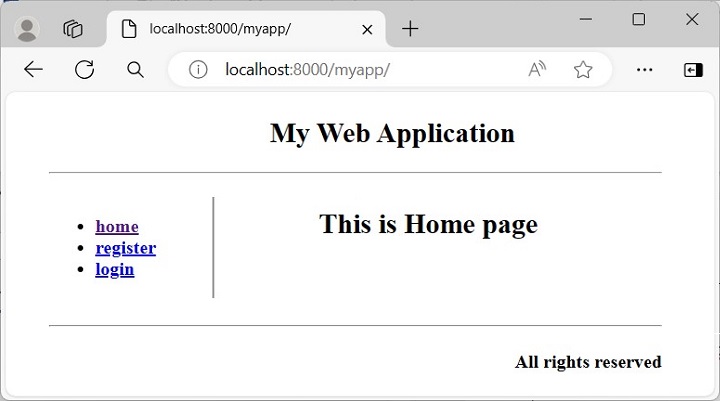
<!doctype html><html><body><!--header--><div style="height:10%;"><h2 align="center">My Web Application</h2><hr></div><div style="width:100%;"><!—side bar--><div style="width:20%; float:left; border-right-style:groove"><ul><b><li><a href="">home</a></li><li><a href="register/">register</a></li><li><a href="login/">login</a></li></b></ul></div><!--contents--><div style="margin-left:21%;"><p>{% block contents %} {% endblock %} </p></div></div><br><br><br><!--footer--><hr><div><h4 align="right">All rights reserved</h4></div></body></html></code></pre>The template for the home page (index.html) inherits this base.html by the tag −
{% extends "base.html"%}It populates the dummy content block with its own content −
<!doctype html><html><body> {% extends "base.html" %} {% block contents %}
{% endblock %} </body></html><h2 align="center">This is Home page</h2>Define a View
Let us define a view that renders this template −
from django.http import HttpResponse from django.shortcuts import render # Create your views here.defindex(request):return render(request,"index.html",{})Register the View
We also need to register this view in urls.py −
urlpatterns =[..., path('home/', views.index, name='home'),]When http://localhost:8000/myapp/home URL is opened, the home page template is rendered with the header, sidebar and footer as designed in base.html −
-
Versatile
Suitable for various types of applications, from simple websites to complex, data-driven applications, making it a versatile choice for many projects.
-
MVT Architecture
Most of the web frameworks implement the MVC (Model-View-Controller) architecture. Django uses a variation of MVC and calls it the MVT (stands for Model-View-Template) architecture.
The Advantage of Using a Web Framework
A software framework, in general, is a standard, reusable software platform that facilitates rapid development of software applications. In contrast, a web framework (also called web application framework) such as Django provides a generic functionality needed for building web applications, APIs and web services.
The main advantage of employing a web framework is that it provides out-of-the-box support to perform common operations in the process of web development. For example, you can easily connect your application to the databases.
Usually, the framework handles tasks such as session management much more efficiently. Likewise, it integrates with templating tools to render dynamic content on web page.
The MVC Architecture
This design pattern separates the entire process of web application development in three layers. The following diagram explains the interplay of these three layers.
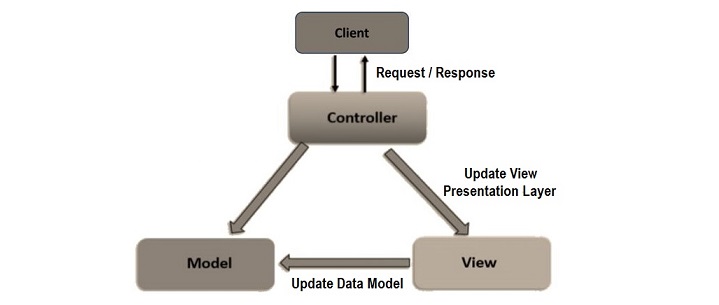
In the MVC approach, the user requests are intercepted by the controller. It coordinates with the view layer and the model layer to send the appropriate response back to the client.
The Model Layer
The Model is known as the lowest level which means it is responsible for maintaining the data. It handles data.
The model layer is connected to the database. It responds to the controller requests because the controller never talks to the database by itself. The model talks to the database back and forth and then it gives the needed data to the controller.
The model is responsible for data definitions, its processing logic and interaction with the backend database.
The View Layer
The View is the presentation layer of the application. It takes care of the placement and formatting of the result and sends it to the controller, which in turn, redirects it to the client as the application’s response.
Data representation is done by the view component. It actually generates the UI or user interface for the user. So, at web applications, when you think of the View component, just think the HTML/CSS part.
Views are created by the data which is collected by the model component but these data aren’t taken directly but through the controller, so the view only speaks to the controller.
The Controller Layer
It coordinates with the View layer and the model layer to send the appropriate response back to the client.
The Controller layer receives the request from the client, and forwards it to the model layer. The Model layer updates the data and sends back to the controller. The Controller updates the view and sends back the response to the user.
The MVT Architecture
The Django framework adapts a MVT approach. It is a slight variation of the MVC approach. The acronym MVT stands for Model, View and Template.
Here too, the Model is the data layer of the application. The View is in fact the layer that undertakes the processing logic. The Template is the presentation layer.
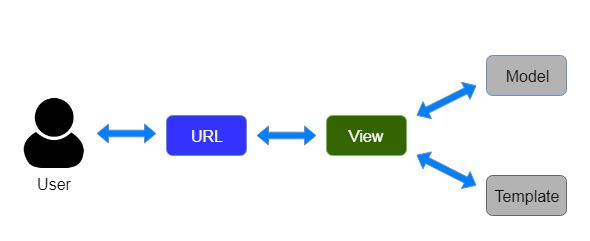
Components of a Django Application
A Django application consists of the following components −
- URL dispatcher
- View
- Model
- Template
The URL Dispatcher
Django’s URL dispatcher mechanism is equivalent to Controller in the MVC architecture. The urls.py module in the Django project’s package folder acts as the dispatcher. It defines the URL patterns. Each URL pattern is mapped with a view function to be invoked when the client’s request URL is found to be matching with it.
The URL patterns defined in each app under the project are also included in it.
When the server receives a request in the form of client URL, the dispatcher matches its pattern with the patterns available in the urls.py and routes the flow of the application towards its associated view.
The View Function
The View function reads the path parameters, query parameters and the body parameters included in the client’s request. It uses this data to interact with the models to perform CRUD operations, if required.
The Model Class
A Model is a Python class. Django uses the attributes of the Model class to construct a database table of a matching structure. Django’s Object Relational Mapper helps in performing CRUD operations in an object oriented way instead of invoking SQL queries.
The View uses the data from the client as well as the model and renders its response in the form of a template.
Template
A Template is a web page in which HTML script is interspersed with the code blocks of Django Template Language.
Django’s template processor uses any context data received from the View is inserted in these blocks so that a dynamic response is formulated. The View in turn returns the response to the user.
This is how Django’s MVT architecture handles the request-response cycle in a web application.