- Multi-Language Support: Django has extensive support for internationalization (i18n) and localization (l10n), making it easier to develop applications that serve global audiences.
Author: saqibkhan
-
Internationalization and Localization
-
Generic Views
In some cases, writing views, as we have seen earlier is really heavy. Imagine you need a static page or a listing page. Django offers an easy way to set those simple views that is called generic views.
Unlike classic views, generic views are classes not functions. Django offers a set of classes for generic views in django.views.generic, and every generic view is one of those classes or a class that inherits from one of them.
There are 10+ generic classes −
>>> import django.views.generic
>>> dir(django.views.generic)

['ArchiveIndexView', 'CreateView', 'DateDetailView', 'DayArchiveView',
   'DeleteView', 'DetailView', 'FormView', 'GenericViewError', 'ListView',
   'MonthArchiveView', 'RedirectView', 'TemplateView', 'TodayArchiveView',
   'UpdateView', 'View', 'WeekArchiveView', 'YearArchiveView', '__builtins__',
   '__doc__', '__file__', '__name__', '__package__', '__path__', 'base', 'dates',
   'detail', 'edit', 'list']
This you can use for your generic view. Let’s look at some example to see how it works.
Static Pages
Let’s publish a static page from the “static.html” template.
Our static.html −
<html> <body>
</body> </html>This is a static page!!!If we did that the way we learned before, we would have to change the myapp/views.py to be −
from django.shortcuts import render

def static(request):
   return render(request, 'static.html', {})
and myapp/urls.py to be −
from django.conf.urls import patterns, url

urlpatterns = patterns("myapp.views", url(r'^static/', 'static', name = 'static'),)
The best way is to use generic views. For that, our myapp/views.py will become −
from django.views.generic import TemplateView

class StaticView(TemplateView):
   template_name = "static.html"
And our myapp/urls.py we will be −
from myapp.views import StaticView
from django.conf.urls import patterns

urlpatterns = patterns("myapp.views", (r'^static/$', StaticView.as_view()),)
When accessing /myapp/static you get −
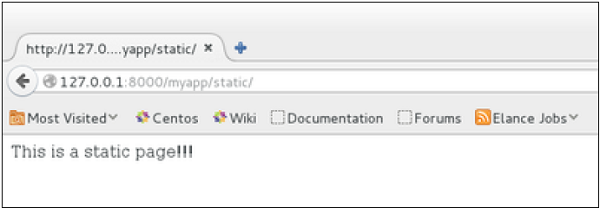
For the same result we can also, do the following −
- No change in the views.py
- Change the url.py file to be −
from django.views.generic import TemplateView
from django.conf.urls import patterns, url

urlpatterns = patterns("myapp.views",
   url(r'^static/',TemplateView.as_view(template_name = 'static.html')),)
As you can see, you just need to change the url.py file in the second method.
List and Display Data from DB
We are going to list all entries in our Dreamreal model. Doing so is made easy by using the ListView generic view class. Edit the url.py file and update it as −
from django.views.generic import ListView from django.conf.urls import patterns, url urlpatterns = patterns( "myapp.views", url(r'^dreamreals/', ListView.as_view(model = Dreamreal,
)template_name = "dreamreal_list.html")),Important to note at this point is that the variable pass by the generic view to the template is object_list. If you want to name it yourself, you will need to add a context_object_name argument to the as_view method. Then the url.py will become −
from django.views.generic import ListView from django.conf.urls import patterns, url urlpatterns = patterns("myapp.views", url(r'^dreamreals/', ListView.as_view(template_name = "dreamreal_list.html")), model = Dreamreal, context_object_name = ”dreamreals_objects” ,)</code></pre>The associated template will then be −
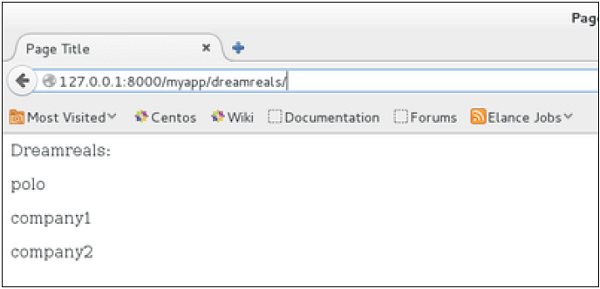
{% extends "main_template.html" %} {% block content %} Dreamreals:<p> {% for dr in object_list %} {{dr.name}}</p> {% endfor %} {% endblock %}Accessing /myapp/dreamreals/ will produce the following page −
-
Django REST Framework (DRF)
- Evolution of APIs: Launched in 2013, DRF rapidly became a standard for building RESTful APIs in Django, further broadening the framework’s application scope and community support.
-
Security Enhancements
- Focus on Security: Django’s developers prioritize security, regularly updating the framework to protect against vulnerabilities. Features like built-in protections against SQL injection, XSS, and CSRF have made it a preferred choice for security-conscious applications.
-
Significant Releases and Features
- Django 1.6 (2013): Introduced support for database migrations, which simplified the process of evolving database schemas alongside code changes.
- Django 1.7 (2015): Brought in a new migrations framework, allowing for easier management of changes to the data model over time.
-
Django Conventions and Philosophy
- “Batteries-Included” Approach: Django’s design philosophy emphasizes having a wide range of built-in features, enabling developers to get applications up and running quickly without needing to rely heavily on third-party libraries.
- DRY Principle: Django promotes the “Don’t Repeat Yourself” principle, encouraging reusable code and clean architecture.
-
Early Adoption and Case Studies
- Notable Projects: Early adopters included sites like the Lawrence Journal-World itself and various other media outlets. Over time, platforms like Instagram, Pinterest, and Disqus demonstrated Django’s capability to handle high-traffic applications.
-
Sending E-mails
Django comes with a ready and easy-to-use light engine to send e-mail. Similar to Python you just need an import of smtplib. In Django you just need to import django.core.mail. To start sending e-mail, edit your project settings.py file and set the following options −
- EMAIL_HOST − smtp server.
- EMAIL_HOST_USER − Login credential for the smtp server.
- EMAIL_HOST_PASSWORD − Password credential for the smtp server.
- EMAIL_PORT − smtp server port.
- EMAIL_USE_TLS or _SSL − True if secure connection.
Sending a Simple E-mail
Let’s create a “sendSimpleEmail” view to send a simple e-mail.
from django.core.mail import send_mail
from django.http import HttpResponse

def sendSimpleEmail(request,emailto):
   res = send_mail("hello paul", "comment tu vas?", "[email protected]", [emailto])
   return HttpResponse('%s'%res)
Here is the details of the parameters of send_mail −
- subject − E-mail subject.
- message − E-mail body.
- from_email − E-mail from.
- recipient_list − List of receivers’ e-mail address.
- fail_silently − Bool, if false send_mail will raise an exception in case of error.
- auth_user − User login if not set in settings.py.
- auth_password − User password if not set in settings.py.
- connection − E-mail backend.
- html_message − (new in Django 1.7) if present, the e-mail will be multipart/alternative.
Let’s create a URL to access our view −
from django.conf.urls import patterns, url

urlpatterns = paterns('myapp.views', url(r'^simpleemail/(?P<emailto>
   [\w.%+-]+@[A-Za-z0-9.-]+\.[A-Za-z]{2,4})/',
   'sendSimpleEmail' , name = 'sendSimpleEmail'),)
So when accessing /myapp/simpleemail/[email protected], you will get the following page −
Sending Multiple Mails with send_mass_mail
The method returns the number of messages successfully delivered. This is same as send_mail but takes an extra parameter; datatuple, our sendMassEmail view will then be −
from django.core.mail import send_mass_mail
from django.http import HttpResponse

def sendMassEmail(request,emailto):
   msg1 = ('subject 1', 'message 1', '[email protected]', [emailto1])
   msg2 = ('subject 2', 'message 2', '[email protected]', [emailto2])
   res = send_mass_mail((msg1, msg2), fail_silently = False)
   return HttpResponse('%s'%res)
Let’s create a URL to access our view −
from django.conf.urls import patterns, url

urlpatterns = paterns('myapp.views', url(r'^massEmail/(?P<emailto1>
   [\w.%+-]+@[A-Za-z0-9.-]+\.[A-Za-z]{2,4})/(?P<emailto2>
   [\w.%+-]+@[A-Za-z0-9.-]+\.[A-Za-z]{2,4})', 'sendMassEmail' , name = 'sendMassEmail'),)
When accessing /myapp/massemail/[email protected]/[email protected]/, we get −
send_mass_mail parameters details are −
- datatuples − A tuple where each element is like (subject, message, from_email, recipient_list).
- fail_silently − Bool, if false send_mail will raise an exception in case of error.
- auth_user − User login if not set in settings.py.
- auth_password − User password if not set in settings.py.
- connection − E-mail backend.
As you can see in the above image, two messages were sent successfully.
Note − In this example we are using Python smtp debuggingserver, that you can launch using −
$python -m smtpd -n -c DebuggingServer localhost:1025
This means all your sent e-mails will be printed on stdout, and the dummy server is running on localhost:1025.
Sending e-mails to admins and managers using mail_admins and mail_managers methods
These methods send e-mails to site administrators as defined in the ADMINS option of the settings.py file, and to site managers as defined in MANAGERS option of the settings.py file. Let’s assume our ADMINS and MANAGERS options look like −
ADMINS = ((‘polo’, ‘[email protected]’),)
MANAGERS = ((‘popoli’, ‘[email protected]’),)
from django.core.mail import mail_admins
from django.http import HttpResponse

def sendAdminsEmail(request):
   res = mail_admins('my subject', 'site is going down.')
   return HttpResponse('%s'%res)
The above code will send an e-mail to every admin defined in the ADMINS section.
from django.core.mail import mail_managers
from django.http import HttpResponse

def sendManagersEmail(request):
   res = mail_managers('my subject 2', 'Change date on the site.')
   return HttpResponse('%s'%res)
The above code will send an e-mail to every manager defined in the MANAGERS section.
Parameters details −
- Subject − E-mail subject.
- message − E-mail body.
- fail_silently − Bool, if false send_mail will raise an exception in case of error.
- connection − E-mail backend.
- html_message − (new in Django 1.7) if present, the e-mail will be multipart/alternative.
Sending HTML E-mail
Sending HTML message in Django >= 1.7 is as easy as −
from django.core.mail import send_mail from django.http import HttpResponse res = send_mail("hello paul", "comment tu vas?", "[email protected]",["[email protected]"], html_message=")</code></pre>This will produce a multipart/alternative e-mail.
But for Django < 1.7 sending HTML messages is done via the django.core.mail.EmailMessage class then calling 'send' on the object −
Let's create a "sendHTMLEmail" view to send an HTML e-mail.
from django.core.mail import EmailMessage from django.http import HttpResponse def sendHTMLEmail(request , emailto): html_content = "<strong>Comment tu vas?</strong>" email = EmailMessage("my subject", html_content, "[email protected]", [emailto]) email.content_subtype = "html" res = email.send() return HttpResponse('%s'%res)Parameters details for the EmailMessage class creation −
- Subject − E-mail subject.
- message − E-mail body in HTML.
- from_email − E-mail from.
- to − List of receivers’ e-mail address.
- bcc − List of “Bcc” receivers’ e-mail address.
- connection − E-mail backend.
Let's create a URL to access our view −
from django.conf.urls import patterns, url urlpatterns = paterns('myapp.views', url(r'^htmlemail/(?P<emailto> [\w.%+-]+@[A-Za-z0-9.-]+\.[A-Za-z]{2,4})/', 'sendHTMLEmail' , name = 'sendHTMLEmail'),)When accessing /myapp/htmlemail/[email protected], we get −
Sending E-mail with Attachment
This is done by using the 'attach' method on the EmailMessage object.
A view to send an e-mail with attachment will be −
from django.core.mail import EmailMessage from django.http import HttpResponse def sendEmailWithAttach(request, emailto): html_content = "Comment tu vas?" email = EmailMessage("my subject", html_content, "[email protected]", emailto]) email.content_subtype = "html" fd = open('manage.py', 'r') email.attach('manage.py', fd.read(), 'text/plain') res = email.send() return HttpResponse('%s'%res)Details on attach arguments −
- filename − The name of the file to attach.
- content − The content of the file to attach.
- mimetype − The attachment's content mime type.
-
Current State
- Active Community: Django remains one of the most popular web frameworks, used by large companies and small startups alike, with a strong emphasis on security, scalability, and rapid development.
-
Ongoing Development (2020-Present)
- Django 4.0 (2021): Continued to enhance async capabilities, improved security features, and added new functionalities.
- Community and Documentation: Django’s documentation is considered one of its strong points, and ongoing efforts by the community continue to refine it and create resources for developers.