- Features: Course creation, user registration, quizzes, and progress tracking.
- Django Components: Create models for Courses, Users, and Quiz Results. Use views to handle course enrollment and progress updates.
Author: saqibkhan
-
Online Learning Platform
-
RSS
Django comes with a syndication feed generating framework. With it you can create RSS or Atom feeds just by subclassing django.contrib.syndication.views.Feed class.
Let’s create a feed for the latest comments done on the app (Also see Django – Comments Framework chapter). For this, let’s create a myapp/feeds.py and define our feed (You can put your feeds classes anywhere you want in your code structure).
from django.contrib.syndication.views import Feed from django.contrib.comments import Comment from django.core.urlresolvers import reverse class DreamrealCommentsFeed(Feed): title = "Dreamreal's comments" link = "/drcomments/" description = "Updates on new comments on Dreamreal entry." def items(self):
def item_title(self, item):return Comment.objects.all().order_by("-submit_date")[:5]
def item_description(self, item):return item.user_name
def item_link(self, item):return item.commentreturn reverse('comment', kwargs = {'object_pk':item.pk})</code></pre>- In our feed class, title, link, and description attributes correspond to the standard RSS <title>, <link> and <description> elements.
- The items method, return the elements that should go in the feed as item element. In our case the last five comments.
- The item_title method, will get what will go as title for our feed item. In our case the title, will be the user name.
- The item_description method, will get what will go as description for our feed item. In our case the comment itself.
- The item_link method will build the link to the full item. In our case it will get you to the comment.
Now that we have our feed, let's add a comment view in views.py to display our comment −
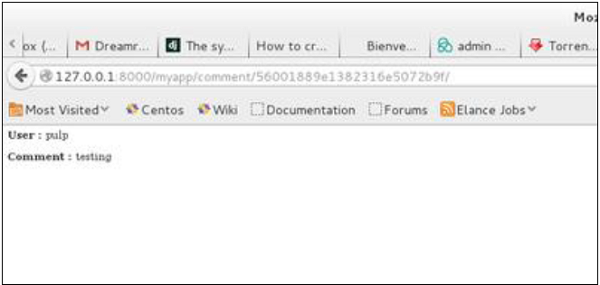
from django.contrib.comments import Comment def comment(request, object_pk): mycomment = Comment.objects.get(object_pk = object_pk) text = '<strong>User :</strong> %s <p>'%mycomment.user_name</p> text += '<strong>Comment :</strong> %s <p>'%mycomment.comment</p> return HttpResponse(text)We also need some URLs in our myapp urls.py for mapping −
from myapp.feeds import DreamrealCommentsFeed from django.conf.urls import patterns, url urlpatterns += patterns('', url(r'^latest/comments/', DreamrealCommentsFeed()), url(r'^comment/(?P\w+)/', 'comment', name = 'comment'), )When accessing /myapp/latest/comments/ you will get our feed −
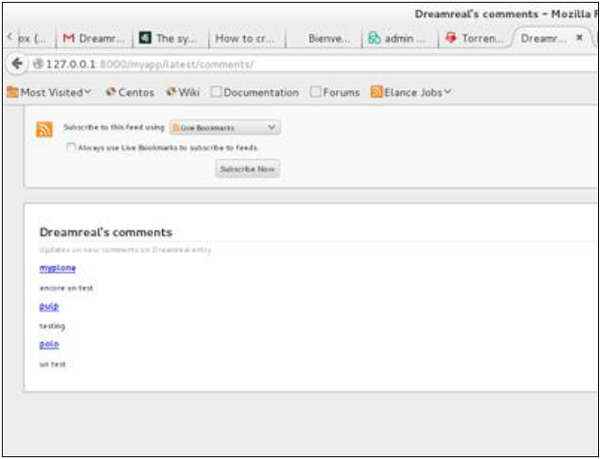
Then clicking on one of the usernames will get you to: /myapp/comment/comment_id as defined in our comment view before and you will get −
Thus, defining a RSS feed is just a matter of sub-classing the Feed class and making sure the URLs (one for accessing the feed and one for accessing the feed elements) are defined. Just as comment, this can be attached to any model in your app.
-
Social Media Platform
- Features: User profiles, friend connections, news feeds, and direct messaging.
- Django Components: You can create models for Users, Posts, and Messages, and use Django’s REST framework to build APIs for mobile or front-end apps.
-
Blog Application
- Features: User authentication, post creation, commenting, and tagging.
- Description: You can build a simple blog where users can create an account, write blog posts, and allow other users to comment on them. You can also implement tagging to organize posts by topics.
-
E-commerce Site
- Features: Product listings, user authentication, shopping cart functionality, and order processing.
- Django Components: Use Django’s built-in authentication system for user accounts, models for products and orders, and views to manage the cart and checkout process.
-
Comments
Before starting, note that the Django Comments framework is deprecated, since the 1.5 version. Now you can use external feature for doing so, but if you still want to use it, it’s still included in version 1.6 and 1.7. Starting version 1.8 it’s absent but you can still get the code on a different GitHub account.
The comments framework makes it easy to attach comments to any model in your app.
To start using the Django comments framework −
Edit the project settings.py file and add ‘django.contrib.sites’, and ‘django.contrib.comments’, to INSTALLED_APPS option −
INSTALLED_APPS += ('django.contrib.sites', 'django.contrib.comments',)Get the site id −
>>> from django.contrib.sites.models import Site
>>> Site().save()
>>> Site.objects.all()[0].id
u'56194498e13823167dd43c64'
Set the id you get in the settings.py file −
SITE_ID = u'56194498e13823167dd43c64'Sync db, to create all the comments table or collection −
python manage.py syncdbAdd the comment app’s URLs to your project’s urls.py −
from django.conf.urls import include
url(r'^comments/', include('django.contrib.comments.urls')),
Now that we have the framework installed, let’s change our hello templates to tracks comments on our Dreamreal model. We will list, save comments for a specific Dreamreal entry whose name will be passed as parameter to the /myapp/hello URL.
Dreamreal Model
class Dreamreal(models.Model): website = models.CharField(max_length = 50) mail = models.CharField(max_length = 50) name = models.CharField(max_length = 50) phonenumber = models.IntegerField() class Meta:db_table = "dreamreal"</code></pre>hello view
def hello(request, Name): today = datetime.datetime.now().date() daysOfWeek = ['Mon', 'Tue', 'Wed', 'Thu', 'Fri', 'Sat', 'Sun'] dreamreal = Dreamreal.objects.get(name = Name) return render(request, 'hello.html', locals())hello.html template
{% extends "main_template.html" %} {% load comments %} {% block title %}My Hello Page{% endblock %} {% block content %} <p> Our Dreamreal Entry: <p><strong>Name :</strong> {{dreamreal.name}}</p> <p><strong>Website :</strong> {{dreamreal.website}}</p> <p><strong>Phone :</strong> {{dreamreal.phonenumber}}</p> <p><strong>Number of comments :<strong> {% get_comment_count for dreamreal as comment_count %} {{ comment_count }}</p> <p>List of comments :</p> {% render_comment_list for dreamreal %} </p> {% render_comment_form for dreamreal %} {% endblock %}Finally the mapping URL to our hello view −
url(r'^hello/(?P<Name>\w+)/', 'hello', name = 'hello'),Now,
- In our template (hello.html), load the comments framework with − {% load comments %}
- We get the number of comments for the Dreamreal object pass by the view − {% get_comment_count for dreamreal as comment_count %}
- We get the list of comments for the objects − {% render_comment_list for dreamreal %}
- We display the default comments form − {% render_comment_form for dreamreal %}
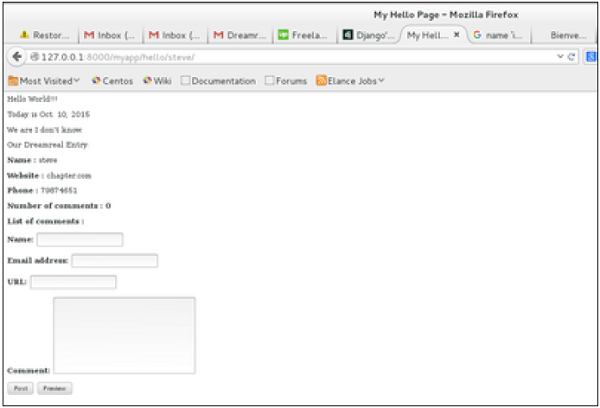
When accessing /myapp/hello/steve you will get the comments info for the Dreamreal entry whose name is Steve. Accessing that URL will get you −
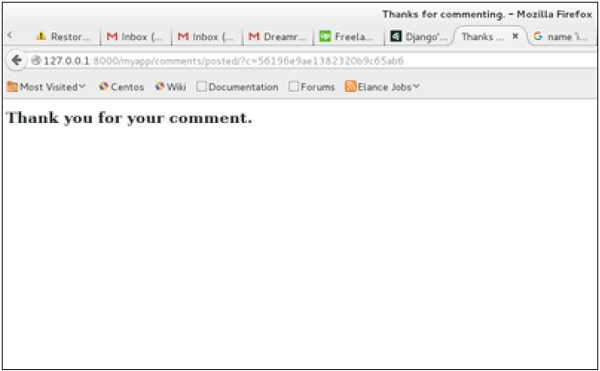
On posting a comment, you will get redirected to the following page −
If you go to /myapp/hello/steve again, you will get to see the following page −
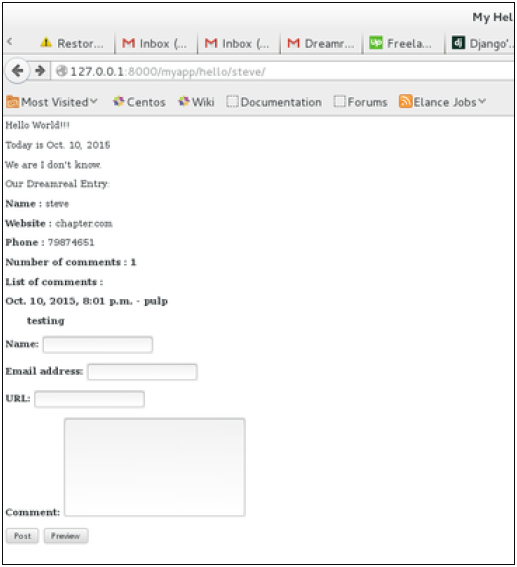
As you can see, the number of comments is 1 now and you have the comment under the list of comments line.
-
Modular Design:
Django’s architecture supports a modular approach, enabling developers to break applications into smaller, reusable components or apps.
-
Caching
To cache something is to save the result of an expensive calculation, so that you don’t perform it the next time you need it. Following is a pseudo code that explains how caching works −
given a URL, try finding that page in the cache

if the page is in the cache:
   return the cached page
else:
   generate the page
   save the generated page in the cache (for next time)
   return the generated page
Django comes with its own caching system that lets you save your dynamic pages, to avoid calculating them again when needed. The good point in Django Cache framework is that you can cache −
- The output of a specific view.
- A part of a template.
- Your entire site.
To use cache in Django, first thing to do is to set up where the cache will stay. The cache framework offers different possibilities – cache can be saved in database, on file system or directly in memory. Setting is done in the settings.py file of your project.
Setting Up Cache in Database
Just add the following in the project settings.py file −
CACHES = { 'default': {
} }'BACKEND': 'django.core.cache.backends.db.DatabaseCache', 'LOCATION': 'my_table_name',For this to work and to complete the setting, we need to create the cache table ‘my_table_name’. For this, you need to do the following −
python manage.py createcachetableSetting Up Cache in File System
Just add the following in the project settings.py file −
CACHES = { 'default': {
} }'BACKEND': 'django.core.cache.backends.filebased.FileBasedCache', 'LOCATION': '/var/tmp/django_cache',Setting Up Cache in Memory
This is the most efficient way of caching, to use it you can use one of the following options depending on the Python binding library you choose for the memory cache −
CACHES = { 'default': {
} }'BACKEND': 'django.core.cache.backends.memcached.MemcachedCache', 'LOCATION': '127.0.0.1:11211',Or
CACHES = { 'default': {
} }'BACKEND': 'django.core.cache.backends.memcached.MemcachedCache', 'LOCATION': 'unix:/tmp/memcached.sock',Caching the Entire Site
The simplest way of using cache in Django is to cache the entire site. This is done by editing the MIDDLEWARE_CLASSES option in the project settings.py. The following need to be added to the option −
MIDDLEWARE_CLASSES += (
   'django.middleware.cache.UpdateCacheMiddleware',
   'django.middleware.common.CommonMiddleware',
   'django.middleware.cache.FetchFromCacheMiddleware',
)
Note that the order is important here, Update should come before Fetch middleware.
Then in the same file, you need to set −
CACHE_MIDDLEWARE_ALIAS – The cache alias to use for storage.
CACHE_MIDDLEWARE_SECONDS – The number of seconds each page should be cached.
Caching a View
If you don’t want to cache the entire site you can cache a specific view. This is done by using the cache_page decorator that comes with Django. Let us say we want to cache the result of the viewArticles view −
from django.views.decorators.cache import cache_page

@cache_page(60 * 15)

def viewArticles(request, year, month):
   text = "Displaying articles of : %s/%s"%(year, month)
   return HttpResponse(text)
As you can see cache_page takes the number of seconds you want the view result to be cached as parameter. In our example above, the result will be cached for 15 minutes.
Note − As we have seen before the above view was map to −
urlpatterns = patterns('myapp.views',
   url(r'^articles/(?P<month>\d{2})/(?P<year>\d{4})/', 'viewArticles', name = 'articles'),)
Since the URL is taking parameters, each different call will be cached separately. For example, request to /myapp/articles/02/2007 will be cached separately to /myapp/articles/03/2008.
Caching a view can also directly be done in the url.py file. Then the following has the same result as the above. Just edit your myapp/url.py file and change the related mapped URL (above) to be −
urlpatterns = patterns('myapp.views',
   url(r'^articles/(?P<month>\d{2})/(?P<year>\d{4})/',
   cache_page(60 * 15)('viewArticles'), name = 'articles'),)
And, of course, it’s no longer needed in myapp/views.py.
Caching a Template Fragment
You can also cache parts of a template, this is done by using the cache tag. Let’s take our hello.html template −
{% extends "main_template.html" %}
{% block title %}My Hello Page{% endblock %}
{% block content %}

Hello World!!!<p>Today is {{today}}</p>
We are
{% if today.day == 1 %}

the first day of month.
{% elif today == 30 %}

the last day of month.
{% else %}

I don't know.
{%endif%}

<p>
   {% for day in days_of_week %}
   {{day}}
</p>

{% endfor %}
{% endblock %}
And to cache the content block, our template will become −
{% load cache %}
{% extends "main_template.html" %}
{% block title %}My Hello Page{% endblock %}
{% cache 500 content %}
{% block content %}

Hello World!!!<p>Today is {{today}}</p>
We are
{% if today.day == 1 %}

the first day of month.
{% elif today == 30 %}

the last day of month.
{% else %}

I don't know.
{%endif%}

<p>
   {% for day in days_of_week %}
   {{day}}
</p>

{% endfor %}
{% endblock %}
{% endcache %}
As you can see above, the cache tag will take 2 parameters − the time you want the block to be cached (in seconds) and the name to be given to the cache fragment.
-
Versatile Application:
Django can be used to build a wide variety of applications, including content management systems, e-commerce sites, social networks, and more.
-
Django REST Framework (DRF):
DRF is a powerful toolkit for building Web APIs in Django, extending the framework’s capabilities for creating RESTful services.