Author: saqibkhan

  • Directives

    Angular directives are classes that enhance the feature of a HTML element or component and add additional behavior to the web application. They can transform a static HTML page into dynamic by manipulating DOM. They begin with ng, which stands for Angular.

    The @directive decorator is used to mark a TypeScript class as an Angular Directive. This decorator contains some configuration metadata that determines how the directive should be processed, instantiated and used at runtime.

    HTML DOM model is constructed as a tree of objects. It is a standard object model to access HTML elements.

    Features and Uses of Angular Directives

    Following are the features and uses of Angular Directives −

    • Using directives, you can create your custom HTML elements, attributes and classes.
    • They allow developers to create the required features once and reuse them across different parts of the Angular application.
    • It became easy to update and maintain the code as we didn’t need to write code for the same feature again and again.
    • Directives can control the DOM elements.

    Types of Directives

    Directives are categorized based on the type of feature it provides to the HTML element/component. The type of directive and its purpose are as follows:

    • Components: Component is basically a type of directive. As we know, they can generate a a piece of HTML document in memory (DOM structure), called View. The view will have both design and event based dynamic functionality.
    • Attribute directives: Attribute directives provides additional feature to a HTML element/component (host) with respect to appearance and behavior. For example, a menu component attached to a attribute directive can show next level of menu upon hovering the component.
    • Structural directives: Structural directives can change the entire layout of the host HTML element/component by adding or removing the component’s DOM elements.
    Types of Angular Directives

    Structural Directives

    Structural directives change the structure of DOM by adding or removing elements. It is denoted by an asterisk (*) symbol with three pre-defined directives ngIfngFor and ngSwitch. Let’s understand one by one in brief.

    The list of commonly used structural directives are:

    • ngIf − This directive is used to display or hide data in your application. When the given condition becomes TRUE, it will display the data, otherwise not. We can add this to any tag in our template.
    • ngFor − ngFor is used to repeat a portion of elements from the given list of items.
    • ngSwitch − It checks multiple conditions.

    Attribute Directives

    Attribute directives change the appearance or behavior of DOM elements or components. It is used just like a normal HTML attribute. However, the directive should be enclosed within square brackets [ ] to bind it to the element.

    The most commonly used attribute directives are as follows:

    • ngStyle − It is used to add dynamic styles.
    • ngClass − It adds or removes CSS classes in HTML elements.
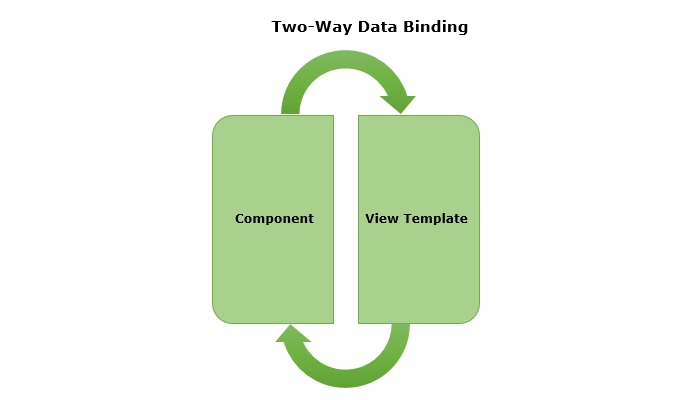
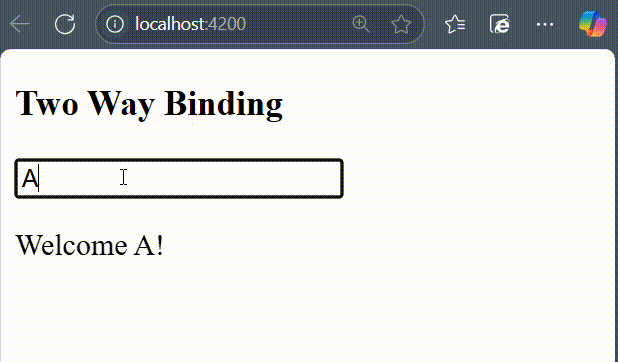
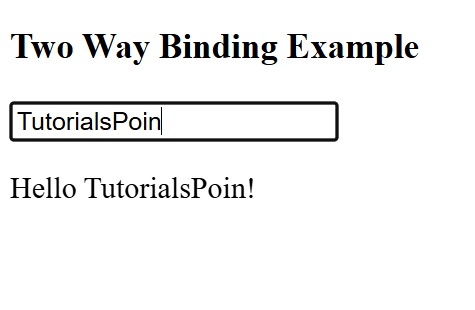
    • ngModel − This directive is used for two-way binding.

    Component Directives

    Each component of an Angular application is a directive itself. It is a special directive with Views. Also, it has @Input and @Output decorator to send and receive information between parent and child components.

    Syntax

    To create a component for your Angular application, use the command given below −

    ng generate component component-name
    

    Difference between Component and Directive

    The table below shows how Components are different from Directives −

    ComponentsDirectives
    Components in Angular are used to create UI elements and manage their state.Directives in Angular are classes that can modify the behavior or appearance of existing DOM elements.
    They create reusable UI elements.They create reusable features and behaviors for certain elements.
    The @Component decorator is used to declare a Component.The @Directive decorator is used to declare a Directive.
    There is only one component for each DOM element.There can be one or more directives for each DOM element.

    Custom Directives

    A custom directive is a user-defined directive that allows developers to extend the functionality of HTML elements. The attribute and structural built-in directives (covered in previous two chapters) offers very basic and pre-defined functionalities. However, with custom directives, you can add specific behaviors to HTML elements based on project requirements, user interactions, or changes in data.

    To create a custom directive, run the following command in Angular CLI −

    ng generate directive <directive-name>

  • Wildcards

    SQL Wildcards

    SQL Wildcards are special characters used as substitutes for one or more characters in a string. They are used with the LIKE operator in SQL, to search for specific patterns in character strings or compare various strings.

    The LIKE operator in SQL is case-sensitive, so it will only match strings that have the exact same case as the specified pattern.

    Following are the most commonly used wildcards in SQL −

    S.No.Wildcard & Description
    1The percent sign (%)Matches one or more characters.Note − MS Access uses the asterisk (*) wildcard character instead of the percent sign (%) wildcard character.
    2The underscore (_)Matches one character.Note − MS Access uses a question mark (?) instead of the underscore (_) to match any one character.

    The percent sign (%) represents zero, one, or multiple characters within a string. The underscore (_) represents a single character or number. These symbols can also be used in combination to perform complex pattern searching and matching in SQL queries.

    Syntax

    Following is the basic syntax to use wildcard characters −

    SELECT*FROM table_name
    WHERE column_name LIKE[wildcard_pattern];

    We can combine N number of conditions using the AND or the OR operators. Here, the [wildcard_pattern] can represent any numeric or string value.

    The following table demonstrates various ways of using wildcards in conjunction with the LIKE operator within a WHERE clause:

    S.No.Statement & Description
    1WHERE SALARY LIKE ‘200%’Finds any values that start with 200.
    2WHERE SALARY LIKE ‘%200%’Finds any values that have 200 in any position.
    3WHERE SALARY LIKE ‘_00%’Finds any values that have 00 in the second and third positions.
    4WHERE SALARY LIKE ‘2_%_%’Finds any values that start with 2 and are at least 3 characters in length.
    5WHERE SALARY LIKE ‘%2’Finds any values that end with 2.
    6WHERE SALARY LIKE ‘_2%3’Finds any values that have a 2 in the second position and end with a 3.
    7WHERE SALARY LIKE ‘2___3’Finds any values in a five-digit number that start with 2 and end with 3.

    Example

    Firstly, let us create a table named CUSTOMERS using the following query −

    CREATETABLE CUSTOMERS (
       ID INTNOTNULL,
       NAME VARCHAR(20)NOTNULL,
       AGE INTNOTNULL,
       ADDRESS CHAR(25),
       SALARY DECIMAL(18,2),PRIMARYKEY(ID));

    The following INSERT query adds records into the CUSTOMERS table −

    INSERTINTO CUSTOMERS VALUES(1,'Ramesh',32,'Ahmedabad',2000.00),(2,'Khilan',25,'Delhi',1500.00),(3,'Kaushik',23,'Kota',2000.00),(4,'Chaitali',25,'Mumbai',6500.00),(5,'Hardik',27,'Bhopal',8500.00),(6,'Komal',22,'Hyderabad',4500.00),(7,'Muffy',24,'Indore',10000.00);

    The table will be created as −

    IDNAMEAGEADDRESSSALARY
    1Ramesh32Ahmedabad2000.00
    2Khilan25Delhi1500.00
    3Kaushik23Kota2000.00
    4Chaitali25Mumbai6500.00
    5Hardik27Bhopal8500.00
    6Komal22Hyderabad4500.00
    7Muffy24Indore10000.00

    Here, we are displaying all the records from the CUSTOMERS table where the SALARY starts with 200.

    SELECT*FROM CUSTOMERS WHERE SALARY LIKE'200%';

    Output

    This would produce the following result.

    IDNAMEAGEADDRESSSALARY
    1Ramesh32Ahmedabad2000.00
    3Kaushik23Kota2000.00
  • Two-Way Data Binding

    Two-Way Data Binding in Angular

    Two-way data binding is a two-directional interaction in Angular. In this type of data binding, data flows in both ways, from the component to views and from the views back to the component. When you bind a value into an element then, two-way binding gives that element the ability to apply changes back to the source. It is the combination of property and event binding.

    The term Data binding refers to a mechanism that allows flow of data between component class to template and template to component class.

    two way data binding in angular

    Implementing Two-Way Binding

    We can use the following ways to implement two-way binding in Angular −

    Two-Way Binding using ngModel

    The ngModel is a directive in Angular that is used for two-way data binding between the component class and the HTML template. It helps to sync the data between the model in the component and the view in template. This directive is commonly used on form controls, such as <input>, <textarea>, and <select> to bind them to a component property.

    When the user interacts with the input field of a form, the value of the input is automatically updated in the component property. Similarly, if the component property is changed by any means, the input field is automatically updated to reflect the new value.

    Syntax

    For two-way binding using ngModel, we use ‘banana-in-a-box syntax’ which is shown below −

    <HTML[(ngModel)]="model.name"/>

    Where,

    • [(ngModel)]: The parentheses () represent the event binding and the square brackets [] represent property binding.
    • model.name: This is the component property that will be linked to the form control.

    Example

    In this example, we are demonstrating two-way data binding in Angular. We bind a form control to a component property using the ngModel directive. This will allow the input field to update the component’s user property and reflect any changes made to this property in the view immediately.

    Step 1: Create an Angular application named formApp using the command given below −

    ng newformApp

    Step 2: Import FormsModule first and then define a variable user inside src/app/app.component.tsFormModule will do the necessary setup to enable two-way data binding.

    import{ Component }from'@angular/core';import{ RouterOutlet }from'@angular/router';import{ FormsModule }from'@angular/forms';
    
    @Component({
      selector:'app-root',
      standalone:true,
      imports:[RouterOutlet, FormsModule],
      templateUrl:'./app.component.html',
      styleUrl:'./app.component.css'})exportclassAppComponent{
      title ='Two Way Binding';
      user: string ='';}

    Step 3: Update the view template, app.component.html as mentioned below −

    <h3>{{ title }}</h3><input type="text"[(ngModel)]="user"/><p>Welcome {{ user }}!</p><router-outlet />

    Here,

    The user property is bind to form control using ngModel directive. If you enter any text in the input box, it will update the user property.

    Finally, start your application using the below command −

    ng serve
    

    After running your application, you could see a response as given below −

    Two Way Data binding using ngmodel

    Try to change the input value to any string of your choice. You will get the output as per the given input.

    NOTE: We will learn more about form controls in the upcoming chapters.

    Two-Way Binding using custom Event and Property Binding

    As mentioned earlier, if we combine event and property binding, we can achieve two-way binding. It is mainly used when we need to establish two-directional interaction between a parent and its child component. Compare to ngModel, using custom event and property binding requires more configuration.

    To enable two-way binding between components, the @Input() property and corresponding @Output property along with an event emitter method that updates the value of the @Input() needs to defined inside child component.

    Inside the parent component, wrap the @Input() property name in the ‘banana-in-a-box syntax’ and specify the corresponding property to which the updated value is assigned.

    Example

    In this example, we are illustrating two-way data binding by combining event and property binding together.

    Step 1: Create an Angular application named customApp using the command given below −

    ng newcustomApp

    Step 2: Next, generate a child component named child-component.

    ng generate component child-component
    CREATE src/app/child-component/child-component.component.html(31 bytes)CREATE src/app/child-component/child-component.component.spec.ts(672 bytes)CREATE src/app/child-component/child-component.component.ts(281 bytes)CREATE src/app/child-component/child-component.component.css(0 bytes)

    Step 3: Open child-component.component.ts file and add the following code −

    import{ Component, EventEmitter, Input, Output }from'@angular/core';import{ FormsModule }from'@angular/forms';
    
    @Component({
      selector:'app-child-component',
      standalone:true,
      imports:[FormsModule],
      template:'<input [value]="val" (input)="onValChange($event)" />',
      styleUrls:['./child-component.component.css']})exportclassChildComponentComponent{
      @Input() val: string ='';
      @Output() valChange: EventEmitter<string>=newEventEmitter<string>();onValChange(event: Event){// Cast the event target to HTMLInputElement and access the valueconst input = event.target as HTMLInputElement;if(input){this.valChange.emit(input.value);}}}

    Step 4: Add the following code inside app.component.ts file −

    import{ Component }from'@angular/core';import{ FormsModule }from'@angular/forms';import{ RouterOutlet }from'@angular/router';import{ ChildComponentComponent }from'./child-component/child-component.component';
    
    @Component({
      selector:'app-root',
      standalone:true,
      imports:[RouterOutlet, FormsModule, ChildComponentComponent],
      template:`<h3>{{ title }}</h3>
    
             &lt;app-child-component [(val)]="user"&gt;&lt;/app-child-component&gt; 
             &lt;p&gt;Hello {{ user }}!&lt;/p&gt;`,
    styleUrl:'./app.component.css'})exportclassAppComponent{ title ='Two Way Binding Example'; user: string ="";}

    Now, start your application using the below command −

    ng serve
    

    After running your application, you could see the following output −

    Two way binding using event and property binding
  • Style Binding

    What is Style Binding?

    A dynamic web application usually have dynamic styles and are set during the runtime of the application. Style binding is a special binding to bind a value to the style attribute of a HTML element dynamically.

    Let us see more details about style binding in this chapter.

    Ways to use Style Binding

    Angular provides four different ways to implement style binding. Each type of style binding supports a special feature. The four ways are as follows:

    Let us learn one by one in the upcoming sections.

    Single Style Binding

    In single style binding, the property name of a CSS style should be appended to style. string and should be surrounded by square bracket. For example, the width of a HTML element can be set using [style.width] as shown below −

    <div [style.width]="<template variable>"><!-- content --></div>

    Single Style Binding with Unit

    In single style binding with unit, the property name of a CSS style should be appended to style. string, the unit (.px) should be appended to the property name of a CSS style and should be surrounded by square bracket. For example, the width of a HTML element in px using can be set using [style.width.px] as shown below −

    <div [style.width.px]="<template variable>"><!-- content --></div>

    Multiple Style Binding

    In multiple style binding, style string should be surrounded by square bracket and the value should have proper CSS styles. For example, the width and height of a HTML element can be set using [style] as shown below −

    <div [style]="<template variable>"><!-- content --></div>

    Here, an example output of the template variable is width: 100px; height: 200px

    Multiple Style Binding with Object

    In multiple style binding with object, style string should be surrounded by square bracket and the value should be set with an object of type Record<string, string having keys and values with proper CSS property name (or converted to camelCase) and value respectively. For example, the width and height of a HTML element can be set using [style] as shown below −

    <div [style]="<objects as template variable>"><!-- content --></div>

    Here, an example object is as follows,

    {width:'100px',height:'100px'}

    Implementing Style Binding

    Let us create a simple registration form to understand attribute binding. Our registration form will have three input field as shown below and a button to submit the registration form.

    1. Username
    2. Password
    3. Confirm password
    

    Step 1: Create a new application, my-app using angular CLI as shown below −

    ng newmy-app
    

    Step 2: Create a new registration form component, RegisterForm using angular CLI as shown below −

    ng generate component RegisterForm
    

    Step 3: Next, open the registration form component’s template and add a form with username, password and confirm password.

    <div><form method="post"><div class="container"><label for="username"><b>Username</b></label><input type="text" name="username" required><label for="password"><b>Password</b></label><input type="password" name="password" required><label for="confirm_password"><b>Confirm Password</b></label><input type="password" name="confirm_password" required><button type="submit">Register</button></div></form></div>

    Step 4: Open the registration form component’s CSS style file and style the form using CSS as shown below −

    .container{padding: 15px;}input[type=text], input[type=password]{width: 100%;padding: 10px 20px;margin: 10px 0;display: inline-block;border: 1px solid #ccc;box-sizing: border-box;}button{background-color: blue;color: white;padding: 15px 20px;margin: 10px 0;border: none;cursor: pointer;width: 100%;}

    Step 5: Include our registration form component in the app template file, app.component.html:

    <app-register-form />

    Step 6: Run the application and test the registration form.

    style binding form

    Step 7: Next, let us try to apply the style for the button using style binding.

    Step 8: Add an object in the component with necessary values as shown below −

    btnStyle: Record<string, string> ={'backgroundColor':'purple','color':'white','padding':'15px 20px','margin':'10px 0','border':'none','cursor':'pointer','width':'100%'}

    Here, we have changed the background color of the button from blue to purple. Also, note that the name of the background color style property, background-color is in camelCase, backgroundColor.

    Step 9: Next, remove the button style in the components style file.

    Step 10: Next, assign the style object to the button through style binding.

    <button type="submit"[style]="btnStyle">Register</button>

    Step 11: The complete listing of the component is as follows:

    import{ Component }from'@angular/core';
    
    @Component({
       selector:'app-login-form',
       templateUrl:'./register-form.component.html',
       styleUrls:['./register-form.component.css']})exportclassRegisterFormComponent{
       btnStyle: Record<string, string>={'backgroundColor':'purple','color':'white','padding':'15px 20px','margin':'10px 0','border':'none','cursor':'pointer','width':'100%'}}

    Step 12: The complete listing of the component’s template is as follows:

    <div><form method="post"><div class="container"><label for="username"><b>Username</b></label><input type="text" name="username" required><label for="password"><b>Password</b></label><input type="password" name="password" required><label for="confirm_password"><b>Confirm Password</b></label><input type="password" name="confirm_password" required><button type="submit" [style]="btnStyle" >Register</button></div></form></div>

    Step 13: Run the application and check the output.

    confirm password
  • NonClustered Index

    SQL Non-Clustered Indexes

    The SQL Non-Clustered index is similar to the Clustered index. When defined on a column, it creates a special table which contains the copy of indexed columns along with a pointer that refers to the location of the actual data in the table. However, unlike Clustered indexes, a Non-Clustered index cannot physically sort the indexed columns.

    Following are some of the key points of the Non-clustered index in SQL −

    • The non-clustered indexes are a type of index used in databases to speed up the execution time of database queries.
    • These indexes require less storage space than clustered indexes because they do not store the actual data rows.
    • We can create multiple non-clustered indexes on a single table.

    MySQL does not have the concept of Non-Clustered indexes. The PRIMARY KEY (if exists) and the first NOT NULL UNIQUE KEY(if PRIMARY KEY does not exist) are considered clustered indexes in MySQL; all the other indexes are called Secondary Indexes and are implicitly defined.

    To get a better understanding, look at the following figure illustrating the working of non-clustered indexes −

    Non-Clustered

    Assume we have a sample database table with two columns named ID and NAME. If we create a non-clustered index on a column named ID in the above table, it will store a copy of the ID column with a pointer that points to the specific location of the actual data in the table.

    Syntax

    Following is the syntax to create a non-clustered index in SQL Server −

    CREATENONCLUSTEREDINDEX index_name 
    ON table_name (column_name)

    Here,

    • index_name: holds the name of non-clustered index.
    • table_name: holds the name of the table where you want to create the non-clustered index.
    • column_name: holds the name of the column that you want to define the non-clustered index on.

    Example

    Let us create a table named CUSTOMERS using the following query −

    CREATETABLE CUSTOMERS(
       ID INTNOTNULL,
       NAME VARCHAR(20)NOTNULL,
       AGE  INTNOTNULL,
       ADDRESS CHAR(25),
       SALARY DECIMAL(20,2),);

    Let us insert some values into the above-created table using the following query −

    INSERTINTO CUSTOMERS VALUES(7,'Muffy','24','Indore',5500),(1,'Ramesh','32','Ahmedabad',2000),(6,'Komal','22','Hyderabad',9000),(2,'Khilan','25','Delhi',1500),(4,'Chaitali','25','Mumbai',6500),(5,'Hardik','27','Bhopal',8500),(3,'Kaushik','23','Kota',2000);

    The table is successfully created in the SQL database.

    IDNAMEAGEADDRESSSALARY
    7Muffy24Indore5500.00
    1Ramesh32Ahmedabad2000.00
    6Komal22Hyderabad9000.00
    2Khilan25Delhi1500.00
    4Chaitali25Mumbai6500.00
    5Hardik27Bhopal8500.00
    3Kaushik23Kota2500.00

    Now, let us create a non-clustered index on a single column named ID using the following query −

    CREATENONCLUSTEREDINDEX NON_CLU_ID 
    ON customers (ID ASC);

    Output

    On executing the above query, the output is displayed as follows −

    Commands Completed Successfully.
    

    Verification

    Let us retrieve all the indexes that are created on the CUSTOMERS table using the following query −

    EXEC sys.sp_helpindex @objname= N'CUSTOMERS';

    As we observe, we can find the column named ID in the list of indexes.

    index_nameindex_descriptionindex_keys
    1NON_CLU_IDnonclustered located on PRIMARYID

    Now, retrieve the CUSTOMERS table again using the following query to check whether the table is sorted or not −

    SELECT*FROM CUSTOMERS;

    As we observe, the non-clustered index does not sort the rows physically instead, it creates a separate key-value structure from the table data.

    IDNAMEAGEADDRESSSALARY
    7Muffy24Indore5500.00
    1Ramesh32Ahmedabad2000.00
    6Komal22Hyderabad9000.00
    2Khilan25Delhi1500.00
    4Chaitali25Mumbai6500.00
    5Hardik27Bhopal8500.00
    3Kaushik23Kota2500.00

    Creating Non-Clustered Index on Multiple Columns

    Instead of creating a new table, let us consider the previously created CUSTOMERS table. Now, try to create a non-clustered index on multiple columns of the table such as ID, AGE and SALARY using the following query −

    CREATENONCLUSTEREDINDEX NON_CLUSTERED_ID 
    ON CUSTOMERS (ID, AGE, SALARY);

    Output

    The below query will create three separate non-clustered indexes for ID, AGE, and SALARY.

    Commands Completed Successfully.
    

    Verification

    Let us retrieve all the indexes that are created on the CUSTOMERS table using the following query −

    EXEC sys.sp_helpindex @objname= N'CUSTOMERS';

    As we observe, we can find the column names ID, AGE and SALARY columns in the list of indexes.

    index_nameindex_descriptionindex_keys
    1NON_CLU_IDnonclustered located on PRIMARYID, AGE, SALARY
  • Clustered Index

    An index in a database is a data structure that helps to improve the speed of retrieving specific data from tables and views.

    Data in a table is stored in the form of an unordered data structure called a “Heap”, where rows are placed without any specific order. Thus, when retrieving data from a table, the query optimizer must scan the entire table to locate the requested rows. This process can be time-consuming, especially when we are dealing with large tables. To speed up the data retrieval, SQL provides a data object called index that stores and organizes table data in a specific way, allowing faster data access.

    SQL Clustered Indexes

    clustered index in SQL is a type of index that determines the physical order in which the data values will be stored in a table.

    When a clustered index is defined on a specific column, during the creation of a new table, the data is inserted into that column in a sorted order. This helps in faster retrieval of data since it is stored in a specific order.

    • It is recommended to have only one clustered index on a table. If we create multiple clustered indexes on the same table, the table will have to store the same data in multiple orders which is not possible.
    • When we try to create a primary key constraint on a table, a unique clustered index is automatically created on the table. However, the clustered index is not the same as a primary key. A primary key is a constraint that imposes uniqueness on a column or set of columns, while a clustered index determines the physical order of the data in the table.

    MySQL database does not have a separate provisions for Clustered and Non-Clustered indexes. Clustered indexes are automatically created when PRIMARY KEY is defined on a table. And when the PRIMARY KEY is not defined, the first UNIQUE NOT NULL key is treated as a Clustered index.

    Syntax

    Following is the syntax to create a clustered index with SQL Server −

    CREATEINDEX index_name ON table_name(column_name [asc|desc])

    Where,

    • index_name: specifies the name you want to give to the index being created.
    • column_name: specifies the column(s) that will be indexed in the order specified.
    • asc|desc: specifies the order (asc – ascending, desc – descending) in which the data should be sorted. The default sorting order is ascending order.

    Example

    In this example, let us create a clustered index on a table in SQL Server. For that, we need to first create a table named CUSTOMERS using the following query −

    CREATETABLE CUSTOMERS( 
       ID INTNOTNULL, 
       NAME VARCHAR(20)NOTNULL, 
       AGE  INTNOTNULL, 
       ADDRESS CHAR(25), 
       SALARY DECIMAL(20,2));

    Now, insert some values into the CUSTOMERS table using the following query −

    INSERTINTO CUSTOMERS VALUES(7,'Muffy','24','Indore',5500),(1,'Ramesh','32','Ahmedabad',2000),(6,'Komal','22','Hyderabad',9000),(2,'Khilan','25','Delhi',1500),(4,'Chaitali','25','Mumbai',6500),(5,'Hardik','27','Bhopal',8500),(3,'Kaushik','23','Kota',2000);

    The table is successfully created in the SQL Server database.

    IDNAMEAGEADDRESSSALARY
    7Muffy24Indore5500.00
    1Ramesh32Ahmedabad2000.00
    6Komal22Hyderabad9000.00
    2Khilan25Delhi1500.00
    4Chaitali25Mumbai6500.00
    5Hardik27Bhopal8500.00
    3Kaushik23Kota2500.00

    Now, let us create a clustered index on the column named ID using the following query −

    CREATECLUSTEREDINDEX CLU_ID ON CUSTOMERS(ID ASC);

    Output

    On executing the above query, the output is displayed as follows −

    Commands Completed Successfully.
    

    Verification

    To verify if the clustered index is defined on ID column, check whether the records of CUSTOMERS table are sorted by retrieving them using the following query −

    SELECT*FROM CUSTOMERS;

    The records of the table are sorted in ascending order based on values in the column named ID.

    IDNAMEAGEADDRESSSALARY
    1Ramesh32Ahmedabad2000.00
    2Khilan25Delhi1500.00
    3Kaushik23Kota2500.00
    4Chaitali25Mumbai6500.00
    5Hardik27Bhopal8500.00
    6Komal22Hyderabad9000.00
    7Muffy24Indore5500.00

    Creating Clustered Index on Multiple Columns

    With the following example, let us understand how clustered index works when it is created on multiple columns of a table.

    Instead of creating a new table, consider the previously created CUSTOMERS table and define a clustered index on multiple columns of this table, such as AGE and SALARY, using the following query −

    CREATECLUSTEREDINDEX MUL_CLUS_ID 
    ON CUSTOMERS (AGE, SALARY ASC);

    Output

    When we execute the above query, the output is obtained as follows −

    Commands Completed Successfully.
    

    Verification

    Now, let us verify whether the values in the columns AGE and SALARY is sorted or not −

    SELECT*FROM CUSTOMERS;

    As we can observe in the table below, the records are sorted only based on the values in AGE column and not with the values in SALARY column. So, it is recommended to have only one clustered index on a table.

    IDNAMEAGEADDRESSSALARY
    6Komal22Hyderabad9000.00
    3Kaushik23Kota2500.00
    7Muffy24Indore5500.00
    2Khilan25Delhi1500.00
    4Chaitali25Mumbai6500.00
    5Hardik27Bhopal8500.00
    1Ramesh32Ahmedabad2000.00
  •  Unique Indexes

    SQL Unique Indexes

    The SQL Unique Index ensures that no two rows in the indexed columns of a table have the same values (no duplicate values allowed).

    A unique index can be created on one or more columns of a table using the CREATE UNIQUE INDEX statement in SQL.

    Following are the points to be noted before creating a Unique Index on a table −

    • If the unique index is only created on a single column, the rows in that column will be unique.
    • If a single column contains NULL in multiple rows, we cannot create a unique index on that column.
    • If the unique index is created on multiple columns, the combination of rows in these columns will be unique.
    • We cannot create a unique index on multiple columns if the combination of columns contains NULL in more than one row.

    Syntax

    Following is the syntax for creating a UNIQUE INDEX in SQL −

    CREATEUNIQUEINDEX index_name
    ON table_name (column1, column2,..., columnN);

    Here,

    • index_name is the name of the index that you want to create.
    • table_name is the name of the table on which you want to create the index.
    • (column1, column2, …., columnN) are the names of one or more columns on which the unique index is being created.

    Example

    First of all, let us create a table named CUSTOMERS using the following query −

    CREATETABLE CUSTOMERS (
       ID INTNOTNULL,
       NAME VARCHAR(15)NOTNULL,
       AGE INTNOTNULL,
       ADDRESS VARCHAR(25),
       SALARY DECIMAL(10,4),PRIMARYKEY(ID));

    Insert some values into the above-created table using the following query −

    INSERTINTO CUSTOMERS VALUES(1,'Ramesh','32','Ahmedabad',2000),(2,'Khilan','25','Delhi',1500),(3,'kaushik','23','Kota',2000),(4,'Chaitali','26','Mumbai',6500),(5,'Hardik','27','Bhopal',8500),(6,'Komal','22','Hyderabad',9000),(7,'Muffy','24','Indore',5500);

    Once the table is created, let us create a unique index for the column named SALARY in the CUSTOMERS table using the following query −

    CREATEUNIQUEINDEX UNIQUE_ID ON CUSTOMERS (SALARY);

    But, when we execute the above query, the output is obtained as follows −

    ERROR 1062 (23000): Duplicate entry '2000.00' for key 'customers.UNIQUE_ID'
    

    Since a unique index could not be created on SALARY column (due to duplicate values), let us create Unique Index on the NAME column of the same table, using the following query −

    CREATEUNIQUEINDEX UNIQUE_ID ON CUSTOMERS (NAME);

    Output

    When we execute the above query, the output is obtained as follows −

    Query OK, 0 rows affected (0.03 sec)
    Records: 0  Duplicates: 0  Warnings: 0
    

    Verification

    Let’s verify whether the unique index for the column NAME is created or not using the following query −

    SHOWINDEXFROM CUSTOMERS;

    As you observe the output below, you can find the column NAME along with the ID (PRIMARY KEY) in the list of indexes.

    TableNon_uniqueKey_nameSeq_in_indexColumn_name
    customers0PRIMARY1ID
    customers0UNIQUE_ID1NAME

    Updating with Duplicate Values

    If we try to update the columns that have unique index with duplicate values, the database engine generates an error.

    Example

    Assume the previously created CUSTOMERS table and create a unique index on the column named ADDRESS using the following query −

    CREATEUNIQUEINDEX ADD_UNIQUE_INDEX ON CUSTOMERS(ADDRESS);

    Now, let us update the value in the column named ADDRESS with a duplicate (already existing data) value using the following query −

    UPDATE CUSTOMERS SET ADDRESS ='Mumbai'WHERE ADDRESS ='Delhi';

    Output

    On executing the above query, the output is displayed as follows −

    ERROR 1062 (23000): Duplicate entry 'Mumbai' for key 'customers.ADD_UNIQUE_INDEX'
    

    Creating a unique index on Multiple Fields

    We can also create a unique index on multiple fields or columns of a table using the CREATE UNIQUE INDEX statement. To do so, you just need to pass the name of the columns (you need to create the index on) to the query.

    Example

    Instead of creating a new table, let us consider the previously created CUSTOMERS table. We will create a unique index on the columns NAME and AGE using the following query −

    CREATEUNIQUEINDEX MUL_UNIQUE_INDEX ON CUSTOMERS(NAME, AGE);

    Output

    When we execute the above query, the output is obtained as follows −

    Query OK, 0 rows affected (0.04 sec)
    Records: 0  Duplicates: 0  Warnings: 0.
    

    Verification

    Now, let us list all the indexes that are created on the CUSTOMERS table using the following query −

    SHOWINDEXFROM CUSTOMERS;

    As you observe you can find the column names NAME, and AGE along with the ID (PRIMARY KEY) in the list of indexes.

    TableNon_uniqueKey_nameSeq_in_indexColumn_name
    customers0PRIMARY1ID
    customers0MUL_UNIQUE_INDEX1NAME
    customers0MUL_UNIQUE_INDEX2AGE
  • Show Indexes

    The SQL Show Index Statement

    The SHOW INDEX is the basic SQL statement to retrieve the information about the indexes that have been defined on a table. However, the SHOW INDEX statement only works on MySQL RDBMS and is not a valid statement in the SQL Server.

    To list the indexes created on a table in SQL Server, a system stored procedure sp_helpindex is used.

    The result-set obtained from querying the SHOW INDEX statement on a MySQL table contains the index information.

    Syntax

    Following is the syntax of the SHOW INDEX statement in MySQL −

    SHOWINDEXFROM table_name;

    Example

    Following example demonstrates the working of SHOW INDEX statement in MySQL. First, create a table with the name CUSTOMERS in the MySQL database using the CREATE query below −

    CREATETABLE CUSTOMERS (
       ID INTNOTNULL,
       NAME VARCHAR(20)NOTNULL,
       AGE INTNOTNULL,
       ADDRESS CHAR(25),
       SALARY DECIMAL(20,2),PRIMARYKEY(ID));

    Let us now insert some values into the above created table using the following query −

    INSERTINTO CUSTOMERS VALUES(1,'Ramesh','32','Ahmedabad',2000),(2,'Khilan','25','Delhi',1500),(3,'Kaushik','23','Kota',2000),(4,'Chaitali','25','Mumbai',6500),(5,'Hardik','27','Bhopal',8500),(6,'Komal','22','Hyderabad',9000),(7,'Muffy','24','Indore',5500);

    Once the data is inserted, create an index for the column NAME in the CUSTOMERS table using the following query −

    CREATEINDEX INDEX_NAME ON CUSTOMERS(NAME);

    Now, you can list all the indexes that are defined on the CUSTOMERS table using the following query −

    SHOWINDEXFROM CUSTOMERS;

    Output

    On executing the above query, the output is displayed as follows −

    TableNon_uniqueKey_nameSeq_in_indexColumn_name
    customers0PRIMARY1ID
    customers1index_name1NAME

    Showing Indexes in SQL Server

    In SQL server, the system stored procedure sp_helpindex is used to retrieve the information about the indexes that have been defined on a table. It returns the result as a table that contains detailed information about each index, including the name, type, and columns.

    Syntax

    Following is the basic syntax to list indexes defined on a table in SQL Server −

    sp_helpindex [@objname=]'name'

    Here, [ @objname = ] ‘name’ specifies the name of the table for which the index information is being retrieved. The index information includes −

    • index_name is the names of the columns that are included in index.
    • index_description is the brief description of the index such as the type of index (like clustered or non-clustered).
    • index_keys is the keys that are included in the index.

    Example

    CREATEINDEX INDEX_NAME on CUSTOMERS(NAME);

    Now, let us list all the indexes that are created on the CUSTOMERS table using the system stored procedure sp_helpindex as shown below −

    EXEC sys.sp_helpindex @objname= N'CUSTOMERS';

    Output

    On executing the above query, the output is displayed as follows −

    index_nameindex_descriptionindex_keys
    INDEX_NAMEnonclustered located on PRIMARYNAME
    PK__CUSTOMER__ 3214EC27755869D9clustered, unique, primary key located on PRIMARYID

  • Drop Index

    The DROP statement in SQL is used to remove or delete an existing database object such as a table, index, view, or procedure. Whenever we use DROP statement with any of the database objects, it will remove them permanently along with their associated data.

    And when that database object is an index, the DROP INDEX statement in SQL is used.

    Dropping an SQL Index

    An SQL Index can be dropped from a database table using the DROP INDEX statement.

    It is important to understand that dropping an index can have a significant impact on the performance of your database queries. Therefore, only try to remove an index if you are sure that it is no longer required.

    Note − We cannot delete the indexes created by PRIMARY KEY or UNIQUE constraints. In order to delete them, you need to drop the constraints entirely using ALTER TABLE statement.

    Syntax

    Following is the syntax of the DROP INDEX command in SQL −

    DROPINDEX index_name ON table_name;

    Here,

    • index_name is the name of the index that you want to drop.
    • table_name is the name of the table that the index is associated with.

    Example

    In this example, we will learn how to drop an index on a table named CUSTOMERS, which can be created using the following query −

    CREATETABLE CUSTOMERS(
       ID INTNOTNULL,
       NAME VARCHAR(15)NOTNULL,
       AGE INTNOTNULL,
       ADDRESS VARCHAR(25),
       SALARY DECIMAL(10,4),PRIMARYKEY(ID)););

    Now, insert some values into the above created table using the following query −

    INSERTINTO CUSTOMERS VALUES(1,'Ramesh','32','Ahmedabad',2000),(2,'Khilan','25','Delhi',1500),(3,'Kaushik','23','Kota',2000),(4,'Chaitali','25','Mumbai',6500),(5,'Hardik','27','Bhopal',8500),(6,'Komal','22','Hyderabad',9000),(7,'Muffy','24','Indore',5500);

    Once the table is created, create an index on the column NAME in the CUSTOMERS table using the following query −

    CREATEINDEX INDEX_NAME on CUSTOMERS(NAME);

    Now, verify if the index is created on the CUSTOMERS table using the following SHOW INDEX query −

    SHOWINDEXFROM CUSTOMERS;

    On executing the above query, the index list is displayed as follows −

    TableNon_uniqueKey_nameSeq_in_indexColumn_name
    customers0PRIMARY1ID
    customers1index_name1NAME

    Then, drop the same index INDEX_NAME in the CUSTOMERS table using the following DROP INDEX statement −

    DROPINDEX INDEX_NAME ON CUSTOMERS;

    Output

    If we compile and run the above query, the result is produced as follows −

    Query OK, 0 rows affected (0.02 sec)
    Records: 0  Duplicates: 0  Warnings: 0
    

    Verification

    Verify if the index for the column NAME is dropped using the following query −

    SHOWINDEXFROM CUSTOMERS;

    In the following list of indexes, you can observe that name of the column Name is missing.

    TableNon_uniqueKey_nameSeq_in_indexColumn_name
    customers0PRIMARY1ID

    DROP INDEX with IF EXISTS

    The DROP INDEX IF EXISTS statement in SQL is used to drop an index only if it exists in the table. This statement is specifically useful when you want to drop an index, but you are not sure if the index exists. This clause is not supported by MySQL.

    The IF EXISTS clause ensures that the statement only removes the index if it exists. If the index does not exist, it simply terminates the execution.

    Syntax

    Following is the syntax of the DROP INDEX IF EXISTS in SQL −

    DROPINDEXIFEXISTS index_name
    ON table_name;

    Here,

    • index_name is the name of the index that you want to drop.
    • table_name is the name of the table that the index is associated with.

    Example

    In this example, let us try to drop an index in the SQL Server database.

    Let us consider the previously created table CUSTOMERS and let us create an index for the NAME column in the table using the following query −

    CREATEINDEX INDEX_NAME on CUSTOMERS(NAME);

    Then, let us drop it using the following query −

    DROPINDEXIFEXISTS INDEX_NAME ON CUSTOMERS;

    Output

    When we execute the above query, the output is obtained as follows −

    Commands completed successfully.
    

    Verification

    Let’s verify whether the index for the NAME is dropped or not using the following query −

    EXEC sys.sp_helpindex @objname= N'CUSTOMERS';

    As you observe, the column NAME is deleted from the list of indexes.

    index_nameindex_descriptionindex_keys
    PK__CUSTOMER__3214EC27CB063BB7clustered, unique, primary key locatedPRIMARY on PRIMARYID

    Example

    Now, let us delete an index that doesn’t exist in the CUSTOMERS table using the following query −

    DROPINDEXIFEXISTS INDEX_NAME ON CUSTOMERS;

    Output

    Since no indexes with the specified name exist in the database, so the above query simply terminates the execution without giving any error.

    Commands completed successfully.
    

    Removing indexes created by PRIMARY KEY or UNIQUE

    The DROP INDEX statement does not drop indexes created by PRIMARY KEY or UNIQUE constraints. To drop indexes associated with them, we need to drop these constraints entirely. And it is done using the ALTER TABLE… DROP CONSTRAINT statement.

    Syntax

    Following is the syntax of the ALTER TABLE… DROP CONSTRAINT statement in SQL −

    ALTERTABLE table_name
    DROPCONSTRAINT constraint_name;

    Here,

    • table_name is the name of the table that contains the PRIMARY KEY constraint.
    • constraint_name is the name of the PRIMARY KEY constraint that you want to drop.

    Example

    Assume the previously created table (CUSTOMERS) and let us first list all the indexes that are created on the table using the following query −

    EXEC sys.sp_helpindex @objname= N'CUSTOMERS';

    The list is displayed as follows −

    index_nameindex_descriptionindex_keys
    PK__CUSTOMER__3214EC27CB063BB7nonclustered located on PRIMARYIDID

    Here, the PK__CUSTOMER__3214EC27CB063BB7 is the name of the PRIMARY KEY constraint that was created on the ID column of the CUSTOMERS table.

    Now, let us drop the index created by the PRIMARY KEY constraint.

    ALTERTABLE customers
    DROPCONSTRAINT PK__CUSTOMER__3214EC27CB063BB7;

    Output

    When we execute the above query, the output is obtained as follows −

    Commands completed successfully.
    

    Verification

    Verify whether it is dropped or not by listing the existing indexes using the following query −

    EXEC sys.sp_helpindex @objname= N'CUSTOMERS';

    The following error is displayed because the list of indexes is empty.

    The object 'CUSTOMERS' does not have any indexes, or you do not have permissions.

  • Create Index

    An index is an effective way to quickly retrieve data from an SQL database. It is a database object that references the data stored in a table, which significantly improves query and application performance of a database.

    The process of indexing in SQL is similar to that of an index in a book: it is a database object in the form of a table, contains details of data location, and holds a separate storage space.

    Even though indexes help accelerate search queries, users are not able to directly see these indexes in action.

    What is SQL Index?

    An SQL index is a special lookup table that helps in efficiently searching or querying database tables to retrieve required data. For example, when we try to retrieve data from multiple tables using joins, indexes improve the query performance.

    Indexes are used to optimize the query performance of any Relational Database Management System (RDBMS) as data volumes grow. Hence, they are preferred to be used on frequently queried large database tables.

    Creating an SQL Index

    An index can be created on one or more columns of a table in an SQL database using the CREATE INDEX statement.

    Syntax

    Following is the syntax of CREATE INDEX statement in SQL −

    CREATEINDEX index_name 
    ON table_name (column_name1, column_name2,... column_nameN);

    Here,

    • index_name This specifies the name of the index that you want to create.
    • table_name This specifies the name of the table on which you want to create the index.
    • (column_name1, column_name2…column_nameN) are the names of one or more columns on which the index is being created.

    Example

    To create an index on a database table, we first need to create a table. So, in this example, we are creating a table named CUSTOMERS using the following query −

    CREATETABLE CUSTOMERS(
       ID INTNOTNULL,
       NAME VARCHAR(15)NOTNULL,
       AGE INTNOTNULL,
       ADDRESS VARCHAR(25),
       SALARY DECIMAL(10,4),PRIMARYKEY(ID)););

    Then, insert some values into the CUSTOMERS table using the following query −

    INSERTINTO CUSTOMERS VALUES(1,'Ramesh','32','Ahmedabad',2000),(2,'Khilan','25','Delhi',1500),(3,'Kaushik','23','Kota',2000),(4,'Chaitali','25','Mumbai',6500),(5,'Hardik','27','Bhopal',8500),(6,'Komal','22','Hyderabad',9000),(7,'Muffy','24','Indore',5500);

    Once the table is created, create an index for the column named NAME in the CUSTOMERS table using the following query −

    CREATEINDEX index_name ON CUSTOMERS(NAME);

    Output

    When we execute the above query, the output is obtained as follows −

    Query OK, 0 rows affected (0.06 sec)
    Records: 0  Duplicates: 0  Warnings: 0
    

    Verification

    The following SHOW INDEX query is used to display all the indexes created on an existing table.

    SHOWINDEXFROM CUSTOMERS;

    In the list obtained, you can find the column name NAME, along with the ID in the list of indexes.

    TableNon_uniqueKey_nameSeq_in_indexColumn_name
    customers0PRIMARY1ID
    customers1index_name1NAME

    Creating an Index on Multiple Fields

    We can also create an index on multiple fields (or columns) of a table using the CREATE INDEX statement. To do so, you just need to pass the name of the columns (you need to create the index on).

    Example

    Instead of creating a new table, let us consider the previously created CUSTOMERS table. Here, we are creating an index on the columns NAME and AGE using the following query −

    CREATEINDEX mult_index_data on CUSTOMERS(NAME, AGE);

    Output

    When we execute the above query, the output is obtained as follows −

    Query OK, 0 rows affected (0.04 sec)
    Records: 0  Duplicates: 0  Warnings: 0
    

    Verification

    Now, let us list all the indexes that are created on the CUSTOMERS table using the following SHOW INDEX query −

    SHOWINDEXFROM CUSTOMERS;

    As you observe, you can find the column names NAME, and AGE along with ID (PRIMARY KEY), in the list of indexes.

    TableNon_uniqueKey_nameSeq_in_indexColumn_name
    customers0PRIMARY1ID
    customers1index_name1NAME
    customers1mult_index_data1NAME
    customers1mult_index_data2AGE