Author: saqibkhan

  • Custom Pipes

    Custom Pipes in Angular

    custom pipe is a user-defined pipe that allows developers to perform specific transformations that Angular’s built-in pipes can’t achieve. The built-in pipes provide limited functionalities like formatting dates, numbers and strings. However, you can achieve more than that using custom pipes. For example, sorting and filtering.

    In Angular, pipes are functions that format specified data before displaying it in the View.

    Features and Uses of Angular Custom Pipes

    The Angular Custom Pipes provides the following features −

    • Once you define a custom pipe, you can reuse it wherever needed in the application.
    • Like built-in pipes, custom pipes can also be used directly in the template expressions.
    • The logic for custom pipes is written in a separate TypeScript class and applied within the template. This helps in maintaining the code and improving the performance.
    • There are a number of features that you can add using custom pipes to your Angular application, such as digit count, filtering, sorting, password generation and many more.

    Creating a Custom Pipe in Angular

    Follow the steps given below to create a Custom pipe in Angular −

    • Step 1: Create a TypeScript class and export it. By convention, a pipe class should end with the string “Pipe”.
    • Step 2: Decorate the created TypeScript class with @Pipe Decorator. Inside this decorator, specify a name for the pipe.
    • Step 3: In the end, inherit the PipeTransform interface and implement its transform() method.

    Example

    The following example explains about creating a custom Pipe and using it inside an Angular application.

    Step 1: Open Angular CLI and generate a Pipe using the below command −

    ng g pipe digitcount
    

    After executing the above command, you can see these two files −

    CREATE src/app/digitcount.pipe.spec.ts(211 bytes)CREATE src/app/digitcount.pipe.ts(258 bytes)

    Step 2: Let’s create a logic for counting digits in a number using Pipe. Open digitcount.pipe.ts file and add the below code −

    import{ Pipe, PipeTransform }from'@angular/core'; @Pipe({ 
       name:'digitcount'})exportclassDigitcountPipeimplementsPipeTransform{transform(val : number): number {return val.toString().length;}}

    Step 3: Navigate to app.component.html file and use the newly created pipe inside the template as shown below −

    <div><h3> Using Custom DigitCount Pipe </h3><p>Count :-{{ digits | digitcount }}</p></div><router-outlet />

    Step 4: Now, we have added logic to count number of digits in a given number. It’s time to add the final code in app.component.ts file. Here, we import the DigitcountPipe and define a number.

    import{ Component }from'@angular/core';import{ RouterOutlet }from'@angular/router';import{ DigitcountPipe }from'./digitcount.pipe';
    
    @Component({
      selector:'app-root',
      standalone:true,
      imports:[RouterOutlet, DigitcountPipe],
      templateUrl:'./app.component.html',
      styleUrl:'./app.component.css'})exportclassAppComponent{
      digits : number =100;}

    Step 5: Now, run the application using ng serve command. The code will display the following result on the browser −

    Using Custom DigitCount Pipe
    Count :- 3
    
  • Built-in Pipes

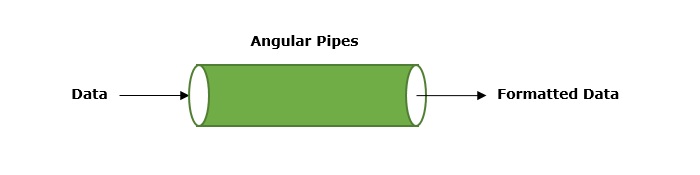
    Angular is a TypeScript (a superset of JavaScript) based framework used for building web applications. It offers various built-in features which include routing, data binding, server-side rendering and data transformation and formatting that help to fulfill project requirements.

    Suppose your project requires some data formatting tasks, such as formatting dates, numbers, and text. For this kind of task, pipes are used in Angular to format specified data before displaying it in View. In this tutorial, we are going to cover how Angular built-in pipes work.

    Built-in Pipes in Angular

    Some of the important Angular built-in pipes are given below −

    Let’s see how they work with examples.

    The LowerCasePipe

    The LowerCasePipe is used to convert all letters of the input string to lowercase. If the input value is null or undefined, this pipe returns null.

    Syntax

    Syntax of the LowerCasePipe is given below −

    {{ inputvalue | lowercase }}

    Example

    In this example, we will see the practical implementation of the LowerCasePipe.

    Step 1: Import the @angular/common package and define a string and an array of strings inside the app.component.ts file.

    import{ Component }from'@angular/core';import{ RouterOutlet }from'@angular/router';import{ LowerCasePipe}from'@angular/common';
    
    @Component({
      selector:'app-root',
      standalone:true,
      imports:[RouterOutlet, LowerCasePipe],
      templateUrl:'./app.component.html',
      styleUrl:'./app.component.css'})exportclassAppComponent{
      TutorialName: string ='Angular'; 
      chapterList: string[]=["Binding","Pipe","Services"];}

    Step 2: Open app.component.html file and apply lowercase pipe to each string as shown below −

    <p>The name ofthis Tutorial is {{TutorialName}}</p><p>The first Topic is {{chapterList[0]| lowercase}}</p><p>The second Topic is {{chapterList[1]| lowercase}}</p><p>The third Topic is {{chapterList[2]| lowercase}}</p><router-outlet />

    Once you save all the code changes, run the application to get the following output −

    The name of this Tutorial is Angular
    The first Topic is binding
    The second Topic is pipe
    The third Topic is services
    

    The UpperCasePipe

    The UpperCasePipe is used to convert all letters of the input string to uppercase. If the input value is null or undefined, this pipe returns null.

    Syntax

    The UpperCasePipe has the following syntax −

    {{ inputvalue | uppercase }}

    Example

    The following example shows how to use the UpperCasePipe.

    Step 1: Add the following code in the app.component.ts file.

    import{ Component }from'@angular/core';import{ RouterOutlet }from'@angular/router';import{ UpperCasePipe}from'@angular/common';
    
    @Component({
      selector:'app-root',
      standalone:true,
      imports:[RouterOutlet, UpperCasePipe],
      templateUrl:'./app.component.html',
      styleUrl:'./app.component.css'})exportclassAppComponent{
      TutorialName: string ='Angular'; 
      chapterList: string[]=["Binding","Pipe","Services"];}

    Step 2: Add the below code in the app.component.html file.

    <div> 
       The name ofthis Tutorial is {{TutorialName}}<br>  
       The first Topic is {{chapterList[0]| uppercase }}<br> 
       The second Topic is {{chapterList[1]| uppercase }}<br> 
       The third Topic is {{chapterList[2]| uppercase }}<br></div>

    Once you save all the code changes and refresh the browser, you will get the following output −

    The name of this Tutorial is Angular
    The first Topic is BINDING
    The second Topic is PIPE
    The third Topic is SERVICES
    

    The SlicePipe

    The SlicePipe is used to slice a piece of data from the input string. It creates a new array or string containing sub-string from the specified string based on the start and end positions.

    Syntax

    The below code block contains the syntax of SlicePipe −

    {{ inputvalue | slice:start:end }}

    Where,

    • start − This is the starting position from where the slicing begins.
    • end − This is the position where the slicing should end.

    Example

    The following example illustrates the use of SlicePipe.

    Step 1: First ensure the following code is present in the app.component.ts file

    import{ Component }from'@angular/core';import{ RouterOutlet }from'@angular/router';import{ SlicePipe}from'@angular/common';
    
    @Component({
      selector:'app-root',
      standalone:true,
      imports:[RouterOutlet, SlicePipe],
      templateUrl:'./app.component.html',
      styleUrl:'./app.component.css'})exportclassAppComponent{
      TutorialName: string ='Angular'; 
      chapterList: string[]=["Binding","Pipe","Services"];}

    Step 2: Change the code of app.component.html file with the code given below −

    <div> 
       The name ofthis Tutorial is {{TutorialName}}<br>  
       The first Topic is {{chapterList[0]| slice:1:2}}<br> 
       The second Topic is {{chapterList[1]| slice:1:3}}<br> 
       The third Topic is {{chapterList[2]| slice:2:3}}<br></div>

    Now, refresh the browser, you will get the below result on screen −

    The name of this Tutorial is Angular
    The first Topic is i
    The second Topic is ip
    The third Topic is r
    

    The DatePipe

    This is used to convert the input string to date format. If the input value is null, the DatePipe returns null as an output.

    Syntax

    Syntax of the DatePipe is as follows −

    {{ inputvalue | date:"dateformat"}}

    Where,

    dateformat is the date format the input string should be converted to.

    Example

    Let’s understand the working of DatePipe using a sample example.

    Step 1: Change the code of the app.component.ts file with the following code −

    import{ Component }from'@angular/core';import{ RouterOutlet }from'@angular/router';import{ DatePipe}from'@angular/common';
    
    @Component({
      selector:'app-root',
      standalone:true,
      imports:[RouterOutlet, DatePipe],
      templateUrl:'./app.component.html',
      styleUrl:'./app.component.css'})exportclassAppComponent{
      presentDate =newDate();}

    Step 2: Navigate to the app.component.html file and embed the DatePipe inside HTML element as shown in the given code block −

    <div> 
       Today's date :-{{presentDate | date:"MM/dd/yy"}}</div>

    Once you save all the code changes, you will get the following output −

    Today's date :- 01/07/25
    

    The CurrencyPipe

    The CurrencyPipe converts the input string to currency format. The given input value will be formatted according to the locale rules and optional parameters, such as code, symbol, symbol-narrow and digitsInfo.

    Syntax

    Syntax of the CurrencyPipe is given below −

    {{ inputvalue | currency :'code':'symbol':'symbol-narrow'}}

    Where,

    code − The ISO 4217 currency code, such as ‘USD’ for US dollars or ‘EUR’ for euros.

    symbol − Displays the currency symbol.

    symbol-narrow − Displays a narrow version of the currency symbol.

    digitsInfo − It specifies the number of decimal places and the minimum and maximum number of integer digits.

    NOTE: All the parameters are optional.

    Example

    In this example, we will see the use of CurrencyPipe.

    Step 1: Declare and initialize a number inside the app.component.ts file.

    import{ Component }from'@angular/core';import{ RouterOutlet }from'@angular/router';import{ CurrencyPipe}from'@angular/common';
    
    @Component({
      selector:'app-root',
      standalone:true,
      imports:[RouterOutlet, CurrencyPipe],
      templateUrl:'./app.component.html',
      styleUrl:'./app.component.css'})exportclassAppComponent{
      newValue: number =54213;}

    Step 2: Next, open the app.component.html file and apply the currency pipe to the defined number.

    <div> 
       The number in currency:{{newValue | currency}}</div>

    All the above changes will generate the following result on browser −

    The number in currency: $54,213.00
    

    The PercentPipe

    The PercentPipe is used to convert the input string to percentage format. Like other built-in pipes mentioned above, it also returns null when an undefined or null value is passed.

    Syntax

    The PercentPipe has the following syntax −

    {{ inputvalue | percent :"digitsInfo"}}

    Where,

    digitsInfo controls the formatting of the percentage value. It determines the number of decimal places and the minimum and maximum number of integer digits.

    Example

    Let’s understand how PercentPipe works with the help of an example.

    Step 1: Define a decimal number inside the app.component.ts file. Also, make sure to import the PercentPipe.

    import{ Component }from'@angular/core';import{ RouterOutlet }from'@angular/router';import{ PercentPipe}from'@angular/common';
    
    @Component({
      selector:'app-root',
      standalone:true,
      imports:[RouterOutlet, PercentPipe],
      templateUrl:'./app.component.html',
      styleUrl:'./app.component.css'})exportclassAppComponent{ 
      newValue: number =0.59;}

    Step 2: Make the following changes in app.component.html file.

    <div>
       The given number in percentage:{{newValue | percent}}</div>

    Once you save all the code changes, you will see the following output on your browser −

    The given number in percentage: 59%
    

    The DecimalPipe

    The DecimalPipe formats a number into a string of decimal point numbers. The given input number will be formatted according to the specified digitsInfo parameter.

    Syntax

    The following code block contains the syntax of DecimalPipe.

    {{ inputvalue | decimal :"digitsInfo"}}

    Where,

    digitsInfo − It determines the number of decimal places and the minimum and maximum number of integer digits.

    Example

    The example given below demonstrates the working of DecimalPipe.

    Step 1: First ensure the following code is present in the app.component.ts file.

    import{ Component }from'@angular/core';import{ RouterOutlet }from'@angular/router';import{ DecimalPipe}from'@angular/common';
    
    @Component({
      selector:'app-root',
      standalone:true,
      imports:[RouterOutlet, DecimalPipe],
      templateUrl:'./app.component.html',
      styleUrl:'./app.component.css'})exportclassAppComponent{
      newValue: number =5902;}

    Step 2: Next, ensure the following code is present in the app.component.html file.

    <div> 
       The given number in decimal:{{newValue | number:'1.2-2'}}</div>

    Save all the mentioned changes to get the output.

    The given number in decimal: 5,902.00
    
  • Pipes

    What are Angular Pipes?

    In Angularpipes are functions that format specified data before displaying it in the View. They help to transform and manage data within interpolation, denoted by {{ | }}. Therefore, pipes are sometimes referred to as filters. It accepts arrays, integers and strings as inputs which are separated by a vertical bar “|” symbol.

    Angular Pipes

    Features and Uses of Angular Pipes

    Some of the features and uses of Angular pipes are listed below −

    • Pipes can apply transformations directly within the HTML element.
    • Once a custom pipe is created, it can be reused throughout the Angular application.
    • Multiple pipes can be chained together. The output of one pipe can be passed as input to another pipe.
    • You can use pipes to format and transform numbers, objects, strings, and dates in a way that is suitable for display in the UI.
    • Pipes are used to filter data which means it can show only certain items from a list based on passed conditions.

    How to Use Angular Pipes?

    To use Angular pipes in your application, embed the pipe directly inside template expression. This is done using Angular’s pipe operator which is denoted by a vertical bar character “|”.

    The pipe operator is a binary operator. On the left of this operator, the input value is passed to the transformation function, and the right side operand is the pipe name.

    All the built-in pipes in Angular are available in the @angular/common package. Hence, make sure to import the required pipe from this package by specifying the pipe name in the following command −

    import{ Pipe-Name }from'@angular/common';

    Syntax

    The syntax to use Angular pipe is as follows −

    <html-tag-name>{{ input-value | pipe-name }}</html-tag-name>

    Where,

    html-tag-name can be replaced by any HTML tag, input-value is the input that will be passed into the pipe on the right side of pipe operator.

    Chaining Angular Pipes

    Chaining multiple pipes together is also possible. The output of one pipe can be passed as input to another pipe. And, the chained pipes run from left to right.

    The syntax to chain Angular pipes is as follows −

    <html-tag-name>{{ input-value | pipe1 | pipe2 }}</html-tag-name>

    Passing Parameters to Angular Pipes

    Some Angular pipes allow to configure the transformation by passing parameters. To specify a parameter, append the pipe name with a colon (:) followed by the parameter value.

    The syntax to add parameters to Angular pipes is shown below −

    <html-tag-name>{{ input-value | pipe : parameter }}</html-tag-name>

    Working Example

    The following example illustrates how to use the DatePipe in your Angular application to format dates.

    Step 1: Create a pipe-app application using the below command:

    ng newpipe-app
    

    Step 2: Add the below content in app.component.html file.

    <div> 
       Today's date :-{{presentDate}}</div>

    Step 3: Import @angular/common package and create an Date object inside app.component.ts file −

    import{ Component }from'@angular/core';import{ RouterOutlet }from'@angular/router';import{ DatePipe}from'@angular/common';
    
    @Component({
      selector:'app-root',
      standalone:true,
      imports:[RouterOutlet, DatePipe],
      templateUrl:'./app.component.html',
      styleUrl:'./app.component.css'})exportclassAppComponent{
      title ='pipe-app';
      presentDate =newDate();}

    Step 4: Start your application using the below command −

    ng serve
    

    It will display the following output on your browser −

    Today's date :- Tue Jan 07 2025 11:52:26 GMT+0530 (India Standard Time)
    

    Step 5: Let’s add date pipe in the HTML file.

    <div> 
       Today's date :-{{presentDate | date }}</div>

    Now, you will see the below output on your screen −

    Today's date :- Jan 7, 2025
    

    Step 6: Pass fullDate parameter to the date pipe as shown below −

    <div> 
       Today's date :- {{presentDate | date: 'fullDate' }}</div>

    Step 7: Now, run your application and you can see the below response −

    Today's date :- Tuesday, January 7, 2025
    

    Angular Built-in Pipes

    Angular supports a number of built-in pipes, which are as follows −

    SNo.Pipes & Description
    1.DatePipeIt is used to format a given date value.
    2.UpperCasePipeIt converts individual letters of the specified texts into uppercase.
    3.LowerCasePipeIt transforms individual letters of the specified texts into lowercase.
    4.CurrencyPipeThis pipe is used to transform a given number into a currency string.
    5.DecimalPipeThis pipe formats a number into a string of decimal point number.
    6.PercentPipeIt formats specified numbers into a percentage string.
    7.TitleCasePipeIt is used to convert the specified text to a title case.
    8.JsonPipeThis built-in pipe is used to transform an object to its corresponding JSON string representation.
    9.KeyValuePipeUse this pipe to create an array of key-value pairs from a given object or map.
    10.SlicePipeIt returns a new sub-string from the specified string.
  • Custom Directives

    Custom Directives in Angular

    custom directive is a user-defined directive that allows developers to extend the functionality of HTML elements. The attribute and structural built-in directives (covered in previous two chapters) offers very basic and pre-defined functionalities. However, with custom directives, you can add specific behaviors to HTML elements based on project requirements, user interactions, or changes in data.

    Features and Uses of Angular Custom Directives

    The Angular Custom Directives provides the following features −

    • The first and most basic feature of a custom directive is to modify the structure or appearance of DOM elements based on your specific logic.
    • It allows you to embed event listeners to the HTML elements so that their behavior can be changed in response to user interaction.
    • You can create a reusable and modular piece of code using custom directives.
    • The custom directives can also help us add various features to the user interface, such as tooltip, drag and drop, form validation, dynamic styles and much more.

    Creating a Custom Directive in Angular

    To create a custom directive, run the following command in Angular CLI −

    ng generate directive <directive-name>

    The above command will create a new directive with the specified name and add the necessary files for it. Among these files, the most important one is TypeScript file. This file has.tsextension.

    Example

    In this example, we will learn how to create a custom directive in Angular.

    Step 1: Use the below command to create customstyle directive −

    ng generate directive customstyle
    

    After running this command, Angular CLI will create below files −

    CREATE src/app/customstyle.directive.spec.ts(252 bytes)CREATE src/app/customstyle.directive.ts(182 bytes)

    Step 2: Open customstyle.directive.ts file and add the below code −

    import{ Directive, ElementRef }from'@angular/core';
    @Directive({
      selector:'[appCustomstyle]',
      standalone:true})exportclassCustomstyleDirective{constructor(el: ElementRef){ 
    
    el.nativeElement.style.fontSize ='24px';}}</pre>

    Here, constructor method gets the element using CustomStyleDirective as el. Then, it accesses style of el and sets its font size as 24px using the CSS property.

    Step 3: Add the below text and use the selector of custom directive as shown below −

    <p appCustomstyle>This text is styled using custom style directive</p><router-outlet />

    Step 4: Import this custom directive inside app.component.ts file as shown below −

    import{ Component}from'@angular/core';import{ RouterOutlet }from'@angular/router';import{ CustomstyleDirective }from'./customstyle.directive';
    
    @Component({
      selector:'app-root',
      standalone:true,
      imports:[RouterOutlet, CustomstyleDirective],
      templateUrl:'./app.component.html',
      styleUrl:'./app.component.css'})exportclassAppComponent{}

    Step 5: Finally, run your application using the below command −

    ng serve
    

    Output of the above code is shown below −

    Angular Custom Directives
  • Null Functions

    SQL NULL functions are used to perform operations on NULL values that are stored in the database tables.

    A NULL value serves as a placeholder in the database when data is absent or the required information is unavailable. It is a flexible value not associated to any specific data type and can be used in columns of various data types, including string, int, varchar, and more.

    Following are the various features of a NULL value −

    • The NULL value is different from a zero value or a field containing a space. A record with a NULL value is one that has been left empty or unspecified during record creation.
    • The NULL value assists us in removing ambiguity from data. Thus, maintaining the uniform datatype across the column.

    SQL NULL Functions

    To handle these NULL values in a database table, SQL provides various NULL functions. They are listed as follows −

    • ISNULL()
    • COALESCE()
    • NULLIF()
    • IFNULL()

    The ISNULL() Function

    The SQL ISNULL() function returns 0 and 1 depending on whether the expression is null or not. If the expression is null, then this function returns 1; otherwise, it returns 0.

    Syntax

    Following is the syntax for the ISNULL() function −

    ISNULL(column_name)

    Example

    First of all let us create a table named CUSTOMERS, containing the personal details of customers including their name, age, address and salary etc., using the following query −

    CREATETABLE CUSTOMERS (
       ID INTNOTNULL,
       NAME VARCHAR(20)NOTNULL,
       AGE INTNOTNULL,
       ADDRESS CHAR(25),
       SALARY DECIMAL(18,2),PRIMARYKEY(ID));

    Now, insert records into this table using the INSERT INTO statement as follows −

    INSERTINTO CUSTOMERS VALUES(1,'Ramesh',32,'Ahmedabad',2000.00),(2,'Khilan',25,'Delhi',1500.00),(3,'Kaushik',23,'Kota',NULL),(4,'Chaitali',25,'Mumbai',6500.00),(5,'Hardik',27,'Bhopal',8500.00),(6,'Komal',22,'Hyderabad',NULL),(7,'Indore',24,'Indore',10000.00);

    The table will be created as −

    IDNAMEAGEADDRESSSALARY
    1Ramesh32Ahmedabad2000.00
    2Khilan25Delhi1500.00
    3Kaushik23KotaNULL
    4Chaitali25Mumbai6500.00
    5Hardik27Bhopal8500.00
    6Komal22HyderabadNULL
    7Indore24Indore10000.00

    Following is the query to check whether SALARY is NULL or not −

    SELECT SALARY, ISNULL(SALARY)AS Null_value FROM CUSTOMERS;

    Output

    On execution of the above query, we get the column “SALARY” and Null_value. If the SALARY is NULL, then their null value is 1; otherwise, it is 0. −

    SALARYNull_value
    2000.000
    1500.000
    NULL1
    6500.000
    8500.000
    NULL1
    10000.000

    The COALESCE() Function

    The SQL COALESCE() function returns the first occurred NON-NULL expression among its arguments. If all the expressions are NULL, then the COALESCE() function will return NULL.

    An integer is evaluated first in the COALESCE() function, and an integer followed by a character expression always produces an integer as the output.

    Syntax

    Following is the syntax for the COALESCE() function −

    COALESCE(expression_1, expression_2, expression_n);

    Example

    In the following query, we are returning the first occurred NON-NULL value −

    SELECTCOALESCE(NULL,'welcome','tutorialspoint')AS Result;

    Output

    On executing the above query, we get “welcome” as a result, because it is the first NON-NULL value −

    Result
    welcome

    Example

    In the following query, we are using the COALESCE() function on the SALARY and AGE columns of CUSTOMERS table. The first NON-NULL values evaluated from these two columns are displayed in another column named “Result”.

    SELECT NAME, SALARY, AGE,COALESCE(SALARY, AGE)AS Result FROM CUSTOMERS;

    Output

    When you execute the above query, we get the following table as a result −

    NAMESALARYAGEResult
    Ramesh2000.00322000.00
    Khilan1500.00251500.00
    KaushikNULL2323.00
    Chaitali6500.00256500.00
    Hardik8500.00278500.00
    KomalNULL2222.00
    Indore10000.002410000.00

    The NULLIF() Function

    The SQL NULLIF() function compares two expressions. If both expressions are the same, it returns NULL. Otherwise, it returns the first expression. This function can be used directly with clauses like SELECT, WHERE, and GROUP BY.

    Syntax

    Following is the syntax of NULLIF() function −

    NULLIF(expression_1, expression_2);

    Example

    The following SQL query uses NULLIF() function to compare values in NAME and ADDRESS columns of the CUSTOMERS table. If the NAME value matches the ADDRESS value, the result is NULL; otherwise, it returns the NAME value. The result values are stored in another column called “Result”.

    SELECT NAME, ADDRESS,NULLIF(NAME, ADDRESS)AS Result FROM CUSTOMERS;

    Output

    When you execute the above query, we get the following table as a result −

    NAMEADDRESSResult
    RameshAhmedabadRamesh
    KhilanDelhiKhilan
    KaushikKotaKaushik
    ChaitaliMumbaiChaitali
    HardikBhopalHardik
    KomalHyderabadKomal
    IndoreIndoreNULL

    The IFNULL() Function

    The IFNULL() function replaces the NULL values in a database table with a specific value. This function accepts two arguments. If the first argument is a NULL value, it is replaced with the second argument. Otherwise, the first argument is returned as it is.

    This function does not work in the SQL Server database.

    If both the arguments are NULL, the result of this function is also NULL.

    Syntax

    Following is the syntax for IFNULL() function −

    IFNULL(column_name, value_to_replace);

    Example

    The following query evaluates the values in SALARY column of the CUSTOMERS table. Using the IFNULL() function, we are replacing the NULL values in this column (if any) with the value 5500 −

    SELECT NAME, SALARY, IFNULL(SALARY,5500)AS Result FROM CUSTOMERS;

    Output

    Following is the output of the above query −

    NAMESALARYResult
    Ramesh2000.002000.00
    Khilan1500.001500.00
    KaushikNULL5500.00
    Chaitali6500.006500.00
    Hardik8500.008500.00
    KomalNULL5500.00
    Indore10000.0010000.00

  • Structural Directives

    What are Structural Directives?

    Structural directives change the structure of DOM by adding or removing elements at runtime. This type of Angular Directive is used to show or hide elements based on user authentication, render dynamic lists from APIs, or create interfaces like tabs and accordions that change based on user actions.

    The structural directives are applied to elements by prefixing the directive name with an asterisk (*) symbol. To use these directives in your angular application, importing CommonModule is necessary as they are part of this module.

    Built-in Structural Directives

    The list of commonly used structural directives are −

    • ngIf: This directive is used to display or hide data in your application. When the given condition becomes TRUE, it will display the data, otherwise, it will not.
    • ngFor: ngFor is used to repeat a portion of elements from the given list of items.
    • ngSwitch: It checks multiple conditions.
    structural directives

    The ngIf Directive

    The Angular Template does not provide the facility of conditional logic. Therefore, the ngIf directive is used to apply conditional logic. For this reason, it is also known as a conditional directive. For example, you can use the ngIf directive to display or hide data in your application based on the specified condition.

    Example

    Let us try the ngIf directive in our directive-app application to show and hide information.

    Step 1: Add the below code in app.component.html.

    <div *ngIf="showData">
      Tutorialspoint
    </div><button(click)="show()">Show Data</button><router-outlet />

    Step 2: Import the CommonModule and add a show() method in the app.component.ts file as follows −

    import{ Component }from'@angular/core';import{ RouterOutlet }from'@angular/router';import{ CommonModule }from'@angular/common';
    
    @Component({
      selector:'app-root',
      standalone:true,
      imports:[RouterOutlet, CommonModule],
      templateUrl:'./app.component.html',
      styleUrl:'./app.component.css'})exportclassAppComponent{
      title ='directive-app';
      showData =false;show(){this.showData =!this.showData;}}

    Step 3: Open app.component.css file and add below CSS:

    div {
    
    background-color: black;
    color: white;
    width:200px;
    height:200px;
    border-radius:5px;
    box-shadow:0px 5px 15px rgb(6,51,51);
    text-align: center;
    align-items: center;
    justify-content: center;
    display: flex;}
    button {
    border-radius:3px;
    margin:10px auto;
    padding:10px 10px;
    color: white;
    font-weight: bold;
    background-color:rgb(66,59,59);
    cursor: pointer;}</pre>

    Now, run your application using the ng serve command and you can see the below response −

    NgServe

    Clicking on the button will show the hidden contents.

    The ngIfElse Directive

    The ngIfElse directive functions similarly to ngIf, but it also allows you to render content when the condition is evaluated as false. It is identical to the if-else condition that you may have learned in programming languages like C, C++ and Java.

    Example

    Let's understand how the ngIfElse works by creating a sample application.

    Step 1: Add the following code in app.component.html file as follows −

    <div *ngIf="showData; else noData">
      Tutorialspoint
    </div><ng-template #noData>Nothing to display here!!</ng-template><button(click)="show()">Show Data</button>

    If the condition is false, a text will be displayed and in the case of TRUE, a box will be displayed.

    Step 2: Finally, start your application (if not done already) using the below command −

    ng serve
    

    Now, run your application and you can see the below response −

    NgApplication

    The ngFor Directive

    Angular template does not have the feature of looping logic as well. So, to loop through given data, Angular provides NgFor directive. For example, you can use this directive to loop over an array of items and show it as a list, gallery, table, etc.

    Example

    Let's understand how ngFor with the help of a sample application.

    Step 1: Add the list in app.component.ts file as shown below −

    import{ Component }from'@angular/core';import{ RouterOutlet }from'@angular/router';import{ CommonModule }from'@angular/common';
    
    @Component({
      selector:'app-root',
      standalone:true,
      imports:[RouterOutlet, CommonModule],
      templateUrl:'./app.component.html',
      styleUrl:'./app.component.css'})exportclassAppComponent{
      title ='directive-app';
      list =[1,2,3,4,5];}

    Step 2: Add ngFor directive in app.component.html as shown below −

    <h2>ngFor directive Example</h2><ul><li *ngFor="let l of list">{{l}}</li></ul>

    Here, the let keyword creates a local variable and it can be referenced anywhere in your template. The l creates a template local variable to get the list elements.

    Step 3: Finally, start your application using the below command −

    ng serve
    

    The following response will be displayed −

    NgFor directive

    Special Case: trackBy Function

    Sometimes, the ngFor directive performance is low with large lists. For example, when adding a new item or removing any item in the list may trigger several DOM manipulations. To iterate over a large object collection, we usethe trackBy function.

    It tracks when elements are added or removed. It has two arguments index and element. The index is used to identify each element uniquely.

    Example

    Let's understand how trackBy is used with ngFor in this example.

    Step 1: Add the below code in app.component.ts file.

    import{ Component }from'@angular/core';import{ RouterOutlet }from'@angular/router';import{ CommonModule }from'@angular/common';
    
    @Component({
      selector:'app-root',
      standalone:true,
      imports:[RouterOutlet, CommonModule],
      templateUrl:'./app.component.html',
      styleUrl:'./app.component.css'})exportclassAppComponent{
      title ='directive-app';
      studentArr: any[]=[{"id":1,"name":"student1"},{"id":2,"name":"student2"},{"id":3,"name":"student3"},{"id":4,"name":"student4"}];trackByData(index:number, studentArr:any): number {return studentArr.id;}}

    Here,

    We have created,

    trackByData()method to access each student element in a unique way based on the id.

    Step 2: Add the below code in app.component.html file to define trackBy method inside ngFor.

    <ul><li *ngFor="let std of studentArr; trackBy: trackByData">{{std.name}}</li></ul>

    Step 3: Now, run your application using ng serve command and you will get the below response −

    NgFor with trackBy function

    Here, the application will print the student names. Now, the application is tracking student objects using the student id instead of object references. So, DOM elements are not affected.

    The ngSwitch Directive

    Angular template does not have switch statement as well. At the place of switch statement, Angular provides the ngSwitch and its related directive to check multiple conditions and select any one of the item in a collection (of items).

    Example

    Let us try ngSwitch directive in our directive-app application.

    Step 1: Add the following code in app.component.ts file.

    import{ Component, OnInit }from'@angular/core';import{ RouterOutlet }from'@angular/router';import{ CommonModule }from'@angular/common';
    
    @Component({
      selector:'app-root',
      standalone:true,
      imports:[RouterOutlet, CommonModule],
      templateUrl:'./app.component.html',
      styleUrl:'./app.component.css'})exportclassAppComponentimplementsOnInit{ngOnInit():void{// code}
      title ='directive-app';
      logInName ='admin';}

    Step 2: Add the following code in app.component.html file as follows −

    <h2>ngSwitch directive</h2><ul [ngSwitch]="logInName"><li *ngSwitchCase="'user'"><p>User is logged in..</p></li><li *ngSwitchCase="'admin'"><p>admin is logged in</p></li><li *ngSwitchDefault><p>Please choose login name</p></li></ul>

    Step 3: Finally, start your application (if not done already) using the below command −

    ng serve
    

    Now, run your application and you can see the below response −

    NgSwitch Directive

    Here, we have defined logInName as admin. So, it matches the second SwitchCase and prints above admin related message.

  • MIN MAX function

    The MIN() and MAX() functions in SQL are aggregate functions. They are used to compare values in a set and, retrieve the maximum and minimum values respectively.

    An aggregate function is a mathematical computation that takes a range of values as input and yields a single value expression, representing the significance of the provided data.

    MAX() and MIN() aggregate functions are generally used in two ways:

    • As functions, they are used with the GROUP BY clause of the SELECT statement.
    • As expressions, they are used with a subquery and HAVING clause of SELECT statement.

    The SQL MAX() Function

    The MAX() function compares the values in a column and returns the largest value among them.

    Syntax

    Following is the syntax of SQL MAX() function −

    MAX(column_name);

    Example

    In the following example, we are running a query for MAX() function on a table named CUSTOMERS. The objective is to retrieve the maximum salary value from this table. First of all, let us create the CUSTOMERS table using the following query −

    CREATETABLE CUSTOMERS (
       ID INTNOTNULL,
       NAME VARCHAR(20)NOTNULL,
       AGE INTNOTNULL,
       ADDRESS CHAR(25),
       SALARY DECIMAL(18,2),PRIMARYKEY(ID));

    Now, insert values into this table using the INSERT statement as follows −

    INSERTINTO CUSTOMERS VALUES(1,'Ramesh',32,'Ahmedabad',2000.00),(2,'Khilan',25,'Delhi',1500.00),(3,'Kaushik',23,'Kota',2000.00),(4,'Chaitali',25,'Mumbai',6500.00),(5,'Hardik',27,'Bhopal',8500.00),(6,'Komal',22,'Hyderabad',4500.00),(7,'Muffy',24,'Indore',10000.00);

    The CUSTOMERS table will be created as −

    IDNAMEAGEADDRESSSALARY
    1Ramesh32Ahmedabad2000.00
    2Khilan25Delhi1500.00
    3Kaushik23Kota2000.00
    4Chaitali25Mumbai6500.00
    5Hardik27Bhopal8500.00
    6Komal22Hyderabad4500.00
    7Muffy24Indore10000.00

    Here, we are comparing the salaries of CUSTOMERS and retrieving the maximum salary using the following query −

    SELECTMAX(SALARY)FROM CUSTOMERS;

    When the above query is executed, the result is displayed as −

    MAX(SALARY)
    10000.0000

    HAVING with MAX() Function

    In the following query, we are fetching the ID, NAME, and SALARY of the CUSTOMERS using the MAX() function along with HAVING clause.

    SELECT ID, NAME, SALARY 
    FROM CUSTOMERS 
    GROUPBY NAME, ID 
    HAVINGMAX(SALARY)<8000;

    When the above query is executed, we get the details of the employees whose maximum salary is less than 8000 −

    IDNAMESALARY
    1Ramesh2000.00
    2Khilan1500.00
    3Kaushik2000.00
    4Chaitali6500.00
    6Komal4500.00

    MAX() Function in Subqueries

    In the following example, we are using the MAX() function in a subquery to retrieve the record with maximum salary, from the CUSTOMERS table.

    SELECT*FROM CUSTOMERS 
    WHERE SALARY =(SELECTMAX(SALARY)FROM CUSTOMERS);

    When we execute the above query, we will get the following result −

    IDNAMEAGEADDRESSSALARY
    7Muffy24Indore10000.00

    MAX() Function with Strings

    This query retrieves the maximum value (alphabetically) among the names of customers in the CUSTOMERS table using the MAX() function −

    SELECTMAX(NAME)AS max_name FROM CUSTOMERS;

    Following is the result of the above query −

    max_name
    Ramesh

    Aliases with MAX() Function

    In the following example, we use the MAX() function to retrieve the record containing maximum age from the CUSTOMERS table. We are displaying the results as a new column with the alias “max_age”.

    SELECTMAX(age)AS'max_age'FROM CUSTOMERS;

    Following is the output of the above query −

    max_age
    32

    The SQL MIN() Function

    The MIN() function compares values in a column and returns the smallest value among them.

    Syntax

    Following is the syntax of SQL MIN() function −

    MIN(column_name);

    Example

    In this example, we are comparing values in the SALARY column of CUSTOMERS table and displaying the minimum salary using the following query −

    SELECTMIN(SALARY)FROM CUSTOMERS;

    When the above query is executed, the result is displayed as −

    MIN(SALARY)
    1500.0000

    HAVING with MIN() Function

    In the following query, we are fetching the ID, NAME, and SALARY of the CUSTOMERS using the MIN() function along with HAVING clause.

    SELECT ID, NAME, SALARY 
    FROM CUSTOMERS 
    GROUPBY NAME, ID 
    HAVINGMIN(SALARY)>5000;

    When the above query is executed, we get the details of the maximum salary for employees whose minimum salary is more than 5000, as we can see in the table that follows −

    IDNAMEMAX_Salary
    4Chaitali6500.0000
    5Hardik8500.0000
    7Muffy10000.0000

    MIN() Function in Subqueries

    In the following example, we are using the MIN() function in a subquery to retrieve the record with minimum salary, from the CUSTOMERS table.

    SELECT*FROM CUSTOMERS 
    WHERE SALARY =(SELECTMIN(SALARY)FROM CUSTOMERS);

    When we execute the above query, we will get the following result −

    IDNAMEAGEADDRESSSALARY
    2Khilan25Delhi1500.00

    MIN() Function with Strings

    Following is the query to retrieve the minimum value (alphabetically) among the names of customers in the CUSTOMERS table using the MIN() function −

    SELECTMIN(NAME)AS min_first_name FROM CUSTOMERS;

    Following is the result of the above query −

    min_first_name
    Chaitali

    Aliases with MIN() Function

    Following is the SQL query that will fetch the minimum age from the CUSTOMERS table using the MIN() function −

    SELECTMIN(age)AS'min_age'FROM CUSTOMERS;

    When we execute the above query, the minimum value in the age field is displayed as shown below.

    min_age
    22

  • Hosting

    SQL Hosting

    SQL Hosting is nothing but a means to manage any RDBMS linked to your website using SQL. If the website has an access to a RDBMS, any data from the website you created will be stored and retrieved from this database.

    There are various SQL hosting plans available if your web server is hosted by an Internet Service Provider (ISP).

    Following are the most common SQL hosting databases −

    • MS SQL Server
    • Oracle
    • MySQL
    • MS Access

    MS SQL Server

    MS SQL Server is created and developed by Microsoft. It is compatible with both virtual and cloud servers. It is very efficient to use with database-driven websites having high traffic.

    MS SQL Server’s features include −

    • Maximum scalability and security
    • Integrated reporting capabilities
    • Easy to use
    • Powerful
    • Robust
    • Offers more diverse features while hosting

    Oracle

    Oracle is a popular database which is suitable to use with high-traffic websites. This database offers various features like,

    • Cost-effective product
    • High-performance
    • Converged, multi-model database management system
    • In-memory MySQL databases

    Oracle is also a very powerful, robust and full featured SQL database system.

    MySQL

    MySQL is one of the most popular RDBMS in the world used to store and manage data. It is compatible with any type of server, say cloud, virtual or dedicated. Features of MySQL are as follows −

    • Easy to use
    • High performance
    • Excellent security
    • Improved speed
    • Cost effective

    MS Access

    Microsoft Access is a very simple database which can be used for simple websites. MS Access is neither as powerful as MySQL, MS SQL Server or Oracle. Thus, it is not effective for websites with higher traffic.

  • Attribute Directives

    What are Attribute Directives?

    Attribute directives change the appearance or behavior of DOM elements or components. It is used just like a normal HTML attribute. However, the directive should be enclosed within square brackets [ ] to bind it to the element.

    Built-in Attribute Directives

    The most commonly used attribute directives are as follows −

    • ngStyle: It is used to add dynamic styles.
    • ngClass: It adds or removes CSS classes in HTML elements.
    • ngModel: This directive is used for two-way binding.
    attribute directives

    NOTE: To use ngStyle and ngClass directive, importing CommonModule is necessary as they are part of this module. For ngModel, we are required to import FormsModule.

    The ngStyle Directive

    The ngStyle directive is used to add dynamic styles. You can set one or more style properties using key-value pairs separated by a colon. Here, key is the name of style and the value is an expression that gets calculated. If the result is null, no style will be applied to the element.

    Example

    The example below shows how to apply blue color to the paragraph using ngStyle directive.

    Step 1: Create a directive-app application using the below command:

    ng newdirective-app
    

    Step 2: Add the below content in app.component.html file.

    <p [ngStyle]="{'color': 'blue', 'font-size': '14px'}"> 
       paragraph style is applied using ngStyle 
    </p><router-outlet />

    Step 3: Import CommonModule inside app.component.ts file:

    import{ Component }from'@angular/core';import{ RouterOutlet }from'@angular/router';import{ CommonModule }from'@angular/common';
    
    @Component({
      selector:'app-root',
      standalone:true,
      imports:[RouterOutlet, CommonModule],
      templateUrl:'./app.component.html',
      styleUrl:'./app.component.css'})exportclassAppComponent{
      title ='directive-app';}

    Step 4: Start your application (if not done already) using the below command −

    ng serve
    

    Now, run your application and you can see the below response −

    ngStyle

    The ngClass Directive

    The ngClass directive is used to add or remove CSS classes in HTML elements. The CSS classes are updated based on given conditions or type of expression.

    If the expression is a string, the CSS classes specified in the string are added. If it’s an array, the CSS classes listed as array elements are added. And, if the expression is an object, the keys represent CSS classes that will be added when their corresponding values are evaluated to a truthy value and removed when their values are falsy.

    Example

    Let’s try ngClass directive in our directive-app application.

    Step 1: Change the above code of the app.component.html file with the following code:

    <div [ngClass]="dark">
      Tutorialspoint
    </div><button(click)="changeBckgrd()">Toggle</button><router-outlet />

    Step 2: Open app.component.ts file and add the below changes −

    import{ Component }from'@angular/core';import{ RouterOutlet }from'@angular/router';import{ CommonModule }from'@angular/common';
    
    @Component({
      selector:'app-root',
      standalone:true,
      imports:[RouterOutlet, CommonModule],
      templateUrl:'./app.component.html',
      styleUrl:'./app.component.css'})exportclassAppComponent{
      title ='directive-app';
      dark ="";changeBckgrd(){if(this.dark ==""){this.dark ="darkCol";}else{this.dark ="";}}}

    Step 3: Now, open app.component.css file and add the below code:

    div {
    
    width:200px;
    height:200px;
    border-radius:5px;
    box-shadow:0px 5px 15px rgb(6,51,51);
    text-align: center;
    align-items: center;
    justify-content: center;
    display: flex;}
    button {
    border-radius:3px;
    margin:10px auto;
    padding:10px 10px;
    color: white;
    font-weight: bold;
    background-color:rgb(66,59,59);
    cursor: pointer;}.darkCol {
    background-color: black;
    color: white;
    transition: background-color 0.5s;}</pre>

    Step 4: Finally, start your application (if not done already) using the below command −

    ng serve
    

    Now, run your application and you can see the below response −

    ngClass

    The ngModel Directive

    The ngModel is a built-in attribute directive. It is mostly used to enable two-way data binding for HTML form elements with the help of banana-in-a-box syntax "[()]". However, you if you use ngModel in square bracket [] syntax, it will enable the one-way binding.

    The ngModel directive is provided by a separate module called FormsModule, which is necessary for template-driven forms.

    Example

    A simple example of two way binding is given below. Here, a user object with name property is defined. Whenever user change the input field, the updated user name will be reflected to the user.name variable in the component. Similarly, if the components variable, user.name gets changed, the input fields value will be updated as well.

    Let us create a simple registration form to understand ngModel directive. Our registration form will have three input fields as shown below and a button to submit the registration form:

    • Username
    • Password
    • Confirm password

    Step 1: Create a new application, my-app using angular CLI as shown below −

    ng newmy-app
    

    Step 2: Create a new registration form component, RegisterForm using angular CLI as shown below −

    ng generate component RegisterForm
    

    Step 3: Open the registration form component's template and a user with username, password and confirm password.

    <div><form method="post"><div class="container"><label for="username"><b>Username</b></label><input type="text" name="username" [(ngModel)]="user.username" required><label for="password"><b>Password</b></label><input type="password" name="password" [(ngModel)]="user.password" required><label for="confirm_password"><b>Confirm Password</b></label><input type="password" name="confirm_password" [(ngModel)]="user.confirmPassword" required><button type="submit" (click)="showInfo($event)">Register</button></div></form></div>

    Here, ngModel sets the value from "user" object to HTML input element. It sets the user-entered value to the user object in the reverse direction as well.

    Step 4: Open the registration form component's style and add some CSS to the form as shown below −

    .container{padding: 15px;}input[type=text], input[type=password]{width: 100%;padding: 10px 20px;margin: 10px 0;display: inline-block;border: 1px solid #ccc;box-sizing: border-box;}button{background-color: blue;color: white;padding: 15px 20px;margin: 10px 0;border: none;cursor: pointer;width: 100%;}

    Step 5: Include our registration form component in the app template file, app.component.html:

    <app-register-form></app-register-form><router-outlet />

    Step 6: Next, add an object named "user" with username, password and confirmPassword properties. The "user" object will have an empty string initially. Once the user enters the data, it will get populated through NgModel directive.

    user: any ={
       username:'',
       password:'',
       confirmPassword:''}

    Step 7: Create a new member method, showInfo() in the component class. The purpose of the method is to collect the current user information and show it through alert() method.

    showInfo(e: Event){
       e.preventDefault();let info: string ='';
       info +='Username = '+this.user.username;
       info +='\nPassword = '+this.user.password;
       info +='\nConfirm password = '+this.user.confirmPassword;alert(info)}

    Here,

    • preventDefault() method of the event object will prevent the default action of submit button.
    • alert() method will show the message to the user.

    Step 8: The complete listing of the component i.e. register-form.component.ts is as follows:

    import{ Component }from'@angular/core';import{ FormsModule }from'@angular/forms';
    
    @Component({
      selector:'app-register-form',
      standalone:true,
      imports:[FormsModule],
      templateUrl:'./register-form.component.html',
      styleUrl:'./register-form.component.css'})exportclassRegisterFormComponent{
      user: any ={
    
     username:'',
     password:'',
     confirmPassword:''}showInfo(e: Event){
     e.preventDefault();let info: string ='';
     info +='Username = '+this.user.username;
     info +='\nPassword = '+this.user.password;
     info +='\nConfirm password = '+this.user.confirmPassword;alert(info)}}</pre>

    Step 9: Before running the application, add the RegisterFormComponent to the app.component.ts file.

    import{ Component }from'@angular/core';import{ RouterOutlet }from'@angular/router';import{ RegisterFormComponent }from'./register-form/register-form.component';
    
    @Component({
      selector:'app-root',
      standalone:true,
      imports:[RouterOutlet, RegisterFormComponent],
      templateUrl:'./app.component.html',
      styleUrl:'./app.component.css'})exportclassAppComponent{
      title ='my-app';}

    Step 10: Now, run the application, fill out the form and click the register button. It will collect the information through ngModel binding and show it through the alert() function.

    register button
  • Injection

    If you take a user input through a webpage and insert it into an SQL database, there is a chance that you have left yourself wide open for a security issue known as the SQL Injection. This chapter will teach you how to help prevent this from happening and help you secure your scripts and SQL statements in your server side scripts such as a PERL Script.

    SQL Injection

    SQL Injection is a type of security attack that exploits a vulnerability in a database by executing malicious queries. This will allow attackers to access sensitive data, tamper it and also delete it permanently.

    Injection usually occurs when you ask a user for input, like their name and instead of a name they give you a SQL statement that you will unknowingly run on your database. Never trust user provided data, process this data only after validation; as a rule, this is done by Pattern Matching.

    Example

    In the example below, the name is restricted to the alphanumerical characters plus underscore and to a length between 8 and 20 characters (you can modify these rules as needed).

    if(preg_match("/^\w{8,20}$/",$_GET['username'],$matches)){$result=mysqli_query("SELECT * FROM CUSTOMERS 
    
      WHERE name = $matches[0]");}else{echo"user name not accepted";}</pre>

    To demonstrate the problem, consider this excerpt −

    // supposed input$name="Qadir'; DELETE FROM CUSTOMERS;";mysqli_query("SELECT * FROM CUSTOMSRS WHERE name='{$name}'");

    The function call is supposed to retrieve a record from the CUSTOMERS table where the name column matches the name specified by the user. Under normal circumstances, $name would only contain alphanumeric characters and perhaps spaces. But here, by appending an entirely new query to $name, the call to the database turns into disaster; the injected DELETE query removes all records from the CUSTOMERS table.

    Fortunately, if you use MySQL, the mysqli_query() function does not permit query stacking or executing multiple SQL queries in a single function call. If you try to stack queries, the call fails.

    However, other PHP database extensions, such as SQLite and PostgreSQL happily perform stacked queries, executing all the queries provided in one string and creating a serious security problem.

    Preventing SQL Injection

    You can handle all escape characters smartly in scripting languages like PERL and PHP. The MySQL extension for PHP provides the function mysql_real_escape_string() to escape input characters that are special to MySQL.

    if(get_magic_quotes_gpc()){$name=stripslashes($name);}$name=mysql_real_escape_string($name);mysqli_query("SELECT * FROM CUSTOMERS WHERE name='{$name}'");

    The LIKE Quandary

    To address the LIKE quandary, a custom escaping mechanism must convert user-supplied '%' and '_' characters to literals. Use addcslashes(), a function that lets you specify a character range to escape.

    $sub=addcslashes(mysql_real_escape_string("%str"),"%_");// $sub == \%str\_mysqli_query("SELECT * FROM messages 
       WHERE subject LIKE '{$sub}%'");