In HTTP protocol,the requestis a process of starting communication with the server by the client application or browser. In Angular, a request refers to making HTTP calls to a server to fetch, send, or manipulate data. These requests are handled by the Angular HttpClient module.
The following diagram will give you a clear understanding of the HTTP Request:
Let’s see how to send a request (HTTP calls) to the server in the Angular framework, there are various options available in the request phase in this chapter. We will discuss them one by one.
Setting up a server application
To workout the HTTP client-server communication, we need to set up a web application and expose a set of web API. The web API can be requested from the client (i.e., web application or a browser). Let us create a sample server application, Expense API App to provide CRUD REST API for expenses.
Step 1: Go to your favorite workspace as shown below −
cd /go/to/your/favorite/workspace
Step 2: Create a new folder, expense-rest-api, and move into this folder −
mkdir expense-rest-api && cd expense-rest-api
Step 3: Create a new application using the init subcommand provided by the npm command, as shown below −
npm init
Once you hit the above command, it will ask a few questions and answer all of them with default answers.
Step 4: Install express and cors packages to create node-based web applications −
npm install express cors --save
Step 5: Install SQLite package to store the expenses in the SQLite-based database −
npm install sqlite3 --save
Step 6: Create a new file with the name sqlitedb.js, and place the below code to initialize the database with the expense table and sample expense entries. An expense table will be used to store the expense items −
var sqlite3 =require('sqlite3').verbose()constDBSOURCE="expensedb.sqlite"let db =newsqlite3.Database(DBSOURCE,(err)=>{if(err){
  console.error(err.message)throw err   }else{
  console.log('Connected to the SQLite database.')
  db.run(`CREATE TABLE IF NOT EXISTS expense (
     id INTEGER PRIMARY KEY AUTOINCREMENT,
     item text,
     amount real,
     category text,
     location text,
     spendOn text,
     createdOn text
  )`,(err)=>{if(err){
           console.log(err);}else{var insert ='INSERT INTO expense (item, amount, category, location, spendOn, createdOn) VALUES (?,?,?,?,?,?)'

           db.run(insert,['Pizza',10,'Food','KFC','2020-05-26 10:10','2020-05-26 10:10'])
           db.run(insert,['Pizza',9,'Food','Mcdonald','2020-05-28 11:10','2020-05-28 11:10'])
           db.run(insert,['Pizza',12,'Food','Mcdonald','2020-05-29 09:22','2020-05-29 09:22'])
           db.run(insert,['Pizza',15,'Food','KFC','2020-06-06 16:18','2020-06-06 16:18'])
           db.run(insert,['Pizza',14,'Food','Mcdonald','2020-06-01 18:14','2020-05-01 18:14'])}});}});
module.exports = db
Step 7: Open the index.js file and update the below code −
var express =require("express")var cors =require('cors')var db =require("./sqlitedb.js")var app =express()
app.use(cors());var bodyParser =require("body-parser");
app.use(express.urlencoded({ extended:true}));
app.use(express.json());varHTTP_PORT=8000
app.listen(HTTP_PORT,()=>{
console.log("Server running on port %PORT%".replace("%PORT%",HTTP_PORT))});
app.get("/",(req, res, next)=>{
res.json({"message":"Ok"})});
app.get("/api/expense",(req, res, next)=>{var sql ="select * from expense"var params =[]
db.all(sql, params,(err, rows)=>{if(err){
res.status(400).json({"error":"Resource (Expense) Id is not send."})return}var data ={
id: req.params.id,
item: req.body.item,
amount: req.body.amount,
category: req.body.category,
location: req.body.location,
spendOn: req.body.spendOn
}var sql ='SELECT count(*) AS cnt FROM expense WHERE id = ?'var params =[data.id]
db.get(sql, params,function(err, result){if(err){
Here, the code will create six REST API endpoints as mentioned below:
/ endpoint returns an OK message to make sure the application is working fine.
/api/expense endpoint returns all expense items available in the database.
/api/jsonp/expense endpoint returns all expense items available in the database in JSONP format.
/api/expense/:id endpoint returns the expense entry based on the expense entry id.
/api/expense/:id endpoint with put verb will update the expense entry based on the expense entry id.
/api/expense endpoint with post verb will add a new expense entry into the database.
/api/expense/:id/update_amount endpoint with post verb will update the amount of the expense entry specified in the URL.
/api/expense/:id endpoint with delete verb will delete the expense entry based on the expense entry id.
Step 8: Run the application using the following command −
node index.js
Step 9: To test the application open a browser enterhttp://localhost:8000/, and hit enter. It should return the below message if the application is working fine &minu;
{
   "message": "Ok"
}
Setting up the HttpClient service
Before making HTTP requests, we need to properly set up the HttpClient service in our Angular application. Angular provides the HttpClientModule for handling HTTP communication, which includes the HttpClient service. To use HttpClient, import HttpClientModule in the root module or any specific module where it is required.
Step 1: Import the HttpClientModule in your root module (if the application is not standalone) or in the imports array of the root component as follows −
Importing the HttpClientModule will include the HttpClient service in Angular’s dependency injection setup, allowing it to be injected into any Angular component when necessary, as shown below:
The HttpClient provides several methods to start an HTTP request. All methods return an observable with an optional type variable (Observable<T>).
The observable need to be subscribed to to start the request. Once the observable is subscribed, it starts the request, passes it through a series of registered interceptors, and finally reaches the server. The response is then received from the server and published to the subscribed function.
The workflow of the request is as follows −
The user creates a new HttpClient instance, say HTTP through the component constructor:
constructor(private http: HttpClient){}
The user calls any one of the HttpClient methods, say request() by passing the resource information:
let req =this.http.request(<action>,<url>,<body>,<option>)
The request() method will create an observable, say request (req) using the given resource information:
let req =this.http.request(<action>,<url>,<body>,<option>)
The user will subscribe a callback function to the observable using the subscribe() method:
req.subscribe((data)=>console.log(data));
Once a user subscribes to the Observable, it passes the request to the registered interceptors in the order in which the interceptors are registered.
Once the request passes all registered interceptors, Observable will send the request to the server.
Observable waits for the server response, and once receives the response from the server, it returns the response to the subscribed function.
The subscribed function will do the necessary business logic and set the output to the components variable.
The component will render its template using the output of the HttpClient.
A sample request is as follows −
let req =this.http.request('GET','http://localhost:8000/api/expense/1')
req.subscribe(data =>this.myexpense = data);
Here,
The this.http is the HttpClient instance
The request()is the method use to create observable, when subscribed, starts the request.
The subscribe() is the method use to subscribe to the returned observable and to subsequently start the request and fetch the response.
Finally, the argument to the subscribe method is the callback function used to get the actual responses body content.
HttpClient Arguments
Arguments supported by HttpClients methods are as follows −
Resource URI − It is the URL / endpoint representing the resource.
Request body − It is the data to be sent to the server along with the request. The data can be either in query string format or JSON format.
Request options − It is all other data sent along with the request. It contains query strings, headers, cookies, etc.
Resource URI
All method accept url / endpoint as one of the argument. It represents the resource to be fetched from the server. In our sample application, the url starts with http://localhost:8000/ and one of the possible option is http://localhost:8000/api/expenses. This endpoint will fetch all expenses from the server and send it back to the client in json format.
Request body
All methods accept URL / endpoint as one of the arguments. It represents the resource to be fetched from the server. In our sample application, the URL starts with http://localhost:8000/, and one of the possible options is http://localhost:8000/api/expenses. This endpoint will fetch all expenses from the server and send it back to the client in JSON format −
Form data. MIME-type is application/x-www-form-URL-encoded
Form data with uploads. MIME type is multipart/form-data
Plain text. MIME-type is text/plain
JSON. MIME-type is application/json
HttpParams class
Form data can be created using the HttpParams class provided by Angular. HttpParams accepts data in query string format (key/value as key=value and each key/value separated by &). It has methods to add one or more parameters as a sequence by chaining methods together. All methods create a copy of the instance add/remove the parameter (key/value pair) in the copied instance, and return it.
The signature of the HttpParams constructor is as follows −
The HttpParamsOptionsobject can be created using the below properties:
fromString?: string
fromObject?: {}
The sample code to create a HttpParams object using a constructor is as follows −
/* using fromString option */let httpParams =newHttpParams({ fromString:'a=b*b=c'})/* using fromObject option */let httpParams =newHttpParams({ fromObject:{ a:"b", c:"d"})
The methods supported by HttpParams are as follows −
set(): Accepts a parameter and value. Add a new parameter with the given value.
delete(): Accepts a parameter. Delete the given parameter.
has(): Accepts a parameter. Returns true/false based on the availability of the given parameter.
keys(): Accepts nothing. Returns all parameters.
get(): Accepts a parameter. Returns the first value of the given parameter.
getAll(): Accepts a parameter. Returns all values of the given parameter.
append(): Accepts a parameter. Append the value to the given parameter.
appendAll(): Accepts an object with multiple parameters. Append the value to all parameters.
toString(): Accepts nothing. Returns the object in query string format.
The sample code to create a HttpParams object is as follows −
let formData =newHttpParams();
formData = formData
   .set('item','Modified').set('amount',25);console.log(formData.toString())// item=Modified&amount=25
Request options
Irrespective of the method, options are one common argument accepted by all methods and used to represent the request options. Option is a JavaScript object (or hash) with a standard set of request data. Options can have the below entries and represent different aspects of the request and response:
observe
responseType
headers
params
context
reportProgress
withCredentials
transferCache
Let us learn one by one in the upcoming chapters:
observe
Theobserveoption is used to specify which part of the response has to be observed during the server communication and send back the data to the subscribed function.
Based on the observe option, either the full or part of the response will be returned. The possible values are events, body, and response.
events
Theeventsare used to return the events fired in the response stream from the server. It will return the response as Observable<HttpEvent<R>> type. Here, R is the type of the actual data (response body) to be returned.
let req =this.http.request<Expense>('GET','http://localhost:8000/api/expense/1',{
   observe:'events',
   responseType :'json'});
Here,
JSONis the format used to interpret the response body.
Expenseis the type used to convert and return the responses body. Otherwise, it will return the responses body as a generic JavaScript object.
response
The response option is used to return the complete response from the server. It will return the response as Observable<HttpResponse<R>> type. Here, R is the type of the actual data (responses body) to be returned.
let req =this.http.request<Expense>('GET','http://localhost:8000/api/expense/1',{
   observe:'response',
   responseType :'json'});
Here,
JSONis the format used to interpret the responses body.
Expenseis the type used to convert and return the responses body. Otherwise, it will return the responses body as a generic JavaScript object.
body
The body is used to return only the body content of the response from the server. It will return the response asObservable<HttpResponse<R>>type, Here, R is a type of the actual data (responses body) to be returned.
let req =this.http.request<Expense>('GET','http://localhost:8000/api/expense/1',{
   observe:'body',
   responseType :'json'});
Here,
JSONis the format used to interpret the response’s body
Expenseis the type used to convert and return the responses body. Otherwise, it will return the response’s body as a generic JavaScript object.
responseType
The responseType is used to interpret the response’s body. It can have four possible values as shown below −
arraybuffer
blob
text
json
Let us understand the values and their usage one by one:
arraybuffer
The arraybuffer interprets the response’s body as a generic raw binary data buffer and returns Observable. It can be used to stream audio/video content.
let req =this.http.request<Expense>('GET','http://localhost:8000/api/expense/1',{
   observe:'body',
   responseType :'arraybuffer'});
blob
The blob interprets the response’s body as the binary format and returns Observable. It can be used to download large files.
let req =this.http.request<Expense>('GET','http://localhost:8000/api/expense/1',{
   observe:'body',
   responseType :'blob'});
text
The text interprets the response’s body as plain text format and returns Observable. It can be used to represent text-based data.
let req =this.http.request<Expense>('GET','http://localhost:8000/api/expense/1',{
   observe:'body',
   responseType :'text'});
json
The JSON interprets the response’s body in JSON format and returns Observable, where R is the requested type (Expense) of data. It can be used to represent the result in JSON format. It can be further encoded into any type by specifying the type variable (R) in the method as shown below −
let req =this.http.request<Expense>('GET','http://localhost:8000/api/expense/1',{
   observe:'body',
   responseType :'json'});
Based on the observe and responseType, Httpclient will return Observable with a different type variable. Let us check a few combinations of observe and responseType to better understand the concept.
observe => body and responseType => JSONReturns the Observable R represents the type variable.
observe => response and responseType => JSONReturns the Observable<HttpResponse>. R represents the type variable and encodes the response body.
observe => events and responseType => JSONReturns the Observable<HttpEvent>. R represents the type variable and encodes the response body.
observe => events and responseType => arraybufferReturns the Observable<HttpEvent>. The Response body is encoded as ArrayBuffer.
observe => response and responseType => blobReturns the Observable<HttpEvent>. The Response body is encoded as ArrayBuffer.
observe => response and responseType => textReturns the Observable<HttpResponse>. The Response body is encoded as ArrayBuffer.
We can combineobserveandresponseTypeto create many more combinations as we need.
headers
The headers specify the HTTP headers. It can include a standard HTTP header as a key/value pair or can encode the data using the HttpHeaders class. A sample header as a key/value pair is as follows:
{'Content-type':'application/json'}
It specifies that the request content type is JSON.
Angular provides a special class,HttpHeadersto compose header details. It accepts header information as an anonymous object and initializes it.
It has methods (set(), append(), and delete()) to add/remove one or more headers in a sequence by chaining methods together.
All methods create a copy of the instance add/remove the header information in the copied instance, and return it.
The Context is used to send arbitrary values as key/value pairs with type safety and without key conflict. It is used as a source of information for interceptors acting as middleware between client and server. Angular provides a special class, HttpContext to encode the context information. A sample context is as follows −
// create a key using HttpContextTokenexportconstIS_AUTH_ENABLED=newHttpContextToken<boolean>(()=>false);// set data for the contextlet authContext =newHttpContext().set(IS_AUTH_ENABLED,true)let req =this.http.request<Expense>('GET','http://localhost:8000/api/expense/1',{
   observe:'body',
   responseType :'json',
   context: authContext
});
Here,
HttpContextToken class is used to create the key of the context. It has the option to specify the value type as well.
IS_AUTH_ENABLED is the key, and its type is boolean.
IS_AUTH_ENABLED is set to true.
We can get the context value using the get() method by passing the token as shown below −
let contextValue = req.context.get<boolean>(IS_AUTH_ENABLED)// true
reportProgress
The reportProgress specifies whether to get the progress of the request (communication) from the server. It can be used to show the progress of large file uploads through web API.
let req =this.http.request<Expense>('GET','http://localhost:8000/api/expense/1',{
   observe:'events',
   responseType :'json',
   reportProgress:true});
withCredentials
The withCredential specifies whether the request should be sent with outgoing credentials (cookies). It accepts a boolean value.
The transferCache specifies whether the request should be cached. It accepts the boolean value orHttpTransferCacheOptionsvalue. HttpTransferCacheOptions is used to encode dynamic logic to filter requests to be cached based on a custom filter function and override default cache behavior.
let req =this.http.request<Expense>('GET','http://localhost:8000/api/expense/1',{
   observe:'body',
   responseType :'json',
   transferCache:true});
HttpClient methods
Methods provided by the HttpClient class for client-server communication are as follows −
request()
head()
get()
post()
put()
patch()
delete()
jsonp()
options()
Let us learn generic request() method in this chapter and other method in subsequent chapters.
The request() method
The request()is the generic method that sends a request to the server with every possible HTTP verb like get, post, patch, etc. It has many overloads. Let us check two main overload functions, one using the Generic option and another one using the HttpRequest object.
Generic option − Accepts url, http verb, body content and options object.
HttpRequest option − Accepts HttpRequest object
HttpRequest option
Angular provides a class, HttpRequest to represent the complete HTTP request. It has the built-in option to include URL, HTTP method/verb, response type, headers, params, etc.
var httpRequest =newHttpRequest<Expense>('GET','https://localhost:8000/api/expense/1',{
   responseType :'json'});
Here,
The this.http is HttpClient instance.
GET method is used as HTTP verbs.
The endpoint (http://localhost/api/expense/1) will return the expense with an id equal to 1 from the server.
The responseType is set as JSON. This will return the body of the response as JSON.
The above sample request object can be used as below to send the request to the server:
var req =this.http.request<Expense>(httpRequest);

req.subscribe(data : HttpEvent<Expense>=>{this.myexpense =(data as HttpResponse<Expense>).body as Expense;}
Here,
The request returns the HttpEvent, which is the union of multiple type as shown below −
As we have provided responseType as JSON and set Expense as an object to return, the observable will return HttpResponse<Expense> in the body. So, we converted the returned data object into a HttpResponse<Expense> object and then got the expense from the body property.
Generic option
It accepts four arguments as shown below in the given order:
HTTP method / verb
url
body (optional)
options
A sample request is as follows −
let req =this.http.request<Expense>('GET','http://localhost:8000/api/expense/1',{
   observe:'body',
   responseType :'json',});

req.subscribe(data =>{this.myexpense = data });
Working example
Let us create a working angular example to get all expense items from the server by using the HttpClient service class and the HttpRequest option.
Step 1: Create a new angular application by running ng new command as shown below:
ng new my-http-app
Enable angular routing and CSS as shown below −
? Would you like to add Angular routing? Yes
? Which stylesheet format would you like to use? CSS
Step 2: Enable HTTP communication in the application by importing HttpClientModule in the root component (app.component.ts) within the imports array:
Set http://localhost:8000/api/expense as the URL of our endpoint.
Set JSON as responseType. This will parse the response of the body as JSON.
Step 10: Call therequestmethod of this.HTTP (HttpClientinstance) object by passing theHttpRequestobject and getting the expense object from the server. Then, set the expenses into our local variable,expenses.
responseType:'json'})this.http.request<Expense[]>(req).subscribe((data : HttpEvent<Expense[]>)=>{this.expenses =(data as HttpResponse<Expense[]>).body as Expense[]console.log(this.expenses)})}}</pre>
Here,
Sets theExpense[]as the type of the object returned by the server. The server will send the array of expense objects in its body in JSON format.
Subscribed to the request (this.http.request) object. Then parsed the subscribed data as an array of expense objects and set it to a local expense variable (this.expenses).
Step 11: The complete code of the ListExpensesComponent is as follows −
responseType:'json'})this.http.request<Expense[]>(req).subscribe((data : HttpEvent<Expense[]>)=>{this.expenses =(data as HttpResponse<Expense[]>).body as Expense[]console.log(this.expenses)})}}</pre>
Step 12: Next, get the expenses object from the component and render it in our component template page (list-expenses.component.html)
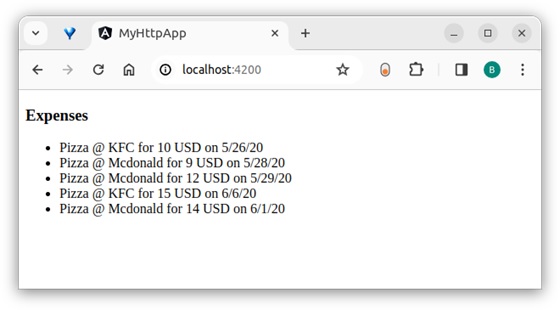
<div><h3>Expenses</h3></div><ul><li *ngFor="let expense of expenses">
{{expense.item}} @ {{expense.location}} for {{expense.amount}} USD on {{expense.spendOn | date:'shortDate' }}
</li></ul>
Step 13: Finally, run the application using below command:
ng serve
Step 14: Open the browser and navigate to http://localhost:4200/ URL and check the output:
Here, the output shows our expenses as a list of items.
Step 15: Let us modify the above sample application by changing the HttpRequest option to a generic option.
Step 16: Change the ngOnInit method as shown below:

Leave a Reply