In the HTTP protocol, the response is the process by which the server returns data to the client (application or browser) after receiving a request.
In Angular, a response refers to the data received from the server following an HTTP call made by the client to fetch, send, or manipulate data. These responses are handled by the Angular HttpClient module.
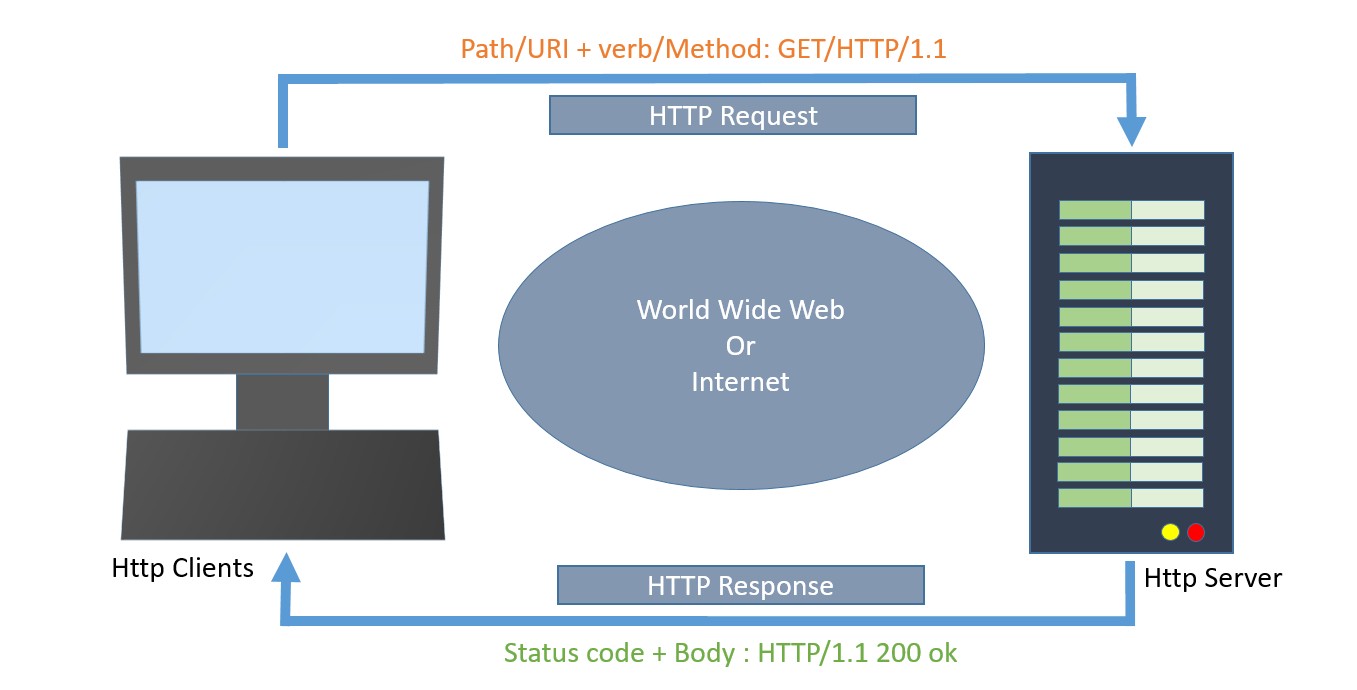
The following diagram will give you a clear understanding of the HTTP Request and Response calls −
Now, let’s discuss the various events of the HttpEvent class that allow you to handle different phases of an HTTP request/response in Angular:
HttpEvent Class
The HttpEvent class is a key part of the Angular HttpClient module, which provides a way to monitor the progress of HTTP requests.
HttpClientwill send the request to the server and capture the response from the server. Then, based on the request configuration, it will enclose the response in an object with the below possible types:
The HttpUserEvent is used to identify that the response event is user-defined. It will be useful to group all custom events into one category. It will ensure that the event is properly handled and forwarded by all interceptors.
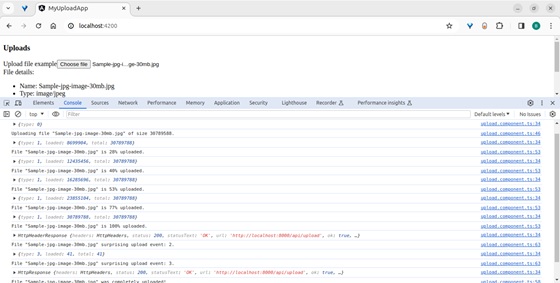
TheHttpProgressEventis used to identify whether the request is download-based or upload-based. Also, it will enclose the currently loaded bytes during download/upload functionality.
loaded is used to refer to the number of bytes uploaded / downloaded
total is used to refer to the total data to be downloaded / uploaded
HttpResponseBase
The HttpResponseBase is the base class for both HttpHeaderResponse and HttpResponse. It has basic information about the response.
Syntax for the HttpResponseBase −
abstractclassHttpResponseBase{constructor()// have not shown full details for understanding purpose
   headers: HttpHeaders
   status:number
   statusText:string
   url:string|null
   ok:boolean
   type: HttpEventType.Response | HttpEventType.ResponseHeader
}
Here,
headers − A response header information as HttpHeaders object.
status − The number (code) is used to refer to the different status of the request.
statusText − Text used to refer to different status of the request (default: ‘ok’).
url − Url of the request.
ok − Success / failure of the request.
type − Type of the event (Response or ResponseHeader).
HttpHeaderResponse
TheHttpHeaderResponseinherits fromHttpResponseBaseand includes an option to clone the response. The purpose of this class is to enclose the response with header and status information, skipping the actual body of the response.
type − Type of the event (Response or ResponseHeader).
clone() − A method, which copy this HttpHeaderResponse, overriding its contents with the given parameter hash.
let response = res.clone(update:{})
headers − A response header information as HttpHeaders object.status − The number (code) is used to refer to the different status of the request.statusText − Text used to refer to different status of the request (default: ‘ok’).url − Url of the request.ok − Success / failure of the request.
HttpResponse
TheHttpResponseinherits fromHttpResponseBaseclass and includes response body and option to clone the response. The purpose of the class is to enclose the response with body, header and status information.
The responsed body can be fetched by using body property as shown below −
headers − A response header information as HttpHeaders object.status − The number (code) is used to refer to the different status of the request.statusText − Text used to refer to different status of the request (default: ‘ok’).url − Url of the request.ok − Success / failure of the request.
Cloning the response can be done similarly toHttpHeaderResponse class as shown below −
let response = res.clone(update:{})
Here,
res is the response object returned from the server.
update is an object holding data to be updated in the responses header.
Working sample
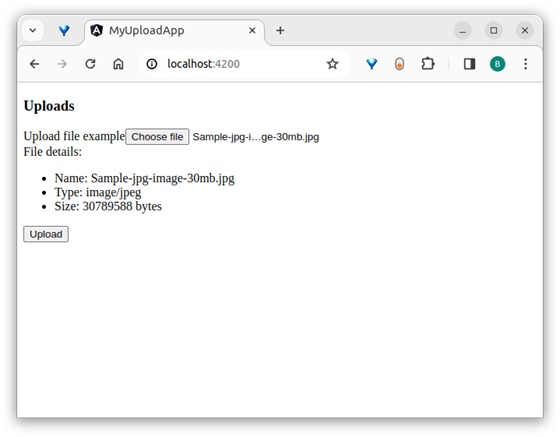
Let’s create a “sample web application” to upload a file to the server. We will develop an API for file uploads and then call this API from the Angular front-end application. Throughout this process, we will learn and handle different types of responses.
First, let’s create a new express app to upload a file to the server by executing the following steps:
Step 1: Go to your favorite workspace as shown below −
cd /go/to/your/favorite/workspace
Step 2: Create a new folder with the name expense-rest-api and move into the folder −
mkdir upload-rest-api && cd upload-rest-api
Step 3: Create a new application using the init subcommand provided by the npm command as shown below −
npm init
Once you hit the above command, it will ask a few questions and answer all of them with default answers.
Step 4: Install express and cors packages to create node-based web applications −
npm install express cors multer --save
Here,
express is a web framework to create a web application.
cors is a middleware used to handle CORS concept in HTTP application.
multer is an another middleware used to handling file upload.
Step 5: Open index.js and place the below code (if not found create it manually within the root folder) −
Configured a simple express app by enabling cors, multi, and body-parser middleware.
Created a new API/api/uploadto accept a file and store it in the uploads folder on the server.
Configured the upload folder as uploads.
The API will accept a file input with the name photo.
Step 6: Create a directory for storing uploads −
mkdir uploads
Step 7: Now, run the application by executing the below command −
node index.js
Step 8: To test the application, you can use the Postman, Curl, or any other HTTP client toolkit. Here is how you can do it −
Create a new request to the API endpoint: http://localhost:8000/api/upload.
Set the request method to post.
Add a form-data field with the key photo, set its type to file, and attach the file you want to upload.
Working Example
Let us create a working angular example to get all expense item from server by using HttpClient service class and using HttpRequest option.
Step 1: Create a new angular application by running ng new command as shown below −
ng new my-upload-app
Enable angular routing and CSS as shown below −
? Would you like to add Angular routing? Yes
? Which stylesheet format would you like to use?CSS
Step 2: Enable HTTP communication in the application by importing HttpClientModule in the imports array in the module configuration file (app.component.ts) as per the latest version (standalone components) −
Step 5: Inject theHttpClientinto theUploadcomponent through the constructor and import necessary classes fromthe rxjsand angular modules as shown below −
formData.append('photo',this.file as Blob,this.file?.name);const myObservable: Observable<HttpEvent<any>>=this.http.post<any>('http://localhost:8000/api/upload',


Leave a Reply