Angular modules are core concepts in Angular application, which help to organize the application structure by grouping the related components, services, etc.
In this chapter, we will learn about the angular module, its importance in the application, how to create a module, and how to use it in our application in detail.
What are Angular Modules?
In Angular, a module refers to a place or container where you can group the components, directives, pipes, and services, which are related to the application. This helps organize the application, making it easier to understand and manage dependencies efficiently.
For example, if you are developing a website or an application, the header, footer, left, center, and right sections become part of a module. However, they are not modules themselves, they are individual components that belong to that module.
Types of Angular Modules
Following is a list of commonly used Angular modules −
Importance of Angular Modules
In Angular, a module plays an important role in “structuring an Angular application”, making it easier for others to understand by simply viewing the application’s hierarchy. An application is considered well-structured if each concern (say component or section) is separated into its own module.
For example, login and signup components can belong to an Authentication module.
How to Create an Angular Module?
To create an Angular module, you must have a basic understanding of thefirst Angular applicationcreation and about CLI, etc. Here are the step-by-step guides to creating an Angular module in an application:
Step 1: In your code editor (such as VS Code) open any existing angular application or create new one. (See how to…)
Step 2: Open the “terminal” in your code editor and go to your application directory as follows:
cd application_directory
e.g....
cd myapp
Step 3: Now create a new module using the following command:
ng generate module auth
Here, auth is your “module name”.
Once the above command is executed successfully, you may see:
CREATE src/app/auth/auth.module.ts (202 bytes)
Step 4: Toggle the Auth folder you may able to see the auth.module.ts file with some default code as follows:
import{ NgModule }from'@angular/core';import{ CommonModule }from'@angular/common';@NgModule({
  declarations:[],
  imports:[
CommonModule  ]})exportclassAuthModule{}
How to use Angular Module?
As we have already created a new module named “auth” in our application. To use it properly in our angular application follow the steps below:
Step 1: Import Module
Import the newly created module within your root module (older version) or in the component (recent version) of your application as follows:
import{ Component }from'@angular/core';import{ CommonModule }from'@angular/common';import{ AuthModule }from'./auth/auth.module';@Component({
  selector:'app-root',
  standalone:true,
  imports:[CommonModule, AuthModule],
  templateUrl:'./app.component.html',
  styleUrl:'./app.component.css'})exportclassAppComponent{}
Step 2: Create Components
Now create “two” different components named login and signup as follows:
ng g c auth/login --no-standalone
ng g c auth/signup --no-standalone
Note: Make sure that the component within the @NgModule should be “no standalone”, otherwise, you may get an “error”.
Step 3: Import and Export the components
Open the auth.module.ts file and import both the components within the @NgModule as follows:
import{ NgModule }from'@angular/core';import{ CommonModule }from'@angular/common';import{ SignupComponent }from'./signup/signup.component';import{ LoginComponent }from'./login/login.component';@NgModule({
  declarations:[SignupComponent, LoginComponent],
  imports:[
CommonModule  ],
  exports:[LoginComponent, SignupComponent]})exportclassAuthModule{}
Step 4: Use Components in your Templates
You can now use the LoginComponent and SignupComponent in your templates. For example, in the app.component.html file, you can include the following:
<app-login></app-login><app-signup></app-signup>
Step 5: Run Application
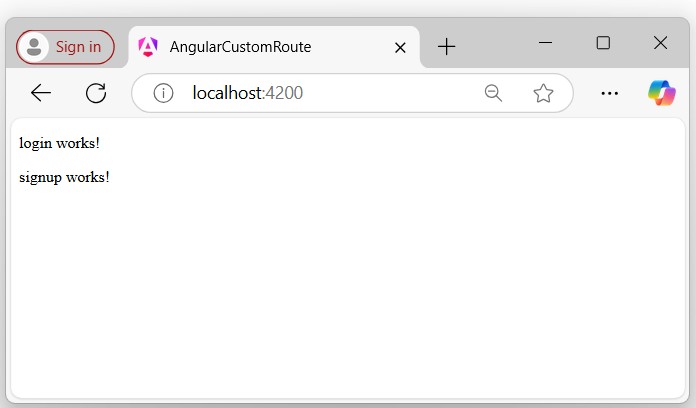
Finally, run the application to see the output:
ng serve
Step 6: Navigate to localhost:4200
Open your friendly browser (e.g chrome) and navigate through the localhost:4200.

As you can see in the above picture the the login and signup components belongs to AuthModule.