Attribute binding helps to set the value for the attribute of the HTML element. Angular exposes attributes of the HTML element with a matching property with the attribute name converted into camelCase.
For example, the colspan attribute’s corresponding angular property is colSpan. Even though, angular tries to provide all HTML elements attributes as property, it still misses some of the attributes of SVG elements, aria (web accessibility) elements, etc.,
We can use attribute binding where the attributes of a HTML element is not available as property. Also, we can use attribute binding for attributes of all HTML element.
How to use Attribute Binding?
To use attribute binding in your Angular application, use the square brackets around the attribute name. It basically represents the attribute of a HTML element in the template.
Syntax
The syntax to use attribute binding is as follows −
We can combine attr. string with the actual attribute name of the HTML element to create the angular attribute representation. The value of the attribute is a template variable. While generating the view from the template, angular will set the value of the attribute by processing the template variable.
Implementing Attribute Binding
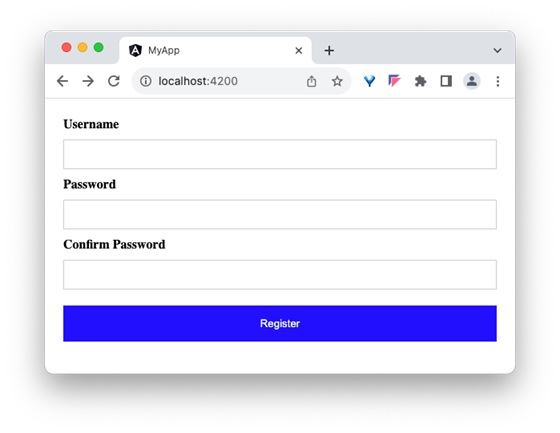
Let us create a simple registration form to understand attribute binding. Our registration form will have three input field as shown below and a button to submit the registration form.
Username
Password
Confirm password
Step 1: Create a new application, my-app using angular CLI as shown below −
ng newmy-app
Step 2: Create a new registration form component, RegisterForm using angular CLI as shown below −
ng generate component RegisterForm
Step 3: Open the registration form component’s template and add user registration form with username, password and confirm password.
Step 5: Include our registration form component in the app template file, app.component.html:
<app-register-form />
Step 6: Run the application and test the registration form.
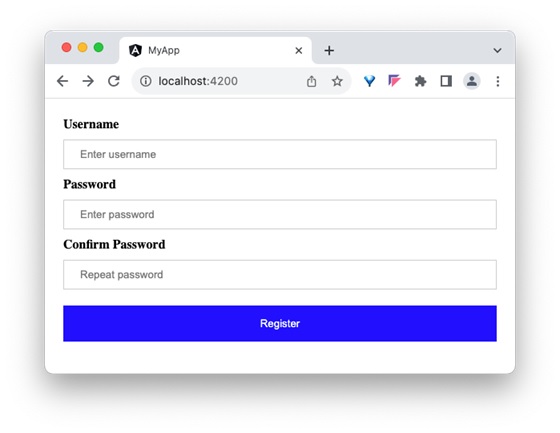
Step 7: Next, we will try to set the placeholder text for all input field using attributes binding. Add three member variable in the component to represent the placeholder text for username, password and confirm password input field.
Step 8: Assign the above declared component’s member variable to the placeholder attributes of username, password and confirm password input accordingly in the template using [attr.placeholder] attribute as shown below −

Leave a Reply