What is Nested Component?
When you work with a large Angular application, placing all features in a single Component is not a good idea. As the application grows, maintaining it can become quite challenging. Therefore, we need to split it into multiple components. It may require creating components inside others to form a hierarchical structure.
In Angular, it is possible to nest components inside each other. The outside container is known as the parent container, and the inner one is known as the child container.
How to Create Nested Components in Angular?
Nested components are normal Angular Components with parent-child relations. The parent can access and share data with the child, either partially or fully. Creating nested components follows the same process as creating regular components.
Example
Let’s look at an example of how to create nested components in an Angular application. Following are the steps −
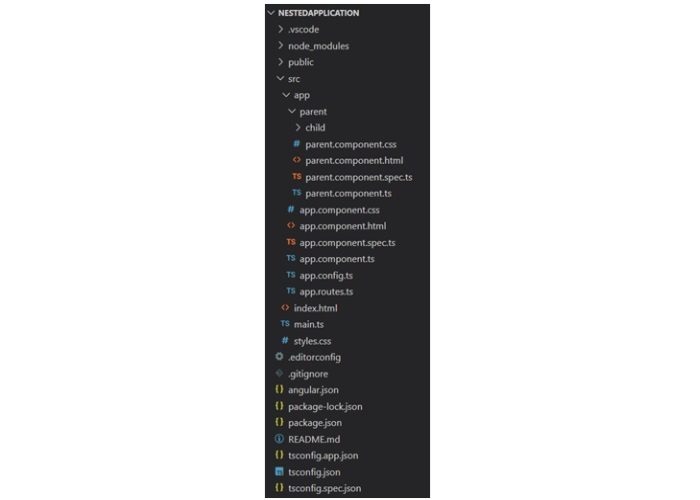
Step 1: Create an application named nestedApplication.
ng newnestedApplicationStep 2: Use the cd command to navigate inside the project folder. Then, create a component called parent using the following command −
ng g c parent
Step 3: To create child component, use the command given below −
ng g c parent/child
Here, child will be created inside the parent component. And, your project structure will look like this −
Step 4: Next, make changes in the child.component.html file:
<p>This is child component. It is inside parent component.</p>Step 5: Add the below code snippet to the parent.component.html file:
<p>This is child component. It is inside parent component.</p>Step 6: Now, call the ParentComponent inside the app.component.html file:
<h2>Nested Component Example</h2><app-parent></app-parent><router-outlet />Step 7: After working on the HTML files, it’s time to update all the TypeScript files. Start with the child.component.ts file:
import{ Component }from'@angular/core';

@Component({
  selector:'app-child',
  standalone:true,
  imports:[],
  templateUrl:'./child.component.html',
  styles:' p { border: 1px solid blue; border-radius: 25px; padding: 16px 32px; } '})exportclassChildComponent{}
Step 8: Next, import the ChildComponent in parent.component.ts file:
import{ Component }from'@angular/core';import{ ChildComponent }from'./child/child.component';

@Component({
  selector:'app-parent',
  standalone:true,
  imports:[ChildComponent],
  templateUrl:'./parent.component.html',
  styleUrl:'./parent.component.css'})exportclassParentComponent{}
Step 9: Finally, call the ParentComponent by importing it inside app.component.ts file:
import{ Component }from'@angular/core';import{ RouterOutlet }from'@angular/router';import{ ParentComponent }from'./parent/parent.component';

@Component({
  selector:'app-root',
  standalone:true,
  imports:[RouterOutlet, ParentComponent],
  templateUrl:'./app.component.html',
  styleUrl:'./app.component.css'})exportclassAppComponent{
  title ='nestedApplication';}
Once you save all the code changes and run the application using ng s command, you will get the following output −

Leave a Reply